Experiments in Starry Sky Photography

I’m not much of a night photographer for a variety of reasons, such as “wandering around in dark, isolated places with expensive gear and when you are a smallish woman is not recommended” and “I never carry my tripod because it’s awkward and extra weight” but thankfully I have friends who mitigate the first and cars that mitigate the second, so then it all works out.

My photographer excursion to Crater Lake is one of those rare times it worked out. We had a “wait, it’s too nice to go to bed” bit of folly, given that our plan was to get up at 4am to catch the sunrise. Alas, the lake was in cloud at sunrise, so those photos never happened, but the night ones totally did.

Here they are before editing:
The view from our "hotel" at Crater Lake (original)Our "hotel" at crater lake (original)

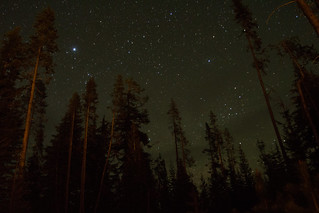
This was 30s exposure at ISO 3200, which is still rather noisy for my tastes, even with some post-processing to clean it up a bit. I think in future I might have to try cranking that down a fair bit.

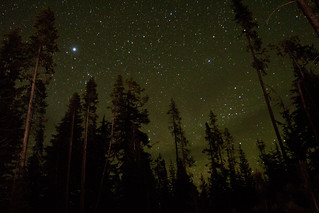
Below is my first attempt at processing the photos base on what I knew to do off the top of my head. They’re not bad, but as I said, I haven’t had a lot of opportunity to practice night photography, and that includes processing as well as the physical taking of photos. You can definitely see some more colour and definition even in the small versions I’ve put here so you can see them all at once:

The view from our "hotel" at Crater LakeOur "hotel" at crater lake

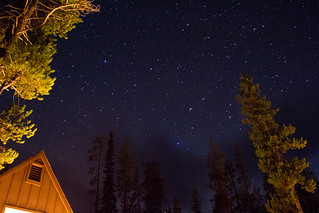
So I read through a night photography tutorial and these are the images that resulted:

Our "hotel" at crater lake

The view from our "hotel" at Crater Lake

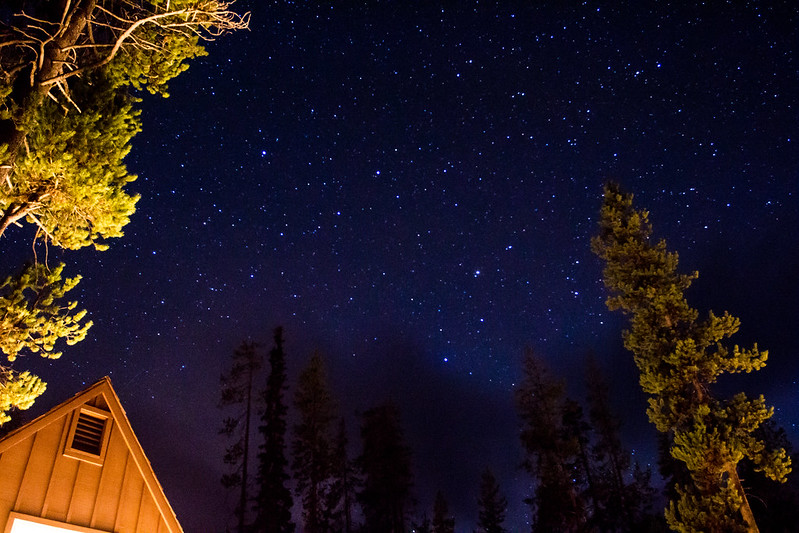
The first one’s maybe not that different from my own attempt, but the second one really pops, no? I guess I need to spend more time reading photo processing tutorials. Processing has been my weak point in terms of just getting it done, but it’s pretty impressive to see how much more I got out of that last image with a little help, I think.

[Note: I somehow failed to schedule this post when I was written, so that’s why you’re getting it so late after the photos were uploaded, in case anyone who follows my flickr stream was wondering, but I doubt anyone actually pays that much attention.]

The WTF necklace

This one barely counts as a maker-y thing, in that all I really did was string some letters onto a faux-leather strap, but I think it’s hilarious and needed to be shared:

Necklace with the letters WTF on it.

WTF Necklace

Actually, this was much harder than it should have been. The necklace strap came pre-assembled and had to be disassembled so I could thread the letters on, which normally wouldn’t be too hard but I can’t find the relevant jewelry pliers so I wound up using these round ones which were totally unsuited. And then once I got it off, it turns out the darned letters have holes that aren’t quite big enough to easily thread the pleather through (or equally, the pleather was a bit too sticky for the length of threading required), so then I had to MacGyver this threading implement with a piece of wire that had been originally used to hold the bead in the package. My original plan of wrapping the wire around the pleather didn’t work because the wire was too thick, and then I wound up accidentally stripping half the wire inside the bead when I tried, and finally I had to find a needle and poke a hole in the end of the pleather and convince the wire to get into this much smaller hole so that I could hook it around and finally get the darned beads on the strap.

So, um, yeah. Totally easy, of course!

I can’t really take credit for the idea exactly: I saw a gal at defcon with a beautiful monogrammed purse that said WTF all classy-like (in as much as one can) and then beads were on sale when I went in to get stuff at the craft store and I was going to get my initials (which are funny enough in and of themselves) but then I decided I needed this too, because I am such a classy individual.

The instagram-clone filters prove it:

Necklace with the letters WTF on it.

WTF Necklace

The thing that bugs me about this is that the holes in the beads aren’t exactly at the same height, so my necklace has a kerning problem. Can you see it? I really can, but I suppose I don’t actually have to look at my own necklace all day, and everyone at work is much too polite to stare randomly at someone else’s chest, so I figure it’s only the font geeks who’ll catch it.

MicroView: the bad, the good, and the awesome

I backed this cute little thing on kickstarter called the Microview, which is basically a teensy arduino with an oled display attached. It was too adorable to pass up: I’ve wanted a little programmable necklace for a while, and this meant that project would be really easy to build.

My MicroView (Adorable Arduino with OLED display)

My MicroView (Adorable Arduino with OLED display)

I’ve been anxiously awaiting the arrival of the MicroView and it finally came today. So I popped open the instructions page and the first thing I see is a big apology. Uh oh…

So I check my email and sure enough, there’s an email about a big problem. Short version: they sent out a whole pile of units without bootloaders, so it runs the demo but won’t run any new code. Both of my MicroViews, it seems, are in the affected batches. More details here:

https://www.sparkfun.com/news/1575
https://www.kickstarter.com/projects/1516846343/microview-chip-sized-arduino-with-built-in-oled-di/posts/959475

So that’s disappointing, but they’re shipping out replacement units, and I suppose I can wait a bit longer to play. It’s not like I don’t have other toys to play with.

But here’s the super awesome news: it’s possible to dissect the unit and fix it!

So… with a bit of hacking, and assuming I don’t break anything, I may have double the number of MicroViews by the time this is done, and I’ll have had an excuse to dissect my new toys.

I’ve never been so pleased about receiving a defective product. :)

In the meantime, I guess I can play the tutorial game:

MicroView running the tutorial "game": Connect a jumper between pins 5 and 8

MicroView running the tutorial “game”: Connect a jumper between pins 5 and 8