Mom socks: lavender apple picking

My mom paid me the ultimate compliment a sock knitter can receive: she let me know that some of the socks I made for her were starting to wear out! It’s going to be a while before I can go do some darning for her, so I cast on another pair instead.

The yarn is from the well-named Must Stash (they do a weekly drop off colours and while they do revisit colourways it can take months so if you love something you kind of have to snag it when you can). I stashed this one with Mom socks in mind because it’s just so beautiful!

The pattern was this year’s Must Stash advent knit, but as you may recall my advent dance card was a teeeeeensy bit full so I didn’t try it but I did put the pattern in my queue for later. It’s the Candy Kisses Socks by Sivia Harding. I loved the cute little xoxo cables:

Okay, the colour is maybe not the best for showing off tiny cables, but they’re fun.

You can tell from the photo above that my mom’s foot and mine aren’t exactly the same size! I don’t mind knitting bigger socks when I know they’re going to get worn, though!

It’s funny: when I started knitting, I thought I’d never really do socks because it seemed like so much work for something you’d wear out. (Plus I lived in New Mexico then where wool socks aren’t always the most desirable.) But I decided to do Socks on Vacay one year and I’ve slowly but surely fallen in love with wearing them. Especially this year where I’m out walking the dog in the cool wet, they’re very suited for our damp winters. They’re just… Really nice? I don’t even know how that happened, but I don’t really mind.

The Dread Pirate has definite opinions about my finished object photos, so this was his composition. Then he did a little dance and I think sang a song about grandma socks. Bringing joy even before they made it to my mom, for sure. ;)

Mando gloves

The blog has had some server changes behind the scenes and it accidentally broke the way I usually post from my phone. But while I’m working that out, here’s a recently finished project:

John wearing the Mando Gloves

Pattern: Mando. by Natela Astakhova

Yarns: Studio Donegal Darnie from Black Sheep Fiber Emporium

The yarn is a real winner here because it’s so perfect for colourwork. Very forgiving, blocks like a dream, easy to felt in ends as needed since it’s non-superwash, and the colour palette was perfect for this project.

Palm side of the Mando gloves showing the non-repeating pattern.

This is not a pattern for the faint of heart: I found it easy to get caught up in the chart and miss the written directions (which are NOT “just follow the chart” but have increases/decreases/ribbing). And honestly, it’s just complicated non-repeating stranded colourwork. Plus I somehow managed to hurt my hands in the middle of knitting them and had to take a few days off to recover.

Back side of gloves, featuring a Mandolorian helmet and Baby Yoda

The results are cute, though! I did them to be larger, with no decreases and a larger (US 2) needle size so that they’d fit my husband. I rarely knit him anything but we actually made time to watch the Mandolorian together, one of few adult TV shows we’ve watched (though we also loved Carmen Sandiego, which is suitable for watching with our 3 year old although he’s not as excited about it as we are.) I managed to finish them the week we had snow, so at least they got a day or two of use before going away as spring starts here!

November works in progress

I mentioned in August that I seemed to be doing some unsettled knitting. Fast forwards a few months, and I’m entering a bit of a pattern: one big project for sitting, one tiny project for knitting on the go, and a few more complicated things for my “nights off” (where I’m not in charge of getting kiddo to sleep). Pre-pandemic, I typically had one on the go project and (sometimes) one bigger home project but since they’re both pretty simple right now, I’m enjoying rotating in a few other things that engage my brain differently.

Big project right now is the Stepping Stones Cardigan.

Terri in a harvest gold Stepping Stones vest.

It’s a boxy open front sweater with nice lace detailing on the front, hem and cuffs. The pattern has a lot of options for customization of the sleeves and I really appreciated those. The lace made knitting the body seem not so repetitive.

Books and knitting the front panel.

I love the yarn, which is Arranmore Light from The Fiber Co in the colour Finian. It’s kind of got a rustic handspun 2 ply feel. It’s also unfortunately easy to tear a single strand if it gets caught on something like a zipper or an over-enthusiastic 3 year old who wants to be in my lap. So I got a new tool to help with that!

This is a yarn ball holder from Hansen (better known for their espinners). I’d coveted it since Tina from Black Sheep Fiber Emporium showed me hers, because it is a beautiful piece of engineering: perfect smooth wood, balanced bearings, thoughtful design. But it didn’t fit into my life then. I’m happy to say that it does now!

Small project right now is socks for my Mom.

It’s the usual Sundae Socks pattern with some mods. I’ve been keeping the yarn colour a surprise, but it’s a matched pair from Must Stash Yarn.

More complicated knitting is the Butterfly Dream Catcher shawl.

This is done in this great special yarn from Black Squirrel Berkeley called ‘sup witches. It glows under black light!

Other alternate night off projects: Crochet

I’ve picked up my Christmas ornament advent from Little Box of Crochet. I got this in 2018 and didn’t plan to finish it all in December, but two years later and I just finished day 6. Whoops. But I need ornaments this year and I didn’t before! Probably should have started earlier than November, though.

Spinning

I’m still spinning but less regularly mostly because I’ve been getting paper books from the library and I can’t read those and spin! I need some more audiobooks. I usually enjoy podcasts but they’ve been kind of getting me down lately.

Craftsy sent me an email offering a full year for $2.49 and I’d wanted to try more of their spinning content so I did that and it’s helping keep my interest up because sometimes I watch spinning videos while knitting. I’m still not blown away by Craftsy. The content I’ve watched is good but the site itself makes it hard to find and doesn’t help you keep track of what you’ve watched, which gets more annoying the more I watch. But for $2.49 I already feel like I got my money’s worth out of it, so that’s ok.

Embroidery

I got a cute Christmas tree set from Dropcloth Samplers, but I haven’t gotten much further than the day I took this picture.

Other

I also finally finished a wooden marble run kit I got to make with my toddler (who I guess is more of a pre-schooler now?). It wasn’t the easiest to do with his help, but we got out the washable markers and he coloured while I built. He coloured most of these not just the scribbles, but sometimes he told me I had to help fill them in if he got bored (and sometimes i did the first scribble and he filled in).

I feel like I have so many things I want to do and so little time before December hits and I switch over to the advent style packages I plan to knit. I might have gone a bit overboard on the advent things this year since I won’t be traveling: I got the ShannaJean Gratitude box, the BySarahS Christmas mkal, and I signed up for the Gnome one too. Plus I got the Katrinkles tool one, though that’s shorter and I don’t have to knit anything.

But on the bright side, Mom’s socks are the only ones I actually “need” to finish in the next couple of weeks if I want to mail them off in time for the holiday! And I don’t have to finish any of the advents on time either!

In threes: finished, wips, upcoming projects

Recently finished:

– Woollywormhead’s 2019 mystery hat. It’s blocking right this moment.

– my Lucky Star shawl (blocked, photographed today, but not worn yet!)

– Mom’s Christmas sock #1

Works in progress:

– Mom’s sock #2 (cast on this afternoon)

– Cascadial Wrap (maybe 3/4 done? More? Abandoned again for travel last month, poor thing)

– crochet advent calendar (still going very slowly, by design. I’m planning to do maybe one or two more, just enough to cover our current tiny tree.)

Coming up soon:

– an advent for 2019 has arrived! I haven’t decided if I’m waiting for the 1st or not, but I’m leaning towards the December start.

– maybe that toddler sweater before we go to Ottawa? I’m thinking Antler by Tin Can Knits but it will depend on what yarn I have.

– maybe pulling out my own sweater that’s been hibernating since last year?

My gift knitting this year is just the one pair of socks, unless I suddenly think of something neat (and small) to do, so I’m nicely on track to be able to start that advent calendar. Finishing a toddler sweater might be too ambitious, though.

Fruit fly socks for my retired biochemist mom

I bought this yarn because the name, “time flies like an arrow, fruit flies like a banana” reminded me of my biochemist parents, and then my mom asked for socks so away we went.

It was also socks on vacay time still! And Mom’s birthday was coming up!

Yarn: Knitted Wit “time flies like an arrow, fruit flies like a banana” in honour of biochemist Christiane Nüsslein-Volhard.

Pattern: Shannon Squire’s Sundae Socks. I sized up one more step than the pattern is written for, since Mom asked for them to be roomy. And apparently I got it right, since she’s requested another pair!

Laser engraved toy dog collars

Yup, you read that right.

I have a Glowforge laser cutter/engraver that had so many delays in manufacturing that it wound up arriving when I was 9 months pregnant. So it hasn’t gotten quite as much use as I’d planned, but I did use it for some holiday presents! And then I forgot to take pictures of most of them. But I did take pictures of these!

I picked up these puppies at a toy store downtown, and wanted to customize them. I did some quick measurements and used the leather that came with the machine, so it was already prepped.

The idea was that these should be removable so they could also be used as bracelets (or just removed entirely if the kids didn’t like them), so I put in snaps. Or rather, I should say that I put in one snap, then was so frustrated with the second one that I begged J for help and even he had trouble getting it to sit securely in the leather. Next time, I buy heavier duty snaps instead of pretty ones!

Still, I like how they turned out, and the pups themselves are cute. Next time I go by the leather store, I might get some heavier snaps and make myself a ruler bracelet!

Medallion hat using Jimmy Beans Big Beanie Bag – April 2017

I’ve actually *just* as of September cancelled my Big Beanie Bag subscription, because I’m anticipating a busy fall and my projects have piled up to the point where I need a break. Still, I have managed to knit some of them up!

April’s Bag looked like this:
20170418-IMG_2010.jpg

And here’s a photo summary of what I made with it:

Last off the needles: My @jimmybeanswool Big Beanie Bag for April! I started casting on for the included pattern but then decided to go a bit more fancy and pulled out a pixel editor to make a pattern on my phone.  #teampixel #knittersofinstagram #knittin

Basically, I started casting on for the included pattern, realized I wanted to do something a bit more fancy with the yarn, and made up a new pattern on the spot with more colourwork and a shorter shaping. I’ve become a huge fan of having little hats that can live in my coat pockets so the pompom also had to go. This one became a present to my grandmother, since my Mom mentioned that she could also use a lighter fall pocket hat, and I thought the colours would suit her the minute I took them out of the bag. Such pretty heathers!

Jimmy Beans Beanie Bags - April 2017

Yarn

The yarn is all Blue Sky Fibers Woolstok. I love the lightly heathered colours, and they were soft enough for hat use for my tastes. This was a great yarn to sample: gorgeous colours, nice to work with. I’m not sure if I’d go out of my way to find it again since I’m spoiled for choice in the Portland area, but it was definitely a treat to get it as a sample!

Pattern

This was pretty off-the-cuff and untested, but here’s a rough pattern:

Needle size: 8.
Pattern is in multiples of 8. If you need it bigger or smaller, add or subtract in multiples of 8.
(My head is 24 inches, for reference. Do a gauge swatch, calculate from there.)

Brim:
Cast on 104 (13×8) in the round using main colour.
Knit 1.5 inches of 1×1 twisted ribbing (it doesn’t have to be twisted, but I like the way it looks)
Knit 1.5 inches plus a few rows so the turned brim doesn’t cover the pattern of straight stockinette.

Colourwork:
Follow colour chart as below or written pattern:
20170907-Screenshot_20170907-173525.jpg

MC-G = Main Colour (in this case, light grey)
CC-V = contrast colour one (in this case, dark violet)
CC-F = contrast colour two (in this case, fuchsia)
CC-P = contrast colour three (in this case, pink)

First band of colour is dark violet:
Row 1: {k3 in MC-G, k3 in CC-V, k2 in MC-G} repeat 13 times
Row 2: {k2 in MC-G, k2 in CC-v, k1 in MC-G, k2 in CC-v, k1 in MC-G} repeat
Row 3: {k1 in MC-G, k2 in CC-v, k3 in MC-G, k2 in CC-v} repeat
Second band of colour is fuchsia:
Row 4: {k3 in MC-g, k3 in CC-F, k2 in MC-G}
Row 5: {k1 in MC-G, k1 in CC-F} repeat
Row 6: repeat row 4. That is, {k3 in MC-g, k3 in CC-F, k2 in MC-G}
Third band of colour is pink:
Row 7: repeat row 3 only with pink in place of fuschia
Row 8: repeat row 2 with colour substitution
Row 9: repeat row 1 with colour substitution

Tie off colours and continue in main colour.
knit 1.5 inches of stockinette (or desired height for your head).

Decreases:
If you did more or less than 13×8 = 104 stitches at the beginning, you’ll need to adjust things accordingly. (e.g. if you did 12×8, you’ll start with a k11 instead of a k12)

Row 0: {k12, k2tog} repeat
Row 1: {k11, k2tog} repeat
Row 2: {k10, k2tog} repeat
and so on down until you get to a few stitches left and can tie them all together nicely.

Here’s a somewhat lousy picture of it on my head (before I blocked it, in case you’re wondering why it looks a bit wonky):
20170504-IMG_20170504_191433.jpg

And post-blocking:
20170514-IMG_20170514_103425.jpg

I gave this to my grandmother when I was out visiting in July, but I imagine she hasn’t had much chance to use it, so who knows if she’ll really like it! It was fun to knit, though, and I hope it’ll be useful to her as the weather cools.

Incidentally, I’m going to miss my yarn subscription: Jimmy Beans really did a nice job of giving me something new to try every month. But I was having trouble finding a few days to a week or so out of every month to actually do a new project. I imagine you’ll be seeing me write up random projects for quite some time before I run out of beanie bags, though, so taking some time off is the right choice even if I’m going to miss the new-yarn-every-month aspect. I did notice that Yarn Of the Month has a new owner and I’m tempted to try it out again, since 2 tiny balls of yarn for swatching is much easier to fit into my schedule, but I’m holding fast to taking a break for now. :)

April the Amigurumi Giraffe

I made this one for a co-worker and very awesome lady who’s expecting to give birth Real Soon Now. With the whole internet waiting for April the Giraffe to give birth, a giraffe seemed like an extra-appropriate baby gift. Since the gift has been gifted and the giraffe has given birth, now’s the time for a blog post!

April the Amigurumi Giraffe

Pattern: Gigi Giraf. You might recognize this one, as I’ve made it before, and used it as a base for a moose I made for another colleague some time ago. It’s a great pattern!

April the Amigurumi Giraffe

Yarn: Be Sweet Bamboo for the base colour. I love using this yarn. It’s so very soft, shiny, and it’s got a neat and very subtle tonal going that really works for giving some depth to the amigurumi. I immediately bought most of the colours for my next few amigurumi projects. If you’re local to me, Black Sheep at Orenco has it, and it’s worth trying!

April the Amigurumi Giraffe

The brown is Nova Plus Four Seasons Cotton. This is a nice soft cotton made of many tiny strands. I love how it feels when crocheted up, but it was a bit easy to split while I was working with it unless I wound it up a bit as it went.

April the Amigurumi Giraffe

I love the little tail. :)

April the Amigurumi Giraffe

I should have taken some more in-progress photos, but here’s one more before it got its spots!

April the Amigurumi Giraffe

Glitz Shawl

It’s February, so clearly it’s time to start breaking out the posts about Christmas gifts that I made. I always think I’m going to prep the posts in advance so they run in January, but then life happens. This year it was a trip to India that took prep time in January and then a big chuck out of February!

So here’s the first of my holiday gift items: a Glitz shawl made for my sister!

Pattern: Glitz Shawl by Kelli Slack

Kelli is a designer with exceptional taste who does a lot of patterns for my local yarn store. I am always admiring her designs in store, but I think this might be the first one I’ve knit up! It definitely won’t be my last. This is a really nicely written pattern with clear charts and good written instructions. I might have marked a few more things as repeats because of the algorithmic way I think about patterns (and the way my eyes skip over the written instructions when I’m tired), but a bit of highlighting and the chart kept me on track without much trouble.

I did this one exactly as written, which means it was actually the easiest of the gifts I made this year, since I made the rest of them up (and tried valiantly to keep notes on what I did).

I particularly love the little dangle bead detail on in this design. I may have to use the same idea in other projects I do!

Yarn: Teresa Ruch Tencel 5/2

I am so obsessed with this yarn that the folk at my local yarn store tease me about how I have to oggle the new stock all the time, but the colours are just that great, and the yarn itself blocks like a dream and has this perfect drape and sheen. Especially with crochet, it just ups the elegance of pretty much every project I’ve tried it on, since it’s such a light fingering weight and it practically glows with colour.

I have used it for a few projects now (most recently completed: Cadfael), but this was first time knitting with it. The yarn really helps make the “Glitz” that the shawl’s named for stand out, although I opted to go with a blue rather than the metallic tones it was designed for. The blue makes it a bit more like something you might have in an Elsa from Frozen cosplay, but since my sister and I have spent years cosplaying together, I didn’t think she’d mind. And besides, she looks good in blue. (Okay, she looks good in pretty much anything, even when we intentionally do thrift store finds that we can’t imagine looking good on anyone!)

It’s definitely more of a decorative piece than a warm one, so I imagine it’ll be some months before my sister can make good use of it, but hopefully it’ll be a fun wardrobe addition when the weather warms up! It was certainly a fun thing to make.

Grey gloves (Phase 1)

Grey gloves for J

I’ve been on a bit of a finishing spree, pulling out older projects. This one technically isn’t finished yet, since I’ll be putting a finger cover to make them convertible gloves, but since I gave them to J to try out in case it’s cool while he’s traveling east I figure they’re finished for now!

These were started in the spring, but abandoned when it got too warm for them to be useful. It’s still too warm, but I wanted to make sure they were done before it actually got cold.

Pattern: Line by Line mittens. This is a bit of a silly pattern to use with a solid grey yarn, but I had a copy (I think maybe it was a giveaway once?) and it has a size that’s suitable for J. Since this wasn’t a surprise, I got J to choose how long to make the fingers, so it’s not exactly to pattern.

Yarn: Misti Tui from Misti Alpaca. Sport weight, chains of thin alpaca. This is the same type of yarn I used for my Easy Kitty Hat. It’s probably not ideal for gloves, but it’s so soft and easy to stuff in a pocket that I thought J might enjoy some gloves out of it and offered to make them.

I don’t know if I’d recommend it for gloves in general because I doubt it’s super hardy, but so soft, and if they got worn out it’s not too hard to patch them up or make more.

Pi day t-shirt (free silhouette cut file)

I designed this shirt for my sister as part of a belated pi day present:

Pi day shirt

This was done using my Roboknife (also known as a Silhouette Portrait Craft Cutter, but that’s way too much of a mouthful to talk about my robotic knife. Well, okay, it’s more of a scalpel, but whatever.) and two colours of heat transfer vinyl (HTV). This is surprisingly nice stuff to work with, once you get the cut settings right on your roboknife.

Here’s the pi day t-shirt .studio3 file. There’s been updates to the silhouette cutting software since this was created, but hopefully it’ll still work.

When you open it up, you should see two pieces in there, reversed because of the way HTV is applied:

View of the pi day shirt pattern in silhouette studio: on the left is digits of pi with a pi-symbol hole in the centre.  On the right is the corresponding pi symbol as a separate piece.  Both are reversed because they are intended for heat transfer vinyl, which applies backwards.

View of the pi day shirt pattern in silhouette studio: on the left is digits of pi with a pi-symbol hole in the centre. On the right is the corresponding pi symbol as a separate piece. Both are reversed because they are intended for heat transfer vinyl, which applies backwards.

I basically grabbed the first hundred digits of pi, made a nice block out of them, then used the pi symbol to cut a hole so that I wouldn’t be layering things that wouldn’t be seen in the final design. (This tutorial on layering HTV is very helpful if you don’t know what I’m talking about.) If I were going to make this design, I would use a thicker font for the background part, and one that was easier to weed. This looks lovely but it was a pain to pull out the little centres, especially those 0’s with the dots that had to be left behind!

3am math art. Really wishing I'd thought of using a stencil font for this. So much weeding.

A photo posted by Terri Oda (@drterriko) on

Plus, after all that work I’m worried that eventually the lettering will come off in the dryer. My sister says she’s been a bit afraid to wear it and decided to save it for when it would be seen by people who’d appreciate it, and I can’t blame her!

Mandala bunnies

I’ve been working diligently on my cardi and more diligently on security for a software release at work, but I did find time in March and April to make a few presents. This pair went to two awesome little girls:

Mandala Bunnies

Their mom tells me there has been much singing of “Little rabbit foo foo” as a result!

The pattern is Easy crochet bunny (Ravelry link) and as promised, it’s pretty easy. Make a couple of round granny square centres and go from there! I did change up the second tail, though, when I realized my first pom pom wasn’t sturdy enough to be age appropriate for the younger giftee:

Mandala Bunnies

Other than the variant tail, I followed the pattern as written, but I kind of think it would be amazing to scale these up a little bit and use a fancier mandala in the front to replace the simple granny square.

Have you seen how amazing crochet mandalas can look? Here’s a roundup of a few free crochet mandala patterns, but that barely scratches the surface. Check out this tutorial and this artist’s crochet overlay mandala patterns and I imagine you might find yourself deep in a “crochet mandala” google image search eventually.

Here’s a few example photos to get your mind imagining the same thing as mine:

Round 33
Overlay crochet potholder
Here's a second #mandalasformarinke

Aren’t they lovely? Overlay crochet is on my list of things to learn; I’m debating doing that with some of my beanie bags now that I’ve collected a few without using them again. But no new projects until I get my cardigan done!

Pi day swap!

One of the Ravelry groups I enjoy runs a pi/e themed yarn swap and I decided to participate this year because seriously, how awesome is that? The deal was that you had to include yarn or spinning fiber, some edible goodies, a handcrafted item, and other goodies related to pi or pie. Target value was $30-40, which was actually hard shopping in all the yarn crawl stores with their beautiful handpainted, hand-made items! But I managed!

My swapee likes batman, so I made her a project bag which *might* have just been an excuse for me to buy some batman fabrics.

It’s reversible, so here’s the outside and the inside:
Batman project bag for Pi Swap
Batman project bag for Pi(e) Swap

I also made some papercraft pie boxes to fit the bag and some tea into. The lemon meringue one is a pattern from the silhouette store, and I modified it to make a blueberry pie one since I was putting blueberry tea inside:
Pie boxes for Pi(e) swap

I also made some magnets and a button, and a whole set of pretty stitch markers suitable for even bulky needles, but I didn’t take pictures of those separately.

Here’s two views of the whole package:
Pi(e) swap package

Pi(e) swap package

It included lovely yarn from Thoroughly Thwacked, a Brittany Crochet hook that my swapee was looking for, and some wooden buttons that I thought looked cool as well as the other things I mentioned. I hope it suited her!

And, since I’m sure you’re all curious, here’s the package I got from my upstream partner:

My Pi(e) swap package!

I see she noticed that I like tea :)

Also, check out the amazing little cherry pi pie charm:

Cherry pi pie charm from my Pi(e) swap package!

And the hat fits perfectly!

Super awesome hat from my Pi(e) swap package

Alpaca Pome Hat for Mom

This one was always intended to be a Christmas gift to my Mom, but I finished it in May. That might be the earliest I’ve ever started or finished a present.

Alpaca Hat for Mom

(whoops, sorry about the cleavage. SLR selfies are hard.)

Pattern: Pome by Agata Smektala
Yarn: I think it was Cascades Eco Alpaca or something. Super soft, pretty natural colours. My enthusiasm for the yarn might be why this got started so early!

Alpaca Hat for Mom

(No, really, SLR selfies are hard…)

Hat selfies are hard with an SLR.

Anyhow, I think the hat worked out! It’s a bit smaller than her favourite blue one, but the alpaca is definitely soft and hopefully warm enough for her daily walks. At this point, J would remind me to tell you all that alpaca is also also fire resistant. (He had an amusing chat with the alpaca rancher at the Oregon Flock and Fiber Festival once.)

Alpaca hat detail

I would definitely use this yarn again, and probably do the pattern again, although with so many neat cabled hat patterns out there, it’s hard to resist the lure of the new!

Why are there so many knit-a-longs starting in January?

January is apparently the month to start knit-a-longs! I guess it makes some sense, since many people are done with holiday gift knitting, and maybe have made new years craft resolutions to try new things where a KAL would be a good way to get help and tips as they go. But oh my goodness, I’ve seen so many of them that I feel rather overwhelmed. Normally I see a KAL once every few months, not a pile of them stacked into the new year! Even though I’m totally excited to try some of these, I just *barely* finished a Christmas present shawl to give it to M before I left Ottawa and I’m torn between taking time off and jumping in to these!

Here’s the three KALs that I’m seriously considering, of the very very many that I’ve seen:

2016 Rose City Yarn Crawl Mystery Knit Along : This is one of two mystery patterns associated with the RCYC, a big event in March where you visit some of the many yarn stores in the Portland area over the course of the weekend. This year it’s 14 stores, and that’s not even all the stores in the area! I’m tempted to do this one because it’s so neat seeing so many people making and wearing the same pattern, and I kind of want to have my own plumage for the event this year! There’s actually two Rose City Yarn Crawl mystery alongs, one for knit and one for crochet. I’m gravitating towards the knitted one because I love the description they used to help you choose your yarn. First clue comes Jan 27, so I still have some time to decide.

Catch a Falling Star MKAL: This is the January Mystery Mitt KAL for the Fingerless Glove Fanatics Group on Ravelry. I honestly don’t remember buying the pattern, so I think maybe it was free for a bit in December and I clicked the link on spec. But the designer has nice stuff and I’ve found fingerless mitts incredibly useful in the Portland weather, so I’ll probably be digging through my stash for a skein this week. First clue is already out, next due on Friday! (The Ravelry notification is the only way I remembered that I had this pattern.)

Twin Leaf Crescent KAL: This was designed by a local designer who creates beautiful patterns that are clear and easy to understand, and I’ve loved doing KALs with her in the past. The gradient kit for this is from Black Trillium, a local dyer whose yarn I’ve loved working with, and the colours are beautiful. But it’s a big shawl to add to my KAL list, overlapping directly time-wise with the RCYC cowl, and it requires a yarn purchase.

Since it seems weird to have a post on this blog without a photo, here a quick cell phone snap of what’s currently on my needles that I want to finish as well as these potential KALs:

Hobo Mitts in Progress

Hobo Mitts in Progress

This will be a set of convertible mitts for J, who says his old ones are getting pretty beat up. (I think maybe I bought them for him when we were first dating and he didn’t have enough cool-weather gear for regular visits to Ottawa?) They look super tiny on the needles, but they’re *really* stretchy and I didn’t want them to be too loose, so that’s the way they’re going to be… assuming they feel right to J when he tries them on a second time later in the process. They’ll fit more easily in a pocket this way, right?

That picture represents only a couple of days of kniting (I cast on two days ago and barely knit anything today), so they’re going fast enough that I’m hoping I’ll get these done well before the RCYC MKAL starts up! We’ll see if it gets messy when I get to the fingers!

Clapotis Wrap for S

I was visiting So Much Yarn in Seattle and looking for possible presents for folk with September birthdays. When I saw this beautiful rayon yarn with a thread of gold in it knit up in the store, though, I knew I had a winner for my sister.

Shawl for S

The Pattern

Clapotis on Ravelry (so you can add it to your queue and see other people’s versions)
Clapotis on Knitty (so you can actually see the pattern)

Shawl for S

I love the description of French women and their scarves, which actually kind of reminds me of my sister (although she’s best known for her hats).

French women are known for wearing scarves. Starting in September and until summer arrives, this is a most important accessory. The scarf may be striped or patterned, colorful, wrinkled and is much bigger than the scarves you probably have. Women just wrap the scarf around their neck in a “Je suis belle et ça ne demande aucun effort*” sort of way and off they go.

Since I have lived in Paris, I have realized that these ladies are on to something. I find I am much warmer wearing a scarf, even if I’m not wearing a jacket, so here is my knit version of the French scarf.

Shawl for S

This is a very popular pattern on Ravelry (over 20k projects!) and you can see there that it looks pretty different depending on the yarn.

Shawl for S

The construction of this one is a bit unusual. Can you tell that the early pictures are of the same shawl?

Shawl for S

You knit clapotis as stockinette with some twisted stitches for stability, and then drop the stitches later on and unravel. It’s kind of fun, although it feels weird to do it since normally you’re trying to avoid dropped stitches when you knit!

Shawl for S

The Yarn

Shawl for S

This particular yarn was very silky and it’s got lovely drape. Just look at it knit up!

Shawl for S

This is Blue Heron Yarns Rayon Metallic, and loved it so much that I may well buy more if I can figure out which colours I actually like. (Sadly, some of the colour ways *really* didn’t do it for me in the store, so I’m hesistent to buy more online!)

Shawl for SShawl for S

One skein made a nearly full-sized Clapotis (I had to leave off the last repeat, but honestly it was big enough!).

Shawl for S

Conclusions

While knitting stockinette is “boring” to many, I kind of like it because it means I can concentrate on other things and multitask. Plus, the yarn itself really made this a treat to make.

Shawl for S

I may have to make one of these for myself!

Shawl for S

Also, next time I ask J to take photos of me, I will skip reminding him that I want photos of the project, not the background, and I will remind him not to cut off my head. He really needs to up his portrait photography game!

Shawl for S

Camp Erin Teddy Bear Cardigan Variation

I’m not big on charity knitting because often it’s much more sensible to donate money that can be used to support more tangible aid (witness the story of the penguin sweaters). But Knitting Bee, one of my local yarn shops (there are so many in the Portland area!) was doing a drive for teddy bear sweaters at the same time that a friend of mine was trying to get rid of a bag of free wool, so I decided I’d participate!

Here’s the finished sweater on the bear who went to Camp Erin, on display in the shop:

Camp Erin Bear

About this pattern

This is a variation on Mr. Bear’s Top Down Cardigan, Hat & Scarf from Knitting Bee (Mr Bear’s Cardigan on Ravelry). I just made the modifications as I was knitting a sweater for Knitting Bee’s charity drive. The variation is nothing too fancy, but I thought I’d write it down in case I ever want to duplicate it.

Teddy Bear Sweater for Camp Erin

I’m happy to have you use this variant sweater in any way you want, but do note that the original has a line at the bottom saying it was made to support Camp Erin, not for commercial purposes, so you go according to your feelings on the matter.

Yarn

I used 4 colours, two blues, one grey and one black.
I’ll call the light blue one the edge colour or EC in the pattern below.

Teddy Bear Sweater for Camp Erin

Teddy Bear Cardigan

Cast on 58 sts in EC to begin neckband.
Row 1: (k1, p1) repeat.
Rows 2-5: continue in seed stitch

Now we’ll be begin the first stripe.
I used 3 strands of yarn, two in the edge colour and one for the stripe colour, twisting them together where the colour changes but not breaking the yarn until the stripe colour change.

Row 6 (Right side): In edge colour (K1, P1) twice (to continue neckband)
Change to stripe color, K5, place marker, K11, pm, K18, pm, K11, pm, K5
Switch back to edge colour and (K1, P1) twice.

Row 7 (wrong side): (P1, K1) twice for edge in EC then switch to stripe colour
In stripe colour, purl, slipping markers, until the last 4 stitches.
Switch back to MC for other edge then (p1, k1) twice

Row 8 (Right Side): (k1, p1) twice, then K to one stitch before marker. Increase by knitting front and back in stitches before and after each marker, knit other stitches up until last 4, (k1, p1) twice. (increase by 8 stitches)

repeat rows 7-8, changing colour every 5 rows, until you have 5 stripes.
(Work should measure around 4.5″)

Slip sleeve stitches onto holders or waste yarn. (Those are the stitches between the 1st and 2nd markers, then the ones between the 3rd and 4th markers.)

Continue to knit body as established only without increasing. I added two more stripes (~1.5″). Shorter bears probably only need one.

Switch entirely to edge colour for final edge.
k across for one row.
Last 5 rows: (K1, P1) repeat (or vice versa) for seed stitch. If you missed an increase somewhere, you may need to k2tog so that the front bands line up with the bottom seed stitches.

Bind off loosely. I use the following bind off, but any loose one would do:
k2tog, slip bound stitch back to 1st needle, repeat until all stitches are bound off then pull through the last one.

Transfer held sleeve sts to double pointed needles or magic loop. Attach yarn and knit all sts; join for knitting in the round.
I knit two more stripes at this point, but a shorter teddy probably only needs one.

Switch to edging colour and work edge in seed stitch:
k around once
then (k1, p1) around until you have 5 more rows. You’ll need to k2tog at the end of the first round to make the seed spiral around nicely.

Bind off loosely.

Weave in all ends.

Teddy Bear Sweater for Camp Erin

The Hat

Same deal with the stripes applied to the original hat pattern. (I didn’t take detailed notes, but you can probably figure it out from the pictures. If you’re trying to duplicate this and need help, please feel free to ask!)

Some more pictures

Here’s a few more snaps of the sweater, modeled by one of J’s stuffed toys:

Teddy Bear Sweater for Camp Erin

Homemade Heartbleed pillow

Perhaps the most well-known of open source bugs this year is heartbleed, notable as much for its marketing as technical merit.

There’s a tradition at work of decorating people’s cubes when they’re on sabbatical, and while I wasn’t the one who came up with the idea to decorate our fearless leader’s cube with things representing the many well-marketed open source bugs, I was the person who brought in the first piece:

Heartbleed Pillow for R

There wasn’t exactly a pattern for this:
Step 1 Draw half a big heart (to make sure it’s symmetrical) and cut out two of them.
Step 2 Cut a long strip with tapered ends to go over the top (to give the pillow some extra width at the top — you can’t see it in the photo but it’s about the width of my palm).
Step 3 Cut various thinner strips to be the bleeding drips.
Step 4 Sew each side of top to tapered strip
Step 5 Carefully sew bottom of two hearts together, placing drips at appropriate intervals.
Step 6 Curse and pull out drips and re-sew so they actually hang correctly. Several times.
Step 7 Leave a hole so you can flip the thing right-side out and stuff, then curse because you have no red thread and spawn another search of the house because it’s much too late to go out and buy thread.

Since my office (and indeed, half of the house) had no floor, there was a lot of frantic searching for the sewing machine. I don’t mind free-handing a pattern, but sewing through 3 layers of polar fleece by hand isn’t my favourite activity! Thankfully, we did find the sewing machine, but in the end, the only red thread I could find came from a promotional sewing kit I got from Raytheon at some Grace Hopper Celebration past. Seems sort of hilariously appropriate.

End result: one very one-of-a-kind throw pillow.

I’m sort of surprised that no one has started marketing open source bug merchandise, to be honest. I’ll bet there’s a market!

Definitely a right-brained brain hat

I actually did complete this hat before giving it to M for Christmas 2013, but apparently I can’t find pictures of it (or the kraken hat I made for S the same year), so instead you get this one photo of it with only one side completed:

Definitely right-brained

BTW, I chose the title for this post because of my half-finished picture. But for those of you who don’t know, the whole “right brained / left brained” thing is kind of BS and you might want to read up on it. The myth comes from some research on epileptic patients where the two halves of the brain were severed and they don’t seem to generalize to humans with normally connected brains.

From the article linked above (because I’m not looking up pubmed for a knitting post):

There is a misconception that everything to do with being analytical is confined to one side of the brain, and everything to do with being creative is confined to the opposite side, Anderson said. In fact, it is the connections among all brain regions that enable humans to engage in both creativity and analytical thinking.

“It is not the case that the left hemisphere is associated with logic or reasoning more than the right,” Anderson told LiveScience. “Also, creativity is no more processed in the right hemisphere than the left.”

Anderson’s team examined brain scans of participants ages 7 to 29 while they were resting. They looked at activity in 7,000 brain regions, and examined neural connections within and between these regions. Although they saw pockets of heavy neural traffic in certain key regions, on average, both sides of the brain were essentially equal in their neural networks and connectivity.

(tl;dr: Brains are much more versatile than pop culture might have you believe.)

So there’s your science tidbit for the day. Let’s go back to talking about knitting.

The pattern

Brain Hat (KNITTING PATTERN, not actual hat)
by Alana Noritake
($5 on Ravelry)

This is a pretty simple pattern: make a skullcap, put a lot of i-cord on it. But it’s worth buying yourself a copy of the pattern because it includes a bunch of pictures of the hat in progress and finished, as well as photos of brains and insight on how to make it look good. I definitely felt like I got my $5 worth and had a much better hat for it!

My notes

I made the brain hat for M, who’s allergic to animal fibers, so I was somewhat limited in my choices of yarn. I think I used knitpicks comfy, which is a cotton-acrylic blend that’s quite nice to work with (soft and a little more stretchy than straight cotton). This worked pretty well, to be honest, but doesn’t make for the warmest of hats. This makes it not so great as an all-winter Canada hat, but ok for warmer climates or indoor costume use.

If I did this again again, I’d probably make 50% more brain icord and take more time pinning it to be absolutely perfect. I just didn’t allot quite as much time as I should have before xmas so I was frantically making this on the plane to Ottawa and at my parents’ house before it got packaged up as a present.

Overall, though, a fun pattern and one I’d be happy to make again, given a lot more time or a knitting machine that produced icord.

Twilight Sparkle for Katie

I made this Twilight Sparkle for a friend and then, uh, took a year or something to get it to her. I am the worst at mailing things (in the end, J gave it to her in person and I never mailed it!)

The pattern

This is a pattern I made myself, and this Twilight Sparkle is actually one of the first ponies I made after I had actually published the pattern. (I also have a set of teensy tiny felted ones that I haven’t finished up and photographed yet… someday I’ll get through my backlog of projects to document!)

[Crochet Pony Pattern inspired by My Little Pony: Friendship is Magic on my website (toybox.ca)]
[Crochet Pony Pattern inspired by My Little Pony: Friendship is Magic on Ravelry]

(You can tell it’s been a while because she’s still just a unicorn!)

Photos

Since I wrote the pattern, I don’t have much more to say about it, so here’s a bunch of pictures of the pony!

Body only:

Violet Pony for Katie

I do love that she’s a bit posable….

Violet Pony for Katie

Those legs are surprisingly bendable!

Violet Pony for Katie

If I wanted to her to have a bigger range of positions I could have wired her legs, but this is just the qualities of the yarn and stuffing.

Violet Pony for Katie

Her head also moves, although maybe not as much as the legs

Violet Pony for Katie

And here she is with a mane and tail and cutie mark: I don’t love her eyes (I haven’t found a great way to do them; these were drawn on fabric and sewn on), but she does look more expressive with them!

Twilight Sparkle for Katie

Closer look at her rump so you can see the cutie mark. Or make jokes about butt-shots, whatever.

Twilight Sparkle for Katie

Did you notice what book it is?

Twilight Sparkle for Katie

I chose it for photos because of the colour, but it does seem like something she might enjoy, eh?

Twilight Sparkle for Katie

Maybe one day I’ll do a version with the wings…

Twilight Sparkle for Katie

Or at least one for myself!

Twilight Sparkle for Katie

Overall, my biggest regret on this one was not sending her out sooner. Sorry about the delay, Katie!

Rippy and Chompy the Gators

Rippy and Chompy

These two gators got named Rippy and Chompy after the Arrogant Worms’ classic children’s song Rippy the Gator. The girls who recieved them might give them other names, but I suspect these might stick given how many times their dad and I went to Arrogant Worms shows over the years! For those not familiar with this particular musical gem…

Billy and his family went on a holiday
They went down to Florida to laugh and dance and play
Bill went in for a swim, he didn’t see the harm
But when he came back out again, he was short an arm
‘Cause Rippy the Gator went chomp, chomp, chomp!
Rippy the Gator went chomp, chomp, chomp!
Passing the time by ending children’s lives
Down in the bottom of the swamp, swamp, swamp!

and so on.

The Pattern

Rippy and Chompy

[Baby Gators on Ravelry]
[Baby Gators pattern on Mochimochi land]

One of my complaints about amigurumi patterns is that it’s hard to find ones that really take advantage of the range of textures and shapes that are possible. Now, don’t get me wrong: there’s a lot of cute things you can make with balls and cylinders, like good old Hello Kitty, but when I was working on the My Little Pony-inspired amigurumi pattern I made, I had a lot of trouble finding good techniques for some of the shaping I wanted to do.

So when I saw this creative pattern with the textured stitches and the nostril and eyebrow shaping, I knew I had to try it.

My Notes

Link to my Rippy and Chompy the Gators as a project on Raverly

I used Caron Simply Soft for this, because I like that it’s soft, washable and reasonably hypoallergenic. Since these were going to two kids under the age of two, those are all important things!

One thing that’s interesting about this is that it’s knitting, not crochet. In my experience, knitting tends to be a bit stretchier so knit animals tend to have less interesting shapes because they squish out when they’re stuffed. As a result, I rarely love them the way I like the crochet ones! But this one was cool enough that I wanted to try it anyhow.

You do have to be a bit careful with stuffing this one because of the properties of knitting, though. When I first stuffed the nose, it lost shape and you could barely see the nice nostril shaping, and you can tell if you look at the photos that the tails are different widths. Under-stuff rather than over-stuff on this one.

Rippy and Chompy

The pattern is very clear and easy to read. It’s increases, decreases, knits and purls, with something a bit fancier for the bobbles (the nose and eyebrows), so it’s doable for a relatively new knitter, but probably not an absolute beginner unless they have help on hand (or patience and youtube videos!).

The only thing I might have changed is that I found the legs a bit long once I had them sewn on. I decided I didn’t care enough to re-knit, but if I do this again I might think about taking out a row.

Also, as usual with amigurumi, don’t be afraid to experiment a bit with how you sew things on. A little movement can make things look way more cute or a bit uncanny, and I found this was especially true with the legs on this one: in some places, they made it look like spider gator!

Rippy and Chompy

Conclusion

In conclusion, great and interesting pattern that knits up quickly because it’s so small. I may make this one again!

Small Starry Sweater / Baby Astronomy Sweater

My friends are having their 2nd child, and since I actually kind of love making baby sweaters (so small! so cute!) I decided to prepare something to welcome her into the world.

Baby Astronomy Sweater

The Yarn

This sweater is actually the first thing I’ve made from my Rose City Yarn Crawl haul. The yarn crawl is a whirlwind weekend++ of yarn shopping. This year (2015) there were 15 shops in the Portland area participating. Believe it or not, that’s not even all the yarn shops in this area! I convinced a friend of mine to come out to Oregon for a visit just to do the crawl and have an excuse to see parts of the area I hadn’t visited yet.

I went a little overboard with the buying, since you got a free pattern (sometimes two!) in each store with purchase. But they had so many neat special “trunk shows” on and so many lovely yarns I’d never tried before, so I kind of bought a year’s worth of fun new experiences for myself, and I don’t regret that at all. Can you spot the yarn I used in the photo of my whole Rose City Yarn haul?

Rose City Yarn Haul

The yarn is Cascade Sunseeker, a 47% cotton/48% acrylic/5% metallic yarn blend. Colourway is “Nautical Blue” (22). The blend is a bit less stiff than many cottons, and less scratchy than many sparkly yarns. It’s not the softest thing I’ve ever worked with, but it’s got a nice balance of feel, look, and easy-care. And strangely, although Cascade is a very popular yarn mill, and I’ve made at least one pattern from their popular books, I think this may be the first thing I’ve made with their yarn! (but not the last: I even have another project completed from another blend of theirs, but it’s a christmas present so you won’t be seeing it for a while!)

I knew at the time of the crawl that I’d be making a baby sweater, but I hadn’t decided what it was going to look like exactly, despite having queued up a bunch of patterns so I’d have some idea of what yarn requirements I had for each. But when I saw the blue sparkly cotton yarn, I knew I wanted to try it for the baby sweater. Starry sweater!

Starry Sweater Sleeve

(I might just love stars. Hey, that second photo was taken on a trip with dad K!)

The dad of the incoming baby once said he’d like me to be a force for science in his kids’ lives. I don’t get to see the family much since I don’t live in the same country any more, but I try to think about that when I prepare gifts for his family. This has been awesome because it gives me an excuse to look at science toys everywhere and claim it’s research for the kids. (Most recently at the big Maker Faire in San Mateo!) My gifts haven’t been all that science-oriented yet since even the eldest is a bit young for some of the building toys that I’d like to get her. But that blue yarn said space, and astronomy is science, so thus the sweater was born!

The Pattern: Offest Wraplan

Offest Wraplan pattern link on ravelry

This pattern has a big warning saying it’s not tech edited, but lots of people have figured it out and I didn’t have too much trouble with it. I do remember there being something a bit weird about the way they handled the ribbing: I think the pattern was done where the ribbing is written with the right side flipping, so in one section you’re purling where you knit in another section, and it seems confusing or wrong until you sit down and work it through.

I made some changes to do a more mistake-rib style ribbing on it in the end, because I liked the way it looked in that yarn in my test swatch. That change was a bit annoying to translate because of the way the pattern reverses things so I had to flip where my twisted stitches were, but I figured it out.

The one thing I should say is that you should pay attention to the number of stitches you pick up for the front panel. When I picked up every one, I got this:

Slightly lopsided starry sweater

So I had to rip that back and try again, skipping a few stitches when I picked up to make it straight.

The details: Buttons!

I had originally planned for there to be a big star on the side of this sweater and then regular buttons, but when I saw the star buttons in the store I changed my plans:

Baby Astronomy Sweater

How cute are those?

I do feel a teensy bit guilty, though, as they’re a bit annoying to use in conjunction with the ribbing I chose. If I’d planned in advance, I could have chosen an edging that was smoother. But they’re so cute, and even after I realized the flaw I figured the cuteness was worth it. At least my friend’s a photographer and he’ll likely get a chance to admire the cuteness in family photos long after the experience of actually using the buttons has faded? (Dear K – I will not be offended if you use this as a pullover after trying to use the buttons once, and I’m sorry I sacrificed function for form. But they’re so cute!)

The details: Appliqué

But now I had a problem. If I put a shooting star on the side as I’d originally intended, would it be just too repetitive? Would I have to futz over making the star exactly match the buttons or it would drive me crazy?

I could have just left it as an offset sweater without appliqué, but that’s such a big space on the side there…

Baby Astronomy Sweater

I’m not the one who hit on the solution. I think it was either my friend M or my sister when we were on Teamspeak playing diablo/knitting/gossiping who suggested the crescent moon:

Baby Astronomy Sweater

And that’s at the point where it went from “Small Starry Sweater” to “Baby Astronomy Sweater.”

I was reminded that it’s a bit annoying to sew something perfectly smoothly onto unfelted knitting because the stitches provide texture that doesn’t line up with your appliqué, but I decided to go for “look handmade” with chunky embroidery stitches. It’s baby clothes, so it’s bound to get messed up anyhow! I do hope this one get re-purposed to doll clothing or something, though, it’s so cute and it’s a shame that at that size, it may only get worn once or twice before it’s outgrown. Ah well, that’s the risks of making baby clothes!

The details: fait avec amour

I’ve never really added clothing labels to the things I make, but I saw these cute “fait avec amour” labels on Knitpicks and thought they were too cute to pass up. I always am pleased when I see French down in the US at all, and the baby this is for has lots of francophones in her family tree!

And while I was at it, I figured I might as well add a washing instruction label. Never hurts to be sure of how you should care for a handknitted piece, although knowing her dad it was bound to be machine washed and dried no matter what!

Baby Astronomy Sweater

Conclusions

Yarn

The sparkles in this are absolutely amazing in person, and the yarn was easy to work with. I love how it holds crisp corners, so I think it was a good fit for this pattern even though there exist softer cottons I could have tried.

Pattern

Despite the dire warnings about tech editing, it’s not bad. Not entirely beginner-friendly, in my opinion, but fine if you don’t mind thinking your way through it and have enough experience reading patterns to do so. I love the shape of the final project with the wide neckline, and I liked the way it left space for my own themeing. You could make hundreds of these and not feel like any of them were really the same.

Overall

When I gave this to the family, big sis was kind of upset that this sweater wasn’t for her. (I wonder if I could scale up this sweater to her size and do it in some other pretty yarn…) It may be just the grabbiness of a (then) almost-two year old, but I take it to mean that the baby astronomy sweater is an object of desire. That’s good, right?

Whims of almost-two-year-olds aside, I liked this and will almost certainly make this pattern again!

Summer Sweater for S (Bell-sleeved version of The Cherry Variations)

One of my personal goals for 2015 was to try knitting an adult-sized sweater. And I’m happy to say that I’ve managed it, although I admit I cheated a bit in making it for my sister rather than for myself, as she’s a few sizes smaller than I am.

S's Cotton Sweater

[Summer Sweater for S on Ravelry]

The Yarn

The yarn is KnitPicks Billow, which I picked up because my sister prefers things without animal fibers so that they won’t be bad for her boyfriend, who is allergic. It’s soft yarn and lovely feeling, but it’s a bit weird to work with because it has variable thickness. After a few test swatches, I decided it would be nicest in a simple stockinette that showcased the homespun feel of the yarn, since the other things I tried seemed to be fighting it.

The pattern

This is based off The Cherry Variations [ravelry link], a most excellent free pattern from Knitty’s Spring 2003 edition. (I didn’t even know how to knit back then!)

However, if you go look at that pattern, you’ll notice mine’s a fair bit different from the original…

Untitled

So what happened?

1. Stripes. These are simple, 8 rows wide, 3 colours.

2. I decided to add some sleeves. I actually didn’t plan to do this, but when it got done the sleeveless version I decided it would be nicer with some sleeves. So I picked up stitches around the arm opening and did them seamless-style. I think there were 35 stitches the way I picked ’em up. I knit the sleeves straight at the top, with stripes to match the body. (My stripes are 8 rows wide.)

When I got down to a bit before wrist length, I decided belled sleeves would be hilarious in this yarn because of the way it drapes. To do this, I divided the stitches into 3 (it wasn’t quite even but close), placed markers (since I was using 2 circulars at this point) and increased at the stitch markers every 3rd row, approximately, for the last two stripes (so last 16 rows).

I cast off using some ludicrously stretchy bind-off from this page comparing bind-off methods. I think it was Jeny’s Surprisingly Stretchy Bind-Off.

S's Cotton Sweater

3. The thing you might not notice immediately is that I decided to add a crochet border along the neckline. I found that the sweater as was tended to be a little too off-the-shoulder on me, and since my sister has much less wide shoulders, I figured that would be annoying and would eventually stretch it out to the point of uselessness. So I looked up stabilizing methods online and settled on a simple single crochet.

S's Cotton Sweater

I didn’t think to take a picture of myself wearing it, so no modeled shot. It would have just looked ill-fitted anyhow, as the shaping around the bust line was made with my sister’s approximate measurements in mind, so it was quite tight on my rib cage, let alone my bust.

I don’t know how much she likes it, but it does fit, at least!

20150323-IMG_7200.jpg

I kind of fell in love with the yarn as I was knitting it, and I like the pattern enough that I’m strongly considering making one for myself, even though it’s cotton and not exactly the most suitable for the Pacific Northwest’s soggy weather!

Hello Kitty Amigurumi (“Bring me the head of Hello Kitty!”)

Hello Kitty Crochet is a book I have coveted since I knew it existed, in part due to nostalgia as I remember getting little cute Japanese things on occasion as a kid, but also because it just looked like a fantastic set of amigurumi crochet patterns with lots of details and cute photos.

Hello Kitty Crochet: Supercute Amigurumi…
Hello Kitty Crochet: Supercute Amigurumi Patterns for Sanrio Friends
by Mei Li Lee

J’s parents were sweet enough to get me a copy for my birthday. So of course, the thing to do is to make the titular character and send her back with a thank you note! I have no idea what they’re ever going to do with a little Hello Kitty, but what has one ever done with Hello Kitty other than admire her, really?

I finished her head pretty quickly, then got side-tracked by something else so there was just this severed head lying around the house for a week:
Hello Kitty Amigurumi

Eventually, though, she got some more body parts:

Hello Kitty Amigurumi

The strange one there is the bow. I am quite sure that there’s an error in the book, because they have you doing 4 sc and then 3 sc in one, which would give you a total of 7 sc across… but then the next line says you should turn and do 9 sc plus another 3-in-one. Does not compute, Hello Kitty. Through looking at the pictures and some online research my best guess is that you’re not supposed to turn your work front to back but rather make an oval by crocheting around the other side of the original chain, so that’s what I wound up doing.

Here’s a picture where you can see it better:
Hello Kitty Amigurumi

And here’s one so you can see that she does indeed have a tail:
Hello Kitty Amigurumi

What you can’t see is that she has washers in her butt to make her a bit weighted and not top heavy. I debated putting a rare earth magnet in there too, but I couldn’t really think when that would be useful, so I went with just the washers.

To fill out the post, here’s some photos with a Hello Kitty Makeup box I got when it was on sale at Sephora:
Hello Kitty Amigurumi

Very kawaii, indeed. I’d originally intended to felt her, but once I got her features on I didn’t want to mess them up. Maybe next time!

Hello Kitty Amigurumi

Hello Kitty Amigurumi

If you don’t know how big that box is, it might be hard to tell how big she is. Here’s a shot with a ruler, although the one I have with the ruler up and down didn’t turn out so well, so you’ll have to guesstimate from the one where it’s beside her. She’s a little under 3in high.
Hello Kitty Amigurumi

Aside from the issue with the bow, I found the directions pretty clear. They’d be suitable for a crochet/amigurumi beginner if you’re eager to try her out. I can’t wait to try some of the other patterns in the collection!

Blue starry math pony (using @valleyviolet’s pattern!)

Ever since I saw Valleyviolet’s Pony Pattern collections, I’ve wanted to make one. I finally bought the collection in order to make the Pink Fluffy Unicorn mascot for Quelab (who is apparently MIA right now, likely stolen by the same person who vandalized the room sign; much sadness. She was a lot of work!), but I didn’t want to jump right into fighting with fun fur, and I’m fortunate enough to know a little girl of around the right age to enjoy a pony, so…

Custom my little pony for V

I went with blue and stars not out of any particular reason other than I liked the way the two fabrics looked together. The recipient’s young and lives far away from me, so I don’t know much about her preferences yet! However, I *do* know that her mom’s a mathematician and that her dad would like me to be a science role model for her. So the pony came with a book:

Custom my little pony for V

The book, as you can’t quite see in that photo, is “The Boy Who Loved Math: The Improbable Life of Paul Erdős.” I was super excited when I first heard of it, as it’s a beautifully illustrated children’s book about a rather famous mathematician. One of the things he did was travel the world, collaborating with mathematicans all over the place. Mathematicians sometimes talk about their Erdős Number, which indicates degrees of collaborators on your published papers leading back to the man himself. (I published a paper with someone who’s number is 2, so mine is 3, a number worthy of bragging about at math parties!). My Calculus prof, an excellent storyteller, used to tell us tales of Erdős at the end of class sometime, and I was totally enchanted to hear more of them through the book. And the art works a lot of careful math and real people into the story, which is amazing. I also love that it doesn’t shy away from the fact that he was a man who couldn’t do his own laundry but helped do so much math that people were willing to welcome him into their homes.

The Boy Who Loved Math: The Improbable Life…
The Boy Who Loved Math: The Improbable Life of Paul Erdos
by Deborah Heiligman, LeUyen Pham (Illustrator)

I highly recommend it, especially if you’ve got a kid in your life who could use a gift!

It’s also a kind of funny pairing with this pony, as some folk have this theory that one of the My Little Ponies with somewhat similar colouring also really likes math. Not an intentional joke on my part, but I’ll take it!

So back to the pony construction…

Much like how representations of humans can have an uncanny valley effect if things are close but a little off, my experience is that this is a pattern that can go kind of horribly wrong if you don’t pay attention to the details. I originally sewed her head on in a weird way and was totally disappointed with the end result. I wasn’t even going to give it to V, it was so awful. I didn’t even take pictures (which is a shame in hindsight because the comparison was so striking). But after ruminating a while, I tried again, and with her nose tipped up just so, she got the curious look I was hoping for.

Custom my little pony for V

Valleyviolet’s instructions are very detailed and clear, and there’s a lot of work put into the shaping that really shows in the final product. There’s also just a lot of thought put into the instructions. I’ve actually never worked with a pattern that was so careful about explaining things, and I’ve got to say the patterns are worth every penny as a result. You can can buy her pony patterns here, and I promise you can make much more polished ponies than I did!

Custom my little pony for V

I think when I do my next one, I’ll have to be a bit more careful about marking the notches and just generally careful about the stitching. I also need to invest in some heavier weighting for her legs since, as you can see, she doesn’t quite keep all four feet on the floor sometimes. (This was right after she came out of my suitcase from my flight to Ottawa, though, so I can’t blame her for looking a bit disheveled!)

Custom my little pony for V

I don’t know how much the recipient cared for the pony, and to be honest she’s a bit young for the book yet, so I didn’t win any gift giving awards here, but it was fun to do and I really loved the pattern.

I think I’m going to try out the shoulder pony pattern next, once I find some suitable beanbag filling!

Three generations of women, one hat

Here’s a project that’s been sitting in my queue of things-to-post for a while!

Cabled Hat

This is a hat I made for my grandmother. It was a post-Christmas present, a project that I brought up so I’d have something to do over the holidays.

Pattern

The pattern is the Cup of Tea Cabled Touque by Jessica Dekker. It’s a pretty neat little pattern with a bunch of different types of cables. You can see the cables in slightly more detail here:

Cable Knit Hat

Incidentally, SLR selfies are silly, as you can see.

I adjusted the pattern to add a crocheted faux-fur edging, in part because I thought it would look cute, and in part because I’d made my grandmother a scarf with the same yarn and thought they’d make a pretty matching set that way. I believe my pattern for that went something like this:

0: Take finished hat brim and fluffy eyelash yarn, sc around picking up stitches as you go.
1: triple-crochet around to make something very fluffy.
2: wrap the crocheted brim up on the front of the hat, and single crochet around pausing every few stichtes to crochet through the hat so that the brim will stay up.

Cable Knit Hat and with fluffy crochet edging

More Photos

So you’ve seen me wearing the hat… what about the other two generations of women?

Here’s my mom, who graciously agreed to pose since I wasn’t sure I’d be able to convince my grandmother to do so:
Cable Knit Hat and with fluffy crochet edging

And my grandmother, who was kind enough to pose with the hat and scarf:
Cable Knit Hat and Scarf

She loves the colour purple, and it certainly complements her nicely! I kind of wish I’d inherited or learned her apparently innate sense of colour and style; she often finds these beautiful jewel-toned jackets and things that are amazing.

And here’s one more photo:
Cable Knit Hat and Scarf

I’m not great with flash photography, but I like how the flash picked up the shininess of the scarf!

While I may not have my grandmother’s sense of style, one thing we do have in common is a penchant for altering existing patterns and creating new ones. She used to make so many stuffed animals for me, including ones based on characters in shows that I loved as a kid (Muffy the mouse!). I grew up wearing winter tuques and scarves she crocheted for us grandkids every winter to match the snowsuit we fit into that year, so it’s been fun to return the favour with knitted gifts myself!

Butterfly Baby Sweater (simplified top-down one piece cardigan for self-striping sock yarn)

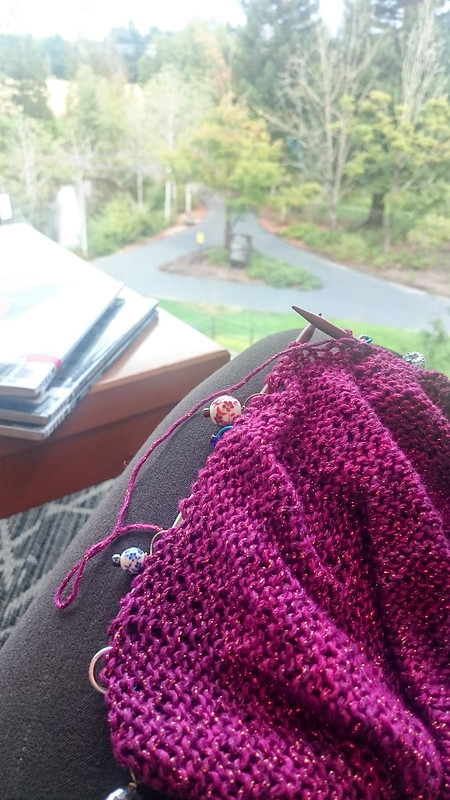
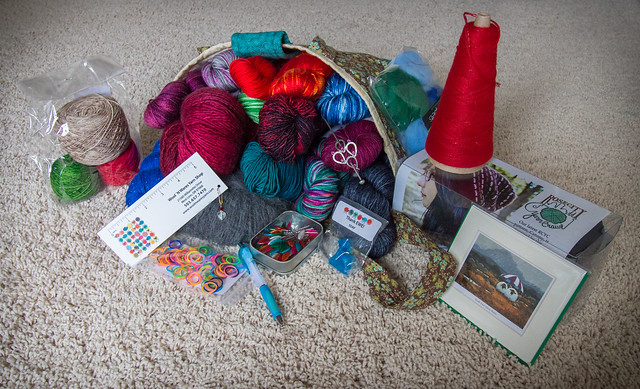
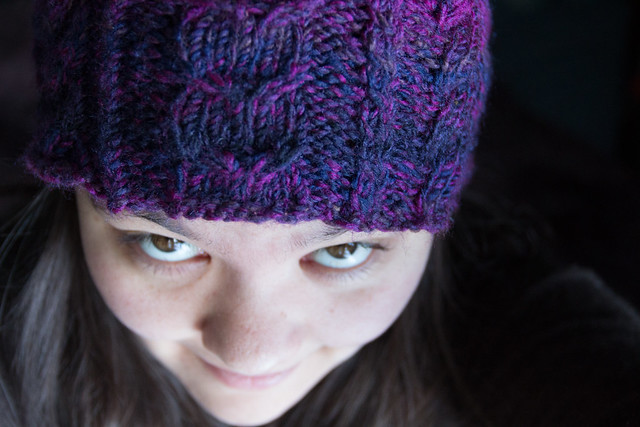
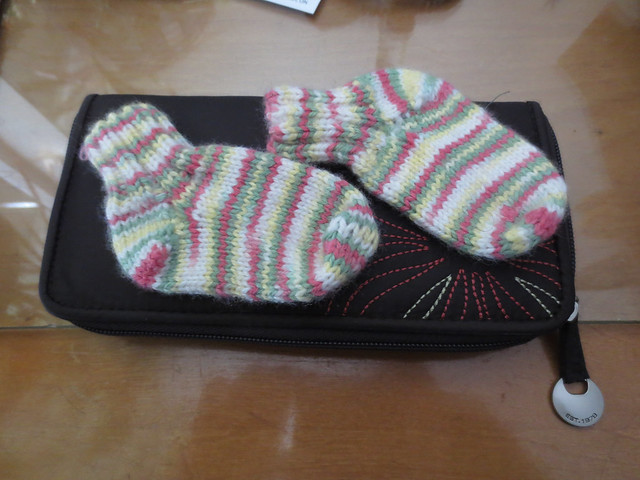
Remember my post about pictures of knitting in sunlight? I think it’s about time I post a few finished photos to go with that, isn’t it?

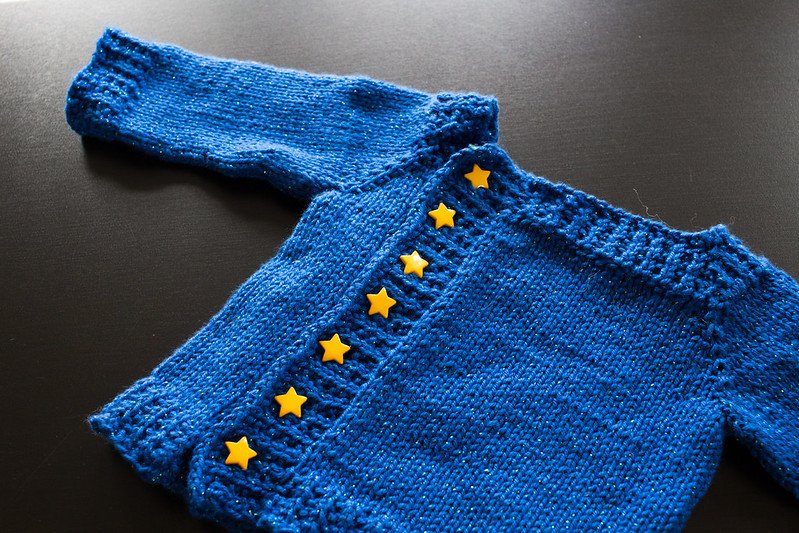
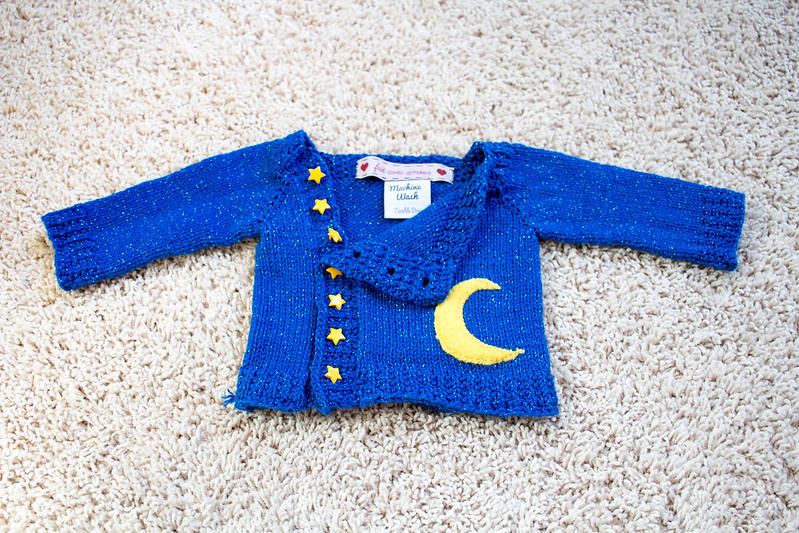
The project was a baby sweater, again for baby V, who probably qualifies as a toddler now that she’s, well, toddling!

Pretty Purple Baby Cardigan

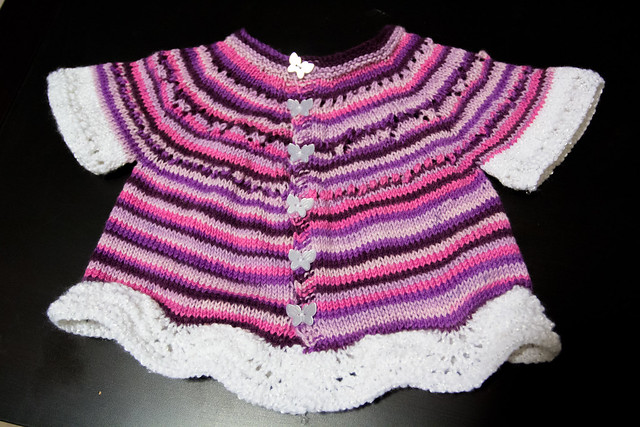
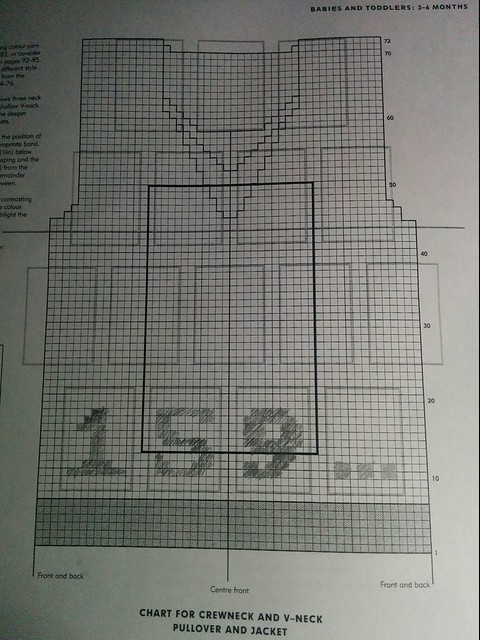
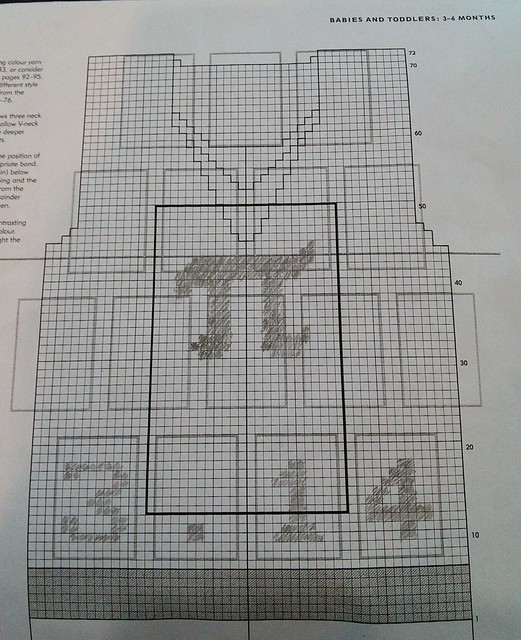
My pattern is based off Eyelet Baby Cardigan pattern from Looking Glass Knits.

Which was in turn based off this baby cardigan pattern from DROPS Design

I’d originally intended to just do the Eyelet Baby Cardigan pattern as written, but I thought it was too busy to have the eyelets with the self-striping yarn, and then on top of that I found the way the pattern was written had me doing too much math as I knit which broke my flow of creating. I must have knit and unknit this 3 times before I gave up and just wrote out my own pattern:

Pattern

Size: 9 months
Gauge: 8 st = 1 inch

inc – k front and back?

In my case, that was knitpicks felici and size 3 needles.
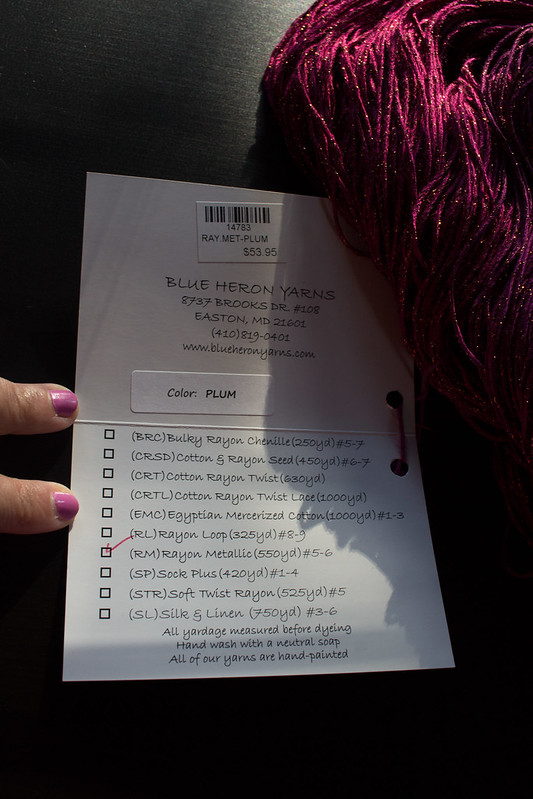
Yarn:

Main colour: One ball of knitpicks felici (sock yarn). If I’d had more, though, I would have used one-and-a-bit-more.
Edging colour: some fluffy baby yarn that I’ve long since lost the label for. It is probably sport weight, not sock yarn weight.

0: CO 84 st.
1-3: k across (garter stitch)
4: make buttonhole (k2, yo, k2tog), k to end
5-8: k across (garter stitch)
9: k4, p to last 4 stitches, then k4
(We’ll do this for all odd rows, really)
10: k, increasing by EIGHT spaced evenly [92]
eg: k4 (border), k3, inc (k10, inc) * 7, k3, k4 (border)
12: k, increasing by EIGHT spaced evenly [100]
eg: k4 (border), k4, inc (k11, inc) * 7, k3, k4 (border)
14: k, increasing by SEVEN spaced evenly [107]
eg: k4, k1, inc (k15, inc) * 6, k1, k4
** In original, pattern row was here **
(See “additional lace details” below if you want to know my embellishments)
16: k
**
18: buttonhole, increasing by SIXTEEN spaced evenly [123]
eg: (k2, yo, k2tog), k5, inc (k6, inc) * 15, k4, k4
20: k, increasing by EIGHT spaced evenly [131]
eg: k4, k1, inc, (k16, inc) * 7, k2, k4
22: k, increasing by EIGHT spaced evenly [139]
eg: k4, k2, inc, (k17, inc) * 7, k2, k4
24: k, increasing by EIGHT spaced evenly [147]
eg: k4, k3, inc (k18, inc) *7, k2 k4
26: k, increasing by EIGHT spaced evenly [155]
eg: k4, k4, inc (k19, inc) * 7, k2, k4
**
28: k
30: k
32: buttonhole (k2, yo, k2tog), k
***
34:k increasing by SIXTEEN spaced evenly [171]
eg k4, k6, inc, (k9, inc) * 15, k6, k4
36: k4, k increasing by SIXTEEN spaced evenly [187]
eg k4, k7, inc, (k10, inc) * 15, k6, k4
38: k4, k increasing by EIGHT spaced evenly [195]
eg k4, k2, inc, (k25, inc) * 7 , k2, k4
40: k4, k increasing by EIGHT spaced evenly [203]
eg k4, k3, inc, (k26, inc) * 7 , k2, k4
42: k4, k increasing by EIGHT spaced evenly [211]
eg k4, k4, inc, (k27, inc) * 7 , k2, k4
**
44: k
**
46: buttonhole, k increasing by TWENTY FOUR spaced evenly [235]
eg (k2, yo, k2tog), k10, inc, (k8, inc) * 23 , k9, k4
48: k4, k increasing by NINE spaced evenly [244]
eg k4, k1, inc, (k28, inc) * 8, k2, k4
50: k4, k increasing by NINE spaced evenly [253]
eg k4, k2, inc, (k29, inc) * 8, k2, k4

Buttonholes: continue every 14 rows (at 60, 74, 88, 102…)

Divide stitches for arms:
Row 52: k39, slip 51 st to holder, k 73 [back], slip 51 st to holder, k39.

Work body (151 st):

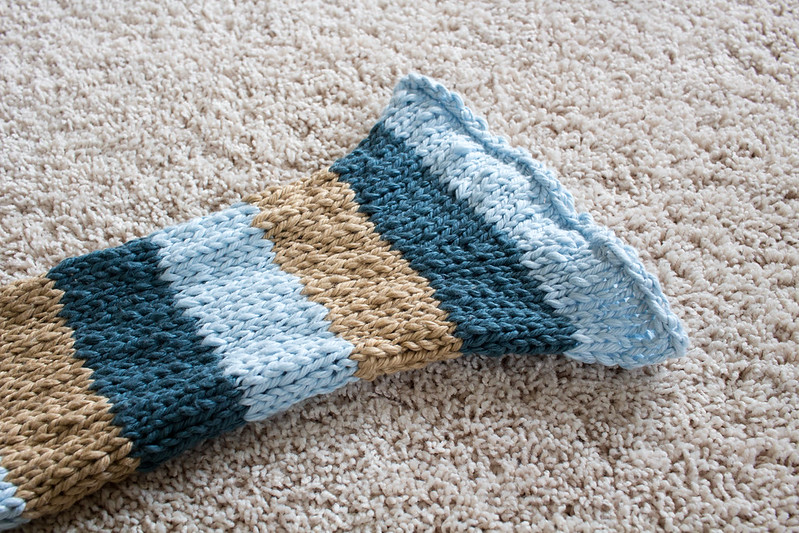
Work in stockinette until… well, in my case it was until I was almost out of yarn, but in theory the original pattern said 10″.
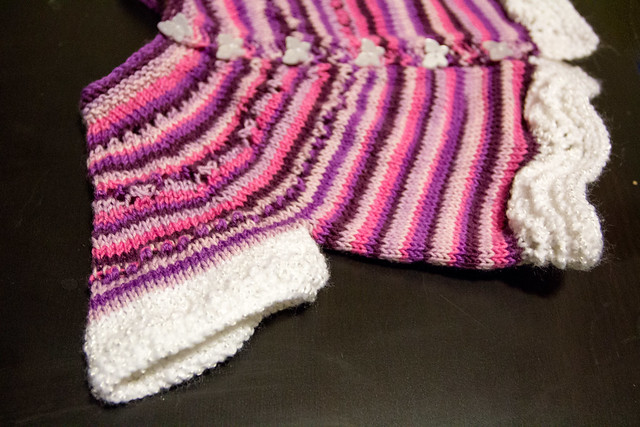
Work edging:

Swap to edging yarn. In my case, this was a white baby yarn that was actually a bit thicker than the sock yarn used for the main body.

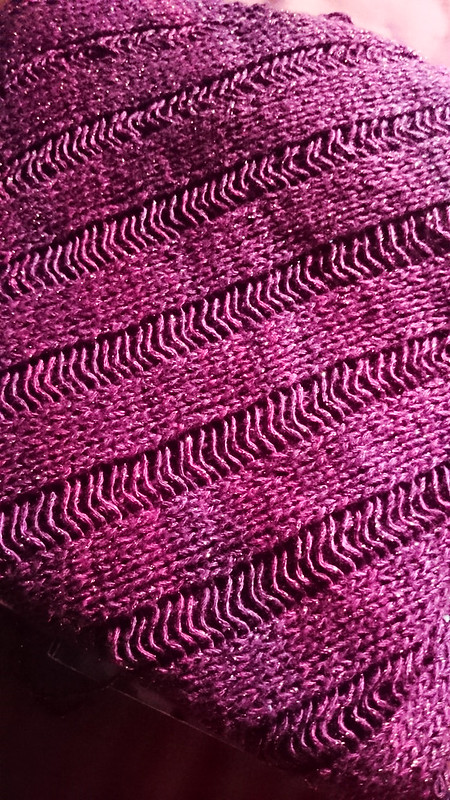
Work feather and fan as per original pattern, repeating this three times:
Row 1: knit.
Row 2: k4, p to last 4 stitches, k4.
Row 3: k5, (yo, k1) three times, (k2tog 6 times), *(yo, k1) six times, (k2tog 6 times); rep from * until last 7 stitches, (yo, k1) three times, k4.
Row 4: knit.

Work two rows of garter stitch and bind off.

Work sleeves:

Pretty Purple Baby Cardigan: sleeve detail

Put 51 arm stitches on a needle.

Knit in stockinette until desired length is reach. I wanted short sleeves, so that was 4 rows for me. Note that this will make intentionally wide sleeves. I hear dressing babies is hard.

Swap to edging colour, and add an eyelet edging to suggest the lace of the feather and fan in the bottom:

1 (RS): k all the way across
2-3: k across
4: repeat (p2tog, yo)
5-7: k across
bind off

Additional lace details

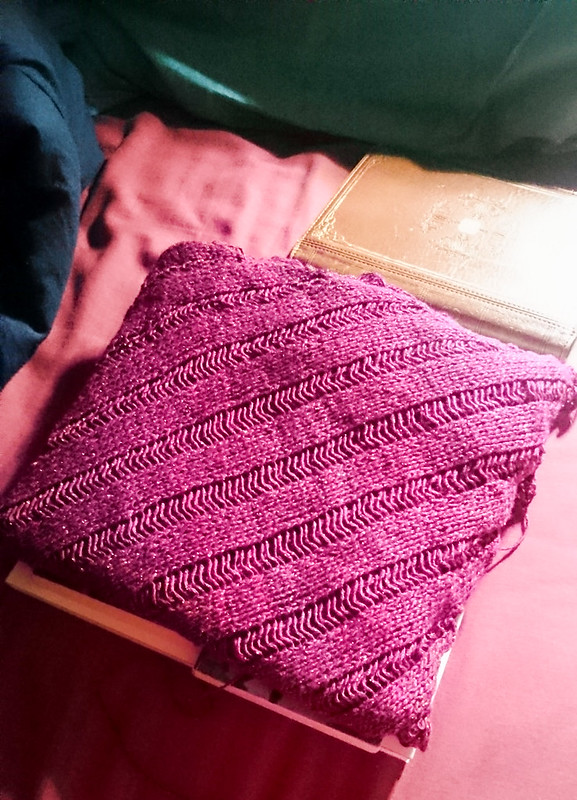
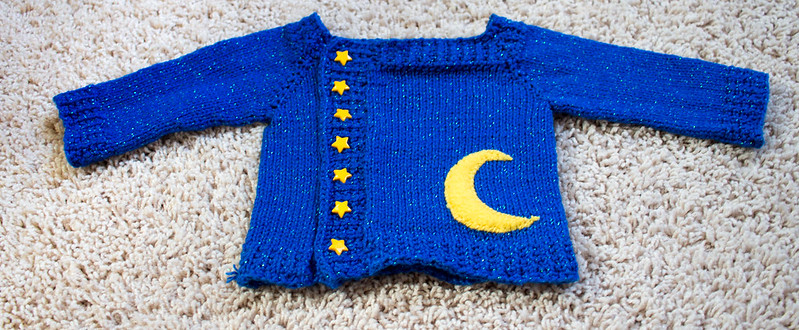
And one final photo:
Pretty Purple Baby Cardigan

As you can see, I actually didn’t use the most basic pattern. I added in lace details in the sections marked with ** above.

In the two one-row sections (rows 18, 44), this was

repeat: (k2 tog, y0)

And in the larger section, I used the following pattern, with appropriate padding to make it line up nicely (i.e. a few extra k stitches at beginning/end).

28: repeat (k1, yo, sl1 k1 psso, k3, k2tog, yo)
30: repeat (k2, yo, sl1 k1 psso, k1, k2tog, yo, k1)
32: repeat (k3, yo, sl1, k2tog, psso, yo k2)

(purl on the odd rows as per rest of pattern).

To be honest, I wasn’t sure if the lace details were necessary on this particular self-striping yarn, but they do look cute enough.

Wrap-up

This one actually lasted for a couple of wearings, helped along no doubt by the fact that I chose colours that matched better with baby V’s existing wardrobe. (A lesson learned about trying for subversively non-pink clothes in the past… alas!) I even managed to see her wearing it when I was in town after PyCon!

I used one ball of felici because that’s what I had (I’d bought it when she was much tinier!) but I probably could have used a little bit more so it wouldn’t be so short. Even with the fluffier, larger lace edging, it was still a bit short. Not so bad since it wound up being a spring sweater, but not ideal!

Sheep Hat

Another baby gift! This one I made just because I thought the pattern was adorable:

Sheep Hat

My picture isn’t great, but…
1. Little sheep feet in the grass!
2. Adorable sheepy texture!
3. 3-D sheep head!
4. Perky sheep ears!

And my favourite:
5. Puffy little tail!

Sheep Hat

Pattern

This one came from a book called 60 Quick Baby Knits put out to show the glory of Cascade Yarns 220 Superwash. Alas, I didn’t have any on hand, so I used Caron Simply Soft. I don’t really recommend acrylic for this project since it made the stranded colourwork for the feet a bit harder to do. However, I like the yarn for amigurumi (it’s cheap, soft, washable, comes in many colours, and can withstand babies), so that’s why I have it on hand.

60 Quick Baby Knits: Blankets, Booties,…
60 Quick Baby Knits: Blankets, Booties, Sweaters & More in Cascade…
by Sixth&Spring Books

Ravelry Pattern Link:
Sheep Hat by Renee Lorion

“Best” baby sock?

"best" baby socks

This is a baby gift that got photographed and then I forgot to blog about it once the gift was received.

Unfortunately, I’ve also forgotten the pattern!

I think it was called “best baby sock” and touted how it was the one that would stay on the most determined of babies. I don’t suppose that rings a bell?

To be honest, I think those little ankles might be a bit squished in these. I had fun making them, but I don’t know if they ever got worn!

Most amusingly, searching for “best baby sock” on Ravelry somehow turned up a pineapple lace bikini. What?

Pi Baby Sweater

My first degree is in mathematics, so MathSoc wound up being the focus of my university social life and an important sanity outlet valve for the duration of my undergrad. A couple of the lovely friends I met through Mathsoc announced they were expecting a child, and I knew immediately what I wanted to send to the shower. I mean, these are the friends who mounted their framed diplomas at right angles to each other due to mis-adjusted frames and laughed when we made mathy jokes about it looking perfectly normal.

Since math nerd baby clothes aren’t exactly the sort of thing one picks up at toys-r-us, I spent a lot of time at PyCon knitting up a gift. After not too long, the theme of I was making started to get obvious to the people around me…

Pi baby sweater (half complete front)

I found the idea of knitting a pi sweater at pycon pretty funny. Alas, since PyCon was later this year, it was not also pi day!

Here’s the sweater front and the back design viewed together before it was finished in case your imagination hasn’t already done the rest:

Pi Baby Sweater (front and back viewed together)

The pattern for the sweater comes from a book called Style Your Own Kids’ Knits by Kate Buller, which gives you basic sweater patterns in a variety of sizes with a huge number of options. I used her font for the numbers on the bottom and my own hand-drawn pi symbol for the chest motif.

Style Your Own Kids' Knits: Simply…
Style Your Own Kids’ Knits: Simply Choose a Pattern and Select a…
by Kate Buller

I also made up a simple ribbing variation for the hem and cuffs that went something like this:

1-3: k stockinette with purl facing RS
4-6: 2×2 rib (k2, p2 on RS; p2, k2 on WS)
1-3: k stockinette with purl facing RS

I’m not going to write out all of the sweater instructions in here since I imagine the author would rather you buy her book if you want more details about sleeve variations and edgings and whatnot, but I do want to provide my charts for the front and back in case any other math nerds need a baby sweater!

Back chart:
Pi Baby Sweater: back chart

And unblocked back piece:
Pi Baby Sweater

Front chart:
Pi Baby Sweater: front chart

And unblocked front piece:
Pi Baby Sweater: front, unblocked

Note that it’s all rumply because it hasn’t been blocked. While the mercerized cotton I chose was lovely to knit with and had great bright colours, it does look a bit lumpy in part due to my lack of experience with stranded knitting and in part due to the lack of blocking to set the stitches straighter.

I don’t have post-blocking pictures because I actually didn’t do the blocking, because I ran out of time before my flight home and I left the sweater in Ottawa with my sister so that she could bring it to the baby shower. She (apparently with some instructional help from my grandmother) did the blocking and sewed the buttons on, and was kind enough to send me a picture of the mom-to-be holding the finished sweater:

M-with-babysweater

I amused myself greatly with this project, and I hope it’ll amuse my math friends and their new baby.

Obligatory Circular Ravelry link

Link to My Pi Baby Sweater pattern on Ravelry, in case you want to queue it up there. (Of course, it just links back here…).