Building the best bacon cookies (Recipe: Spiced Bacon Chocolate Chip Cookies with a hint of Sriracha)

I’ve had a few different types of bacon chocolate chip cookies now, because I have the type of life where that’s a viable dietary choice and plenty of friends who are willing to try something new. But I’ve got to say that I’ve got mixed feelings about them.

Chopped bacon on cutting board.  I actually cut all these pieces smaller before putting them in the cookies.  I figured they'd be best if the bacon chunks were similar in size to the chocolate chips.

Chopped bacon on cutting board. I actually cut all these pieces smaller before putting them in the cookies. I figured they’d be best if the bacon chunks were similar in size to the chocolate chips.

Some bacon chocolate chip cookies are pretty much “I put bacon in this existing recipe” which is fun but not always a true melding of flavour. Some are even “I put bacon on top of this chocolate chip cookie and glued it there with maple goo” which is more the voodoo donut approach to sweet and bacon.

Those are fun, don’t get me wrong. But this is the type of cookie where people go “hey, sure, let me try one of those” and then they do and they go “that was neat” and then they move on to more traditional cookies.

What I wanted was more melding of flavour, which is hard since chocolate and bacon don’t dissolve into each other, flavour wise. So I decided to try merging my favourite spiced cookie recipe with some bacon chocolate chip cookie recipes, in hopes that a bit of spice would bridge the gap.

Spiced bacon chocolate chip cookie dough

Spiced bacon chocolate chip cookie dough

The resulting cookies taste sort of like a candied bacon with spiced chocolate, which is what I was aiming for. Hurrah!

I took these to a cookie exchange party on the weekend and am pleased to report that more than one person tried these, said “hey, that was neat” and then ate a second one immediately. This is a particularly high compliment given the number of truly excellent cookies on offer at the party! So I’m declaring them a success and publishing the recipe.

Are these actually the best bacon cookies? The title is a tongue-in-cheek nod to academic speak for “we don’t want to over-state our claims but we’ve made some real improvements in this area.” So they’re probably not the best cookies yet, but I think I feel comfortable saying that I’m on a viable path in the search for the best!

Spiced bacon chocolate chip cookies ready to be baked

Spiced bacon chocolate chip cookies ready to be baked

Spiced Bacon Chocolate Chip Cookies (with a hint of Sriracha)

Note that I’m calling these “spiced” but not “spicy” — you can easily tweak the spice level, but the current version of the recipe doesn’t rate on my spice scale. The dominant tastes are chocolate, bacon and cinnamon.

1 stick butter
1/2 c brown sugar
1/2 c white sugar
~3 tbsp bacon grease
1/4 c milk
1 egg
1/2 tsp sriracha (in place of vanilla; if you want less spicy you could revert)
2 tsp baking soda
1 tsp cinnamon
2 C flour
1 1/4 C chocolate chips
1/2 C thick bacon cut into 1/4 inch pieces (make them similar in size to the chocolate chips)

Cook the bacon until the edges are just crispy, but the bacon is still chewy enough to work in a cookie. Set aside to cool. I don’t really recommend shelf-stable bacon bits for this because they tend to be too salty and crispy, and thicker bacon is better. Don’t waste money on getting the nicest bacon ever, though; you probably won’t be able to tell once it’s covered in cookie dough.

Cream together butter, sugar and bacon grease. (We just poured warm grease directly from the pan after eating some of the bacon with breakfast, so 3 tbsp is an estimation.) Don’t worry if there’s lumps in your brown sugar, no one minds. Add milk, egg and sriracha and mix further.

Mix in the soda and cinnamon, then stir in the flour slowly and stop when just mixed. Add chocolate chips and bacon, stir. You can tweak the amount of chips and bacon to suit your tastes, but remember that the bacon may be a stronger flavour than the chocolate.

Set the whole thing aside in the fridge to cool for a few hours.

When ready to cook, heat oven to 350F and make small (~ 1 inch) balls. Bake for around 14 minutes. (possibly less if you didn’t bother to chill the dough)

Makes around 48 small cookies.

Spiced bacon chocolate chip cookies, fresh from the oven!

Spiced bacon chocolate chip cookies, fresh from the oven!

Notes

You can totally make big cookies with this recipe if you want, but I don’t recommend it for two reasons:

  1. The chilled dough is really solid (all that cold bacon grease?), so small balls easier to make.
  2. This is the sort of cookie people will be curious about but not want to commit to, so smaller cookies let them get a taste and decide if they actually want more.

There’s three things that I think really make the meld of flavours work better, so if you’re tweaking the recipe, approach these with care:

  1. The substitution of bacon grease for butter/lard/shortening. It works!
  2. The cinnamon. I think you need this to make the flavour meld work. It might not be the only spice that could do this.
  3. The sriracha instead of vanilla. Seriously, it makes the dough quite a bit different than the original recipe, in a good way.

If I were doing this again, I would increase the sriracha to at least double, probably more. It seems overwhelming when you add it to the batter, but by the time the flour is mixed and the cookies are baked, it’s not as detectable as it could be.

The original spicy cookie recipe this was based on included cayenne pepper to make a mexican hot chocolate style cookie. I removed it because I think sriracha goes better with bacon and my taste tester dislikes cayenne, but if you’re into a bit more chemical heat, that’s a good option to experiment with.

I declare these a success, but there’s not much call for bacon cookies in daily life, though, so it might be a while before I try this again!

Single Spiced Bacon Chocolate Chip Cookie, waiting to be baked

Single Spiced Bacon Chocolate Chip Cookie, waiting to be baked

Candy Cane Cupcakes (to tempt those with new year’s resolutions)

Ah, January, the month where one can buy a big box of candy canes in the grocery store for 44 cents. It’s also the month where everyone’s made new years resolutions and don’t want cupcakes. I’m guessing some of my coworkers aren’t going to be impressed with me tomorrow when I bring these in…

Candy Cane Cupcakes

Instructions

My plan for this was “make chocolate cupcakes, dip in candy canes, take to work” but here’s a more descriptive version in case you don’t, say, have a favourite chocolate cupcake recipe.

1. Make chocolate cupcakes

Candy Cane Cupcakes

I use the following “wacky cake” recipe:

Dry ingredients:
1.5 C flour
1 C sugar
3 tbsp cocoa
1 tsp baking powder
0.5 tsp baking soda

Wet ingredients:
1 tsp vanilla
1 tbsp vinegar
1/3 C oil
1 C warm water

Preheat oven to 350F
Mix the dry ingredients (and get rid of any lumps in the cocoa).
Add wet ingredients and stir well.
Spoon into baking cups. (around 1/2 to 2/3 full)
For mini cupcakes, cook 10 min. For normal sized ones, cook around 18 mins, or until a toothpick inserted can be removed cleanly.

Note that I actually make mini and normal sized cupcakes in the same batch. In this case, just pull the tray out of the oven after 10 minutes and grab the little ones off (the silicon liners make it possible for me to do this bare handed, but your mileage may vary), then put the rest back in once you’re done. This may make the tops of the big ones look a bit less than perfect (as you can see in the back of the picture above), but it doesn’t matter since you’ll be covering them anyhow.

Candy Cane Cupcakes

Make vanilla icing

I don’t use a recipe for this exactly, but…

Spoonful of butter
Splash of vanilla
Then add alternating icing sugar and milk until you have enough icing. You don’t actually want that much for this, as the extra candy on the side will make them pretty sweet.

My cake is actually vegan, so if you wanted to replace this with some sort of vegan icing, you could change this up. I suspect a water-icing sugar glaze would be enough to keep the candy canes on if you were so inclined.

Crush up some candy canes

We used wax paper and a rubber mallet for this. (When I lived in Canada, I’d use a small milk bag instead of wax paper, ’cause those things are stronger, but alas, this part of America does not have milk that comes in bags.)

Candy Cane Cupcakes

John helped with the unwrapping and crushing duties!

Put the icing on the cupcakes then roll the rim of the iced cupcake in the crushed candy canes

You could, of course, dip them and cover them entirely, but they’re already pretty sweet and crunchy so I figured less is more here.

Candy Cane CupcakesCandy Cane CupcakesCandy Cane Cupcakes

Garnish with tiny chunks of fudge

I had some leftover fudge so we used that as a final garnish for maximal abuse of new year’s resolutions.

Candy Cane Cupcakes

And finally…

Enjoy!

Here’s a few extra photos I took in aid of this week’s AAW assignment, which is to use foreground/background to tell a story about two (or more) items, one in focus and one blurred. I thought the rubber mallet we used for crushing candy canes was kind of a funny contrast with the finished cupcakes.

Candy Cane Cupcakes

Candy Cane Cupcakes

Brownie in a Mug (or Chocolate Lava Cake in a Mug)

My sister introduced me to this brownie in a mug recipe because she is the bestest sister ever. I tried it out today and it’s everything I imagined, even if I did it “wrong.”

Here’s some pictures:

Almost everything you need for brownie in a mug

Almost everything you need for brownie in a mug

That’s everything you need for brownie in the mug, well, almost:

1/4 cup flour
1/4 cup sugar
2 Tbsp cocoa
Pinch of salt (not pictured ’cause I usually don’t bother with it)
Pinch of cinnamon (original calls for a tiny pinch but I was a lot more generous.)
1/4 cup water
2 Tbsp oil (not strong flavoured, according to the original recipe)
1 to 2 drops vanilla extract

Basically, put it in the mug and mix, then stick the whole thing in the microwave.

I mixed the dry up first, since my sugar is pretty lumpy at the moment (apparently no one ever told my boyfriend that one must actually keep the sugar container sealed…).

Mixing the dry ingredients

Mixing the dry ingredients

Then added the wet. If you’re like me and use a pipette to handle “1 or 2 drops” lest there be a vanilla disaster (yummy but expensive), you can rinse it out using the water that’s going into the cupcakes anyhow.

Rising out the pipette

Rising out the pipette

And mix. Bubble bubble, toil and trouble, eh?

Bubbling uncooked mug o' brownie

Bubbling uncooked mug o’ brownie

Since there’s no egg in this recipe, you can lick the spoon (well, fork in my case). This is a good way to test if the pinch of cinnamon was really enough. In my case, it was, but I’m thinking next time it’ll be cinnamon and cayenne for a mexican mug o’ brownie. Can take the gal out of New Mexico, but you can’t take the New Mexico out of the gal, eh?

So from there, you stick it in the microwave and cook it. The original recipe says 1 min 40 sec worked for them. I decided to try 40s to start (since my new microwave is huge) and got this:

Partially cooked brownie in a mug

Partially cooked brownie in a mug

Now if I was sensible, I’d have put it back in and finished “baking” my brownie in the mug. But instead, I thought, “hey, there’s no egg, and that looks like it’d be delicious…”

And thus was born “chocolate lava cake in a mug”

Chocolate lava cake in a mug

Chocolate lava cake in a mug

Warning: even at 40s cook time, this was crazy hot. So hot that I wrote most of this post waiting for it to cool.

Now, while this brownie/lava cake was everything I wanted right now, I’m apparently not capable of making anything without contemplating ways to make it different, so here’s a list…

Other things I’d like to try:

There’s no reason you have to stick with vanilla extract. I’m going to try a few others since I have them: mint, cherry, banana, maybe root beer since it’s one of the many extracts we have in the house.

As I said, I think this would be really excellent with a bit of cayenne to make a Mexican-style chocolate. I’ll bet it’d be nice with a bit of ground ginger, too.

Chopped peanuts (or other nuts) would probably be amazing on top. Why not make a whole sundae out of it? The original recipe recommends ice cream, even if I didn’t have any on hand, having just moved. I bet sprinkles would be fun if you’re doing it with kids, just don’t add them ’till after the brownie is cooked.

Chocolate chips might work in the mix. I’m worried it might be overkill, but there are days where overkill chocolate brownie sounds like exactly what I need.

Finally, my sister had warned me, and she’s right: this makes about twice as much brownie as I actually want. So next time, I’ll also be cutting the recipe in half. For reference, here’s what my next attempt will look like:

Small brownie in a mug

2 Tbsp flour
2 Tbsp sugar
1 Tbsp cocoa
Pinch of salt
Pinch of spice (cinnamon, cinnamon+cayenne, ginger, etc. Optional.)
2 Tbsp water
1 Tbsp oil (canola or veggie oil, not olive)
1 to 2 drops extract (vanilla, cherry, whatever)

Cook time will decrease accordingly.

Lemon Googe Cupcakes (or Lubricated Lemon Cupakes, if you prefer, but you probably don’t)

I helpfully told my friend Adric that these cupcakes were my way of doing human testing without requiring IRB approval. Remember kiddies, experimental cupcakes are only one step away from mad science because my guinea pigs generally consent to the experiment!

Lemon Googe Cupcake (without icing)

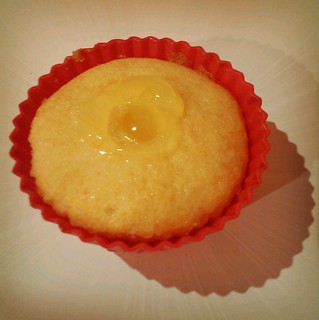
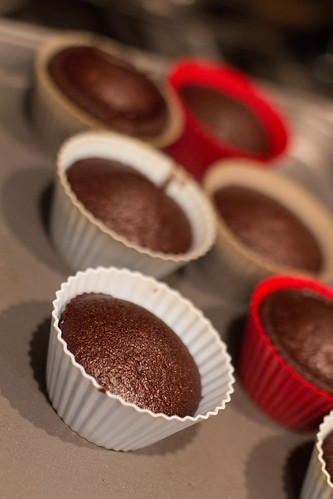
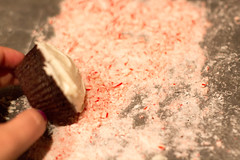
Figure 1: Lemon Googe Cupcake without icing. Note the “clever” use of bad filter in attempt to disguise poor quality cell phone photo, as per cultural norms in a post-instagram world

Lemon Googe Cupcakes

These come in three parts; some assembly required. I made up the recipe as a whole based on my recollection and modification of recipes in my head / recipe card box, with some inspiration from the filled cupcakes in Vegan Cupcakes Take Over the World (although this is not a vegan recipe).

Lemon Cupcake

1/4 C (4 tbsp) butter
3/4 C sugar (1/2C is probably ok for this recipe if you want to cut back)
1 egg
1 tsp vanilla
Zest from one lemon
1/2 C milk

1 tsp baking powder
1 C flour

Cream butter and sugar together; add egg, vanilla, lemon zest and milk and stir well.
Add baking powder and flour and stir until smooth (but no longer).
Spoon into cupcake liners (or I use silicone molds), filling about halfway.
We made 16 cupcakes, you might want to fill a bit higher to get 12.

Bake at 350F for 20-25 minutes (10-15 min for mini cupcakes)

Lemon Googe Filling

The name comes via my Ottawa friends: for some reason we decided that “googe” best described the texture of those little gel cup sweets that are considered to be a choking hazard in the US. This nomenclature would probably have died out, but one of my friends was severely grossed out by the word, so we have used it to describe anything of a given gooey texture ever since.

You’ll note that this is more or less a lemon pie filling recipe, omitting the egg, or a slightly gooey lemon pudding.

1/4 C cornstarch
1/2 C cold water

1 C hot water (Or less if you want thicker googe)
Juice from one lemon
3/4 C icing sugar (or adjust this to taste)

~3 drops of yellow food colouring

Mix together cornstarch and cold water, then add mixture to hot water along with lemon juice and sugar and stir well. Heat in microwave repeatedly (around 30-45s per time), stirring after each heating, until mixture is thick and no taste of cornstarch remains. You can probably nuke it longer between stirrings, but if it boils once it’s thicker it might splatter all over your microwave, so keep an eye on it. Add food colouring, because normal lemon pie filling gets its colour from egg yolk and you want people to immediately think “lemon” and not “what the heck?” as they might have if you had allowed your lovely assistant to use the blue colouring like he wanted.

If you are making mini cupcakes or just don’t plan to lose as much to taste-testing for the sugar, you can probably halve the googe recipe. Or you can allow people to dip the cupcakes in the remaining googe like some sort of weird fondue; I don’t judge.

You can add sugar after the fact if you think it needs more — it’ll dissolve, and no one minds getting a blob of icing sugar. You can’t do this with the cornstarch, though.

Lemon googe, prior to colouring

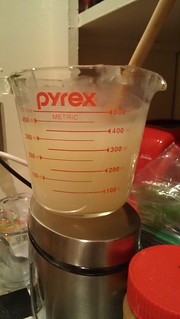
Figure 2: A metric ton of lemon googe, prior to colouring. (Well, ok, it’s 400ml rounded up.) This may be an excessive amount of googe for a single batch of cupakes; see experimental notes below.

Cream Cheese Icing

4 oz regular cream cheese (half a package usually. Don’t use the spreadable stuff.)
1/4 C butter
1 tsp vanilla
Around 2 C icing sugar (or however much it takes until the consistency is correct)

I suspect you’re supposed to plan ahead for this and soften the butter and cream cheese in advance, but what I do is nuke those suckers together ’till they’re practically liquid and easy to stir (around 1 min), then add vanilla and sugar ’till it’s a slightly goopy icing consistency, and let it firm up as it cools. This strategy actually does make it easier to deal with the final icing in this case, since it’s easier to spread when a bit more liquid-y, but your mileage may vary.

You could probably put some lemon in here too, but at this point that seems like overkill.

Assembly instructions

Get an icing bag with a metal or plastic tip (sorry, this is one time that cutting the corner off a plastic bag probably isn’t enough). We’ll be using this to fill the cupcakes with lemon googe.

I chose a slightly too big tip, so my googe was spilling everywhere, and the lazy “I’m not sticking my hand in there to get a new tip because our kitchen sink broke this morning” solution was:

1. Stab the icing tip into the cupcake.
2. Spoon a tablespoon or so of googe into the bag.
3. Squeeze the googe into the cupcake, trying not to go right through to the bottom
Repeat, doing 1 more quickly subsequent times because you are dripping sticky slime all over the counter.

Yeay!

I had my lovely assistant do this part so it wasn’t bad for me at all, but you might want to save yourself the trouble and not use the largest icing tip you have on hand.

Lubricated lemon cupcakes

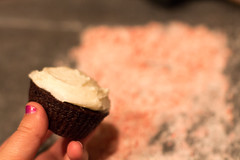
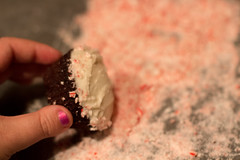
Figure 3: Lubricated lemon cupcakes. I’m pretty sure this monkier is not going to impress the friend who hates the word googe, but it’s more alliterative so it can be the alternate recipe name. Note the tools in the background include googe, an icing bag, and a place to put the icing bag so it doesn’t googe all over the counter.

You now have a cupcake with a gooey hole in it. I will refrain from juvenile jokes, but this may be the point where you’ll be really glad you used the food colouring so your lovely assistant will not think of juvenile jokes.

Cover your googe-filled cupcakes with cream cheese icing. This will be challenging because you’re basically holding a lubricated cupcake and the icing will slide off the hole in the center. Having experimented with this, I can tell you that it is easiest to ice the outside and then cover the googe last. It’s also fun to slime the top of the cupcake and layer the icing on that, which will add extra lemony goodness but is also really messy.

Untitled

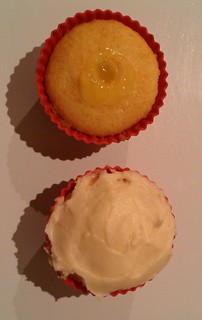
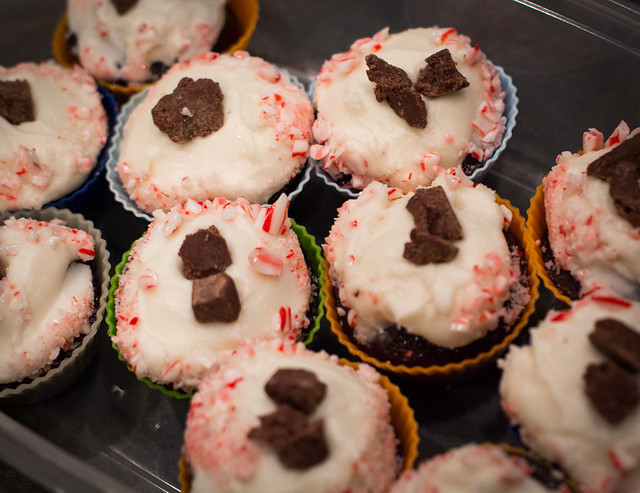
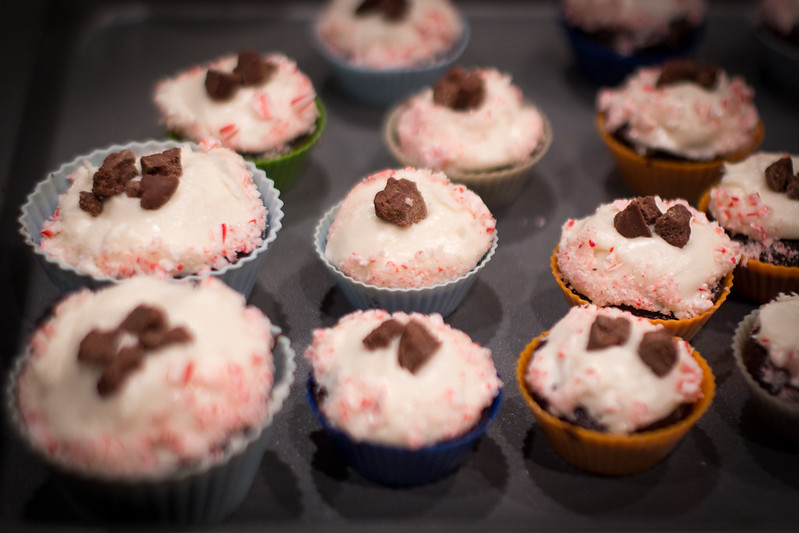
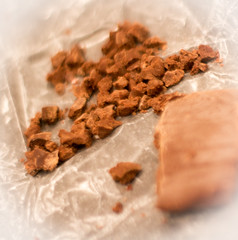
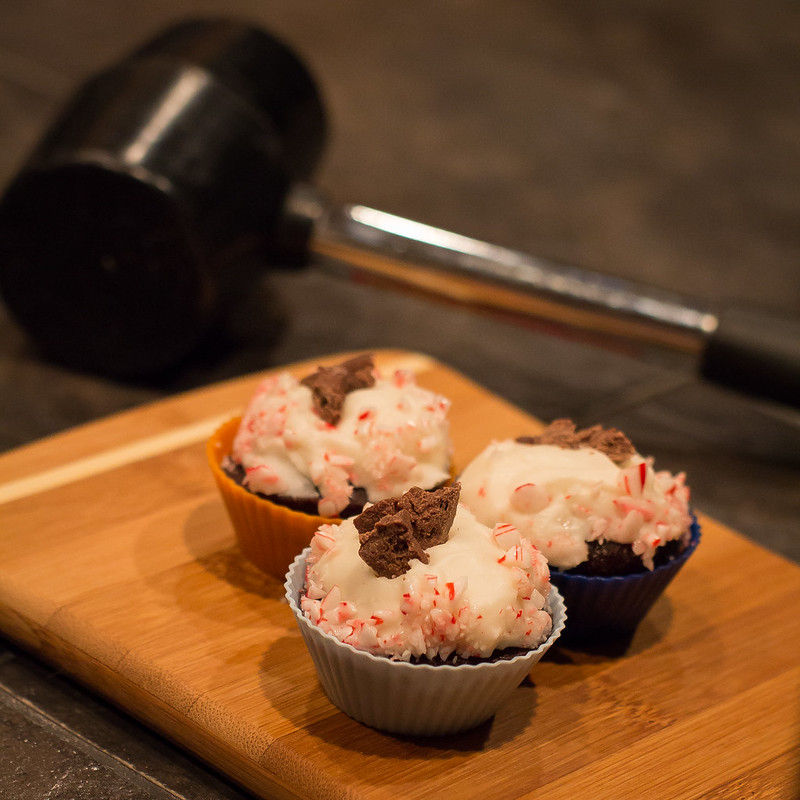
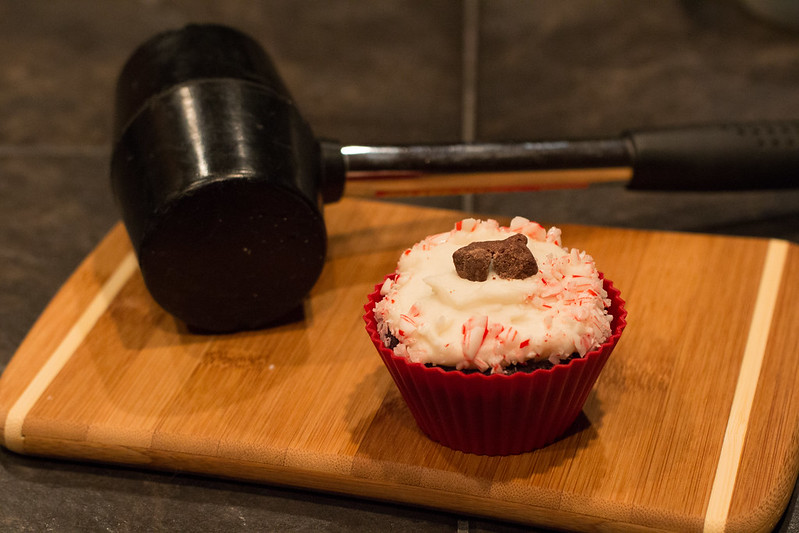
Figure 4: Lemon googe cupcakes, partially and fully prepared

The Lemon Googe Cupcake Experiments

Hypothesis: lemon googe, if inserted into the cupcake 24h+ in advance, will suffuse the cupcake making it more delicious.

Method:
16 cupcakes were created in the initial batch.
2 were assembled and eaten immediately and declared delicious by both experimental subjects J and T.

The remaining cupcakes have been divided into two groups. Group one has been filled with googe and iced and placed in the fridge to age for 24h. After the time has elapsed, two prepared cupcakes will be removed from refrigeration and eaten by experimental subjects J and T. If they are deemed an improvement over the freshly assembled cupcakes, the rest of the batch will be prepared in a similar manner. After 48h have passed, experimental subjects will be able to compare 0-day cupcakes, 24h cupcakes, and 48h cupcakes. If the prepared cupcakes are deemed unsuitable at 24h (likely due to structural integrity failures), then the control batch will be left untouched until shortly before the 2600 meeting which will represent our larger clinical cupcake trial. This will not be a double-blinded experiment, although one could be conducted at a later date to more comprehensively test cupcake saturation over time.

Hypothesis 2: 400ml is way to much googe

Method: 400ml of googe solution has been prepared and will be inserted into cupcakes as described above. If the cupcakes cannot hold this amount of googe, the remainder will be given to the experimental subjects for consumption or further experimentation. We will report back on crowdsourced solutions for too much googe after the clinical trials are complete.

Cupcake Clinical Trial

If you wish to participate in this clinical cupcake trial, please attend the 2600 meeting at Quelab on Friday April 5, 2013. Please note that I have not obtained ethics approval for this experiment and you will be participating at your own risk.