For some reason, eink screens work significantly better for me when I have even the mildest of headaches, so my ereader has been an important accessibility device for me since it now means I can read something while I’m waiting for my painkillers to kick in. I currently use a Kobo Clara BW and aside from some weird hiccups that were likely related to my dying hard drive rather than the device, it’s been pretty good. But occasionally, both the fanfic I download from AO3 and the more modern novels I read on the device have emoji characters, and those weren’t displaying. In a lot of cases, they don’t show any indication that they were there.
I was reminded of this today while chatting with some fanfic people and decided it was time to try to fix it.
Kobo has a nice tutorial for this and it’s pretty straightforwards BUT it turns out that the default emoji font on my laptop (running fedora) is the Google Noto Color Emoji font which doesn’t work on my device. Won’t even show up as a font after I put it on the device.
Step 2: Find the right emoji font that actually works.
In theory, my Kobo has an option to add in “supplemental fonts” so it’ll try those if the main font doesn’t have the necessary characters. But that didn’t work at all, possibly because the font thinks it has the character and is displaying a blank in the epub file I tested? I really don’t know why except that it didn’t work.
Setting the emoji font as the main font for the document does work, though, and the emoji displays just fine. It’s… not a great font, though. Lots of giant spaces between words.
Step 4: ???
The internet has a bunch of random speculation like “epubs only support 1 font” (which seems unlikely but not actually impossible) so it might be best to merge the emoji into a font I actually like for reading.
It’s also possible that I could set up some automatic styling of my epubs in calibre that would make the fonts work better. Some people seemed to have ideas about that but a lot of it included styling each emoji and while I’m sure I can write a perl script for it I’m not convinced that’s the best choice. And, again, it requires me to know that there’s emoji in an epub before I transfer it to my device, which I don’t always know when I buy a book or grab a fanfic. I guess I could build a whole workflow to look for them, but it seems unlikely that’s what everyone else is doing? Surely I am not the only person who reads reasonably modern epubs with chat sections in them?
For now, I have the font on my device and can flip over to it to see if I can see an emoji if I think one is missing, then flip back when reading with weird spacing irritates me. Not the worst, since often I can tell when the narrative has a chat/texting section that might include emoji. But that doesn’t really help when it’s not obvious from context.
So… Not sure what my next step it, but that’s where I’m at and I’m going to give up and make some lunch. If anyone has found a good fix for this, I’d love to know!
Kobo Clara BW showing the fanfic Unknown Number by ZeldaElmo. At the bottom of the authors note there is an emoji character displaying correctly. The rest of the text on the preface page looks weirdly spaced.
I had this idea to do some socks tracking how much time I was spending staring at my phone. A lot of knitters track things like temperatures, but that’s never really interested me, so I set about thinking about data that I’d like to track and could do with relatively minimal effort. (Some people may be good at tracking; I am not naturally inclined to it.) My phone provides me a screen time breakdown, so I thought that would be a good candidate and started taking a look at it to see what colours I’d want to use and what increments of time should represent one row and so on.
But what I discovered, when I started looking, was that I regularly had my phone screen on for more than 5 hours a day. That seemed like… a lot. I felt a lot the way I’d felt about TV in my 20s: it wasn’t the worst thing ever, but I could use the time for things I’d enjoy more. (Also for getting a PhD, but that’s probably not completely related to my dislike of TV.)
So instead of setting up my knitting project (which I still haven’t done but probably will eventually), I set about figuring out how to reduce how much time I spent looking at my phone.
Looking at my data
Once I started looking at my data, I realized there *were* some extenuating circumstances: I’d often spend an hour with my phone open to a knitting pattern but it’s not like I was actually looking at it the whole time. Sometimes I’d accidentally leave my tea timer on screen for an hour while my tea oversteeped (a tragedy for me as it gets too tannin-y). Sometimes the screen time was due to having GPS navigation on, which, again, didn’t feel like it should count. But some days I really was just looking at my phone that often.
One of the things that helped the most was having a big widget on the screen of my phone telling me how much time I’d already spent using the device (I put it beside my weather widget where I’d tend to look). I paired this with stickers in my journal every time I went below my target amount of time, so then I found myself correcting if I felt like I’d used too much time for the day already.
Another thing that helped was just setting the screen auto-shutoff to be more aggressive (30s vs a minute, making it so apps couldn’t keep the screen on) so I wasn’t having it on by accident. That helped me figure out where I was really spending my time, and did reduce my numbers just by itself (and improved my battery usage considerably!)
Removing low-value time sinks
My phone actually up and died partway through this project, in a way that I couldn’t carry over all my settings and apps. And that turned out to be convenient for this because I had to make conscious decisions about what to install. But also inconvenient because I lost all my screen time data from before this project so it’s very hard to compare!
Things that went:
Most mobile games. A lot of these have kind of dark-pattern things to keep you logging in each day but once I broke the streaks because I had no phone for a week I decided I could just… not do that. I kept a few but I’m finding I play them less because they just don’t feel as rewarding as my Switch games now.
Removed most social media, tuned what was left to have less stuff (mostly turning off boosts for most people in Mastodon, being more aggressive about my filters, unfollowing a few people who weren’t bringing me joy but *were* bringing a lot of posts.)
Threw out most of my RSS feeds. I used to follow a lot more news and craft stuff, but the news was making me miserable and the craft stuff was encouraging me to buy supplies I didn’t need. I kept enough so I could be an informed voter for my riding and read my friends blogs, then culled down the rest.
Most notifications got turned off. Wow, there were a lot of notifications.
Swapped my phone to “flip for silent” and put a pretty case on it so I was more likely to flip it. This doesn’t seem like it should have made a big difference because I already had it in do not disturb frequently, but just taking it out of my pocket and putting it down made just that little bit more friction when I went to “just quick check something” so it wound up helping.
Finding other things to do
The big things I wanted to more of were: play actually good games (instead of crappy mobile dark pattern nonsense) and read books/fanfic. So I started actually carrying around my ereader in my pocket and learned how to stuff it with fanfic so I didn’t have to read a whole darned novel when I just wanted to do something for a few minutes while I was waiting for my tea or whatever, and I fell in love with playing Legend of Zelda: Tears of the Kingdom on my Nintendo Switch so I started carrying that around in my knitting back (too big for my pockets, alas. Though I did also pull out my 3DS which is more pocketable.)
An old e-reader with a white cover that has flowers on it, and an Animal Crossing special edition Nintendo switch with green and blue joycons attached.
It’s kind of goofy to be proud of replacing some of my phone time with looking at different screens, but I am getting a *lot* more enjoyment out of my gaming time, and since I’m not *scrolling* for a tiny screen while holding a device, I can enjoy reading longer stuff while knitting. It’s also been great for connecting with my kid, as we’re currently both playing Zelda games and sharing tips and showing off stuff we’ve done.
The amusing thing about switching to my ereader was that it forced me to spend more time on my actual computer to transfer files, which encouraged me to spend more time doing personal writing. You haven’t seen this on the blog yet because I’ve been writing fiction rather than blog posts, something I hadn’t done in a long time. I’m not finishing a novel anytime soon, but I feel like I’m stretching some mental muscles and having fun. So far I’m mostly writing fanfic which is nice because people actually read it. I’ve also found great delight in writing more comments on fanfic that I enjoyed. It’s probably obvious in hindsight, but when you write to tell an author how much you appreciate them a lot of them write back with really thoughtful responses (I know, I know, who knew writers could write) and after all the AI crap I had to deal with for Google Summer of Code this year it’s felt amazing to talk to humans without some chatbot in between. Honestly, it feels pleasantly minorly transgressive to be writing un-monetizable fanfic by hand given the state of capitalism and art right now.
I haven’t really been into fanfic since the last time I was seriously burned out after finishing my PhD thesis and moving to the US and developing both migraines and a problem requiring surgery. (It was a rough two years as much as it was a great two years.) So I’m reading fanfic again and, no surprise, I’m hideously burned out now because of *gestures at everything*. I’m in a completely different fandom than I was last time and doing different stuff (last time I was an artist!) but it’s still helping me cope with the burnout as well as changing what my screen time looks like.
Beyond the “let’s just use different screens” strategy, I’ve been reading more books and starting to do some drawing and I continue to knit although I don’t think I’ve done particularly *more* of that since I already knit a lot. I did a decent stint where I was spinnning until March but I’m taking a break on that right now. Now that the weather is nicer, maybe I’ll get some biking time in too.
So how did it work?
Well, it’s May 2025 and I started putting stickers on my calendar in January 2025. I’ve gone from “regularly looking at my phone for 5+ hours per day” to “only exceeding 3 hours a couple of times per month, often with extenuating circumstances like being sick.”
I probably could have gone lower than my new normal of around 2.5 hours on average, but I found when tracked it that all the days I went over 2hrs it included stuff that brought actual connection: chatting with friends or editing and sharing pictures or writing about books. So I’m not inclined to go any lower than that, although I *did* move some writing stuff to my computer so it doesn’t show up on the phone time tracking when i realized how long it took me to write some things on my phone.
The greatest result has been more connection time with my kid: not because we’re gaming together (we already did that) but because I now am playing the single player games he likes as well. This started before I started really focusing on phone time, back when I bought Echoes of Wisdom for us in the fall, but I’ve been happy to find that the single player gaming doesn’t have to be a “selfish” use of my time since we share some similar tastes in games. It hasn’t really increased our offline time much because the phone screen time was happening when we were both exhausted, but now when I sit and he wants to watch videos after school while he eats his snack and rests for a bit, I’m getting gaming or reading time in instead of scrolling while I wait for him to finish. It’s not perfect — I’m more grumpy about being interrupted during some games than I would have been in boredom mode on my phone — but I think it’s better overall.
What’s next?
I feel like I’ve made the habit change I wanted and I’m going to stop putting stickers in my planner almost every day (though they’re weirdly motivating, so I’ll likely keep them for some new habit tracking). I’ll keep the screen time reminders and other phone setting changes I made. I’m not intending to be quite so aggressive about cutting myself off after 2h, but I *have* bought a new game and new books now that I have time for them, and I’ve got a bunch of writing in progress so I feel like I’m at the point where the change will stick.
I might finally get around to knitting the screen time socks that I had planned, now that I feel better about what the data will show about me!
Overall, I learned some about my habits and made a good change. Go me!
I thought gift yarn would be an easy one, but I’ve hardly used any! When I started this goal I wrote down 5 skeins/sets in hopes of inspiring myself to make plans, but so far I’ve only used half of 1 of those, and the other skein I’ve got on the go wasn’t even on the list.
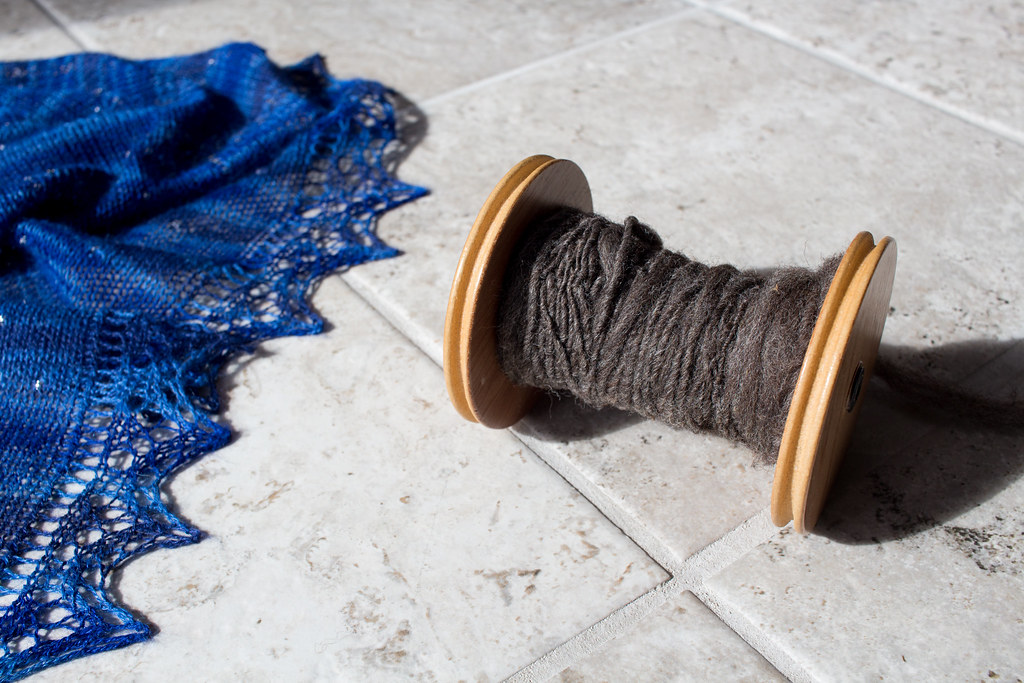
First up, my weaving in progress uses 1 skein gifted to me from my friend M in a canadian national park inspired colourway (it’s the lighter weft; the other two balls of blue are from a shopping trip with M but don’t count as gift yarn):
Caption: A woven shawl in progress on a rigid heddle loom. It’s being woven in two colours of yarn, one variegated blue and one variegated grey, and I’m experimenting with clasped wft which allows stripes to go parway across the weave.
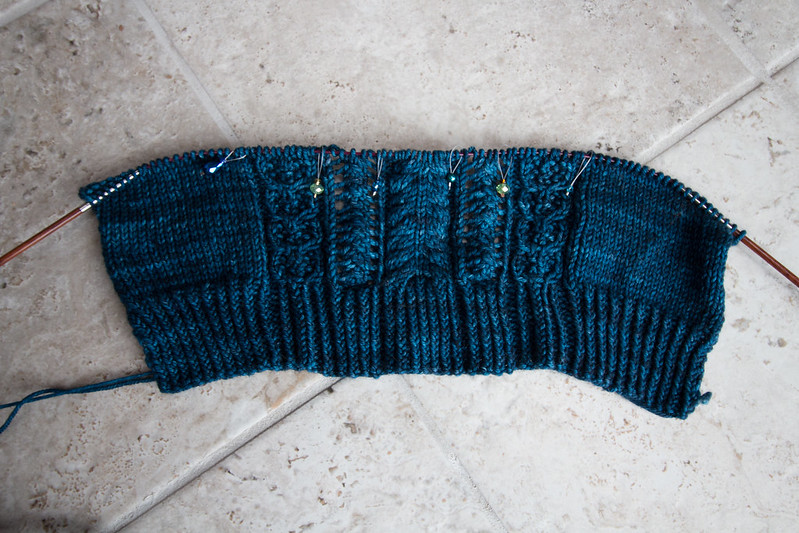
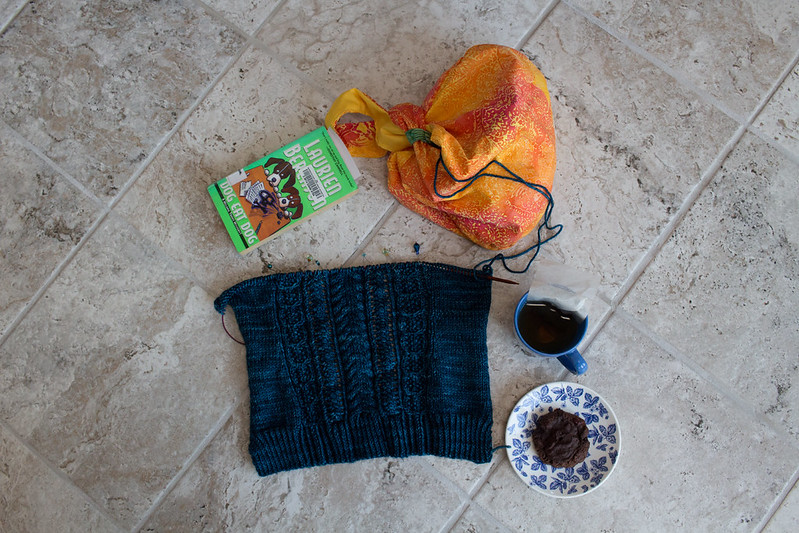
And here’s what I’m working on now. The shawl is from gifted yarn, a pretty “lighthouse” sock gradient from Blue Brick:
Caption: A shawl in progress in a blue-teal-yellow gradient, a pair of recently finished knit socks in a dark variegated with a blue/yellow varigated toe, and a black pottery coffee mug with a skull on it.
Not a *yarn* gift, but I found a fountain pen that was a gift in a drawer and finally got around to buying ink for it, and I’m hooked. More on that later.
Lesser used crafts
Lesser used crafts has been a pretty big success. I’ve rotated through the following things:
January: Spinning (largely spindle spinning)
February: Tatting
March: Mending
April: Weaving
May: Origami
June: Pants (related to my next goal)
July was supposed to be embroidery month, but we’ve been traveling and I haven’t had much time, but I did have a huge blitz on long draw spinning so I might retroactively declare this long draw month and give embroidery a second shot.
Overall I feel like this goal is working for me: in pulling out different crafts and enjoying them again, and I’ve managed to keep my excess supply buying to a minimum. The time limit helps me keep moving on some projects that might otherwise get shelved. But it also feels like a month is too small for some things. I think I’ll stick to the monthly thing for the rest of the year but I will likely change it up if I want to keep this going past the end of 2024. The months are nice because they fit into when I look at my planner and stuff, but I’ll probably sometimes do two months of the same craft, or have a periodic “make up month” to go back and finish unfinished objects.
Pants
I made them! They are not great, mostly because it feels like I made a size too big but also because the pattern was designed to be looser than I think I want. But I learned a *lot* and I’m happy I did it! I think my next attempt will be some pj shorts since that’ll take less material. While I *could* iterate on this pattern until it’s perfect I think I’m going to try at least one other one to see if I can find a better starting point.
But I’m probably going to make another linen skirt or two before going back to pants, since that’s what I wear all the time now. I should probably make some in neutral colours for travel when I go with more of a “capsule wardrobe” than I do at home.
Colour Play
I took a dye class at Craft Emporium PDX!
Caption: A set of 4 hand-dyed skeins from my workshop. The first is blue/green, the second orange, the third pink/grey/blue and the final one rainbow.
And I’ve even knit one of the skeins into socks so I feel like I got a better sense of how the colour really worked.
I also had a lot of fun playing with Woolly Wormhead’s new short row stitch dictionary and my own rainbow handspun from last year’s Tour de Fleece.
Caption: A triangular shawl with a rainbow of short-row leaves on it.
I did a bit of colour play in this year’s tour de fleece, splitting up a braid to make a loosely gradient skein. Haven’t knit it up yet but it looks promising in the skein.
Caption: Handspun yarn on a niddy noddy showing a messy gradient from teal to maroon.
Less fibery, but I have been diving in to the world of cool fountain pen inks. I used to use a fountain pen back in high school to limit strain on body when I had tendonitis and couldn’t write very easily, but there’s a world of very pretty inks now and it’s pretty exciting! I guess paper has fiber, right?
Caption: A page of my (intentionally) messy handwriting using a fountain pen. The text is a list of travel gear that I may review in future blog posts.
I feel like I’ve made a good dent in this goal, but there’s still some dyeing experiments I wanted to try and maybe some fading and other knit colour combos I could fit in, so I don’t feel like I’m done yet, per se.
Overall
I’m about where I should be for halfway through the year, but I still have a lot of things I want to do, and I’m going to have to make a stronger effort to use gift yarn in the second half of the year.
“Gnifty” the gnome from “The More You Gnome” (now renamed to “Big Gnose” by my kid)
I still have some stuff queued for him and a bunny kit I haven’t started, but I feel like I’ve met the goal regardless. There will always be more fun things to make!
Hand Dyed, Hand Spun
The lighter lavender and peach colours in the gnome above were dyed by my kid, and I also used one of his minis for the egg. I still haven’t gotten around to using my own handspun so that’s still on my list. Maybe doing Tour de Fleece (starting today!) will help get me in the mood for that?
Complicated Cables
I haven’t even made a dent in this goal, other than finding some yarn for the Lucy Hauge pattern that I bought. I’m going to have to prioritize that shawl for the fall, I think. And I’ve got a half-formed idea to go with a rainbow yarn I got in the spring Gauge Dyeworks club, but I haven’t even swatched that yet so I’m not sure if it’ll fit into the rest of the year.
Right now I’m back to finishing a sweater plus two things I cast on for travel (some Socks on Vacay/Pride socks and a big shawl), plus I’d like to start some socks for my mom’s birthday which should take me to mid August. It’s funny to think that I only have enough time for maybe 3 more shawl-sized projects before the end of the year, but I’m not a fast knitter and I’m planning to do baubles in November then advent/countdown something in December, so that really leaves me Aug/Sept/Oct to do something and each shawl takes me around a month so… not much time left for cables! Maybe I better make sure some of my baubles have cables? Or socks with cables?
Patterns I own
I’m currently working my way through the Golden Poppy Sweater that has been in my queue since it released:
Golden poppy sweater in progress. It features a large “poppy” panel in mosaic knitting (looks a bit more snowflake-y in the white/blue colours), and decreasing stripes at the end of the sleeves.
And I started the “Bubbles of Joy” shawl which I bought as a kit intending it for travel in 2019 and then by 2020 I wasn’t doing travel so it’s been sitting in my stash for a while.
The “bubbles of joy” shawl in progress with my kid jumping on the mattress in the background.
The story with the pattern is that it’s supposed to help you capture memories of joy, so I started it and took it on my first trip to Ottawa since 2019. I particularly enjoyed how well it matched an afghan made by my grandmother that my mom’s using in her house now. I’ll try to get the picture up later — wordpress is complaining it’s too big and I don’t feel like dealing with manual resizing right this second.
I’m also currently revisiting the Stumptown Socks pattern which I already owned:
Stumptown Sock in progress at the Nepean Concert Band concert.
Plus I finished some Glitz Mitts from a book I owned back in January and I finished an advent from 2022 in the beginning of 2023 too so it counts. So the current breakdown of knit/crochet/weaving I have listed on Ravelry looks like this:
4 patterns I owned before 2023
2 plain weavings (no pattern to buy exactly although I did take the course)
2 free patterns (amigurumi heart, a sock pattern I haven’t shown yet)
2 patterns I made up (rainbow + socks, feather shawl)
5 new patterns I bought (the gnome, romi mystery shawl, easter egg, good bear, rcyc mcal)
On the embroidery front, it’s all been stuff from stash including the Constellation Sampler and Floral Necklaces, plus I’ve got a summer sampler and a bee sampler on the go now. (I did buy a couple of extra samplers this year but on average I’m using more than I purchase. Which is definitely not something I can say about my yarn habit.)
So even though it’s only a few patterns, the ratio of “cast on new exciting thing” to “actually use what you have” is feeling pretty good. Plus most of the new things I bought were to go with knitalongs, which scratch a bit of a community itch that’s been a bit hard of late so I don’t regret finding a few opportunities for that!
Overall
I’d say 2 goals are pretty much done, the 3rd has some progress, and the 4th has a plan. Not bad!
Honestly, this is mostly a test of the Mastodon posting thing which apparently only works if I start a post from the web and not the app. (Unlike the Dreamwidth posting tool, which is clearly superior)
But here’s a picture of my new quilt in progress so that this is kind of a real post too.
A set of 5 inch quilt squares laid out in a rainbow-ish gradient.
This is squares from 5 (or maybe 6?) different “charm packs” of 5 inch squares from Craft Emporium PDX. The packs are relatively cheap so I kind of accumulated a few before I had a plan for them.
I mentioned in August that I seemed to be doing some unsettled knitting. Fast forwards a few months, and I’m entering a bit of a pattern: one big project for sitting, one tiny project for knitting on the go, and a few more complicated things for my “nights off” (where I’m not in charge of getting kiddo to sleep). Pre-pandemic, I typically had one on the go project and (sometimes) one bigger home project but since they’re both pretty simple right now, I’m enjoying rotating in a few other things that engage my brain differently.
Big project right now is the Stepping Stones Cardigan.
Terri in a harvest gold Stepping Stones vest.
It’s a boxy open front sweater with nice lace detailing on the front, hem and cuffs. The pattern has a lot of options for customization of the sleeves and I really appreciated those. The lace made knitting the body seem not so repetitive.
Books and knitting the front panel.
I love the yarn, which is Arranmore Light from The Fiber Co in the colour Finian. It’s kind of got a rustic handspun 2 ply feel. It’s also unfortunately easy to tear a single strand if it gets caught on something like a zipper or an over-enthusiastic 3 year old who wants to be in my lap. So I got a new tool to help with that!
This is a yarn ball holder from Hansen (better known for their espinners). I’d coveted it since Tina from Black Sheep Fiber Emporium showed me hers, because it is a beautiful piece of engineering: perfect smooth wood, balanced bearings, thoughtful design. But it didn’t fit into my life then. I’m happy to say that it does now!
Small project right now is socks for my Mom.
It’s the usual Sundae Socks pattern with some mods. I’ve been keeping the yarn colour a surprise, but it’s a matched pair from Must Stash Yarn.
More complicated knitting is the Butterfly Dream Catcher shawl.
This is done in this great special yarn from Black Squirrel Berkeley called ‘sup witches. It glows under black light!
Other alternate night off projects:Crochet
I’ve picked up my Christmas ornament advent from Little Box of Crochet. I got this in 2018 and didn’t plan to finish it all in December, but two years later and I just finished day 6. Whoops. But I need ornaments this year and I didn’t before! Probably should have started earlier than November, though.
Spinning
I’m still spinning but less regularly mostly because I’ve been getting paper books from the library and I can’t read those and spin! I need some more audiobooks. I usually enjoy podcasts but they’ve been kind of getting me down lately.
Craftsy sent me an email offering a full year for $2.49 and I’d wanted to try more of their spinning content so I did that and it’s helping keep my interest up because sometimes I watch spinning videos while knitting. I’m still not blown away by Craftsy. The content I’ve watched is good but the site itself makes it hard to find and doesn’t help you keep track of what you’ve watched, which gets more annoying the more I watch. But for $2.49 I already feel like I got my money’s worth out of it, so that’s ok.
Embroidery
I got a cute Christmas tree set from Dropcloth Samplers, but I haven’t gotten much further than the day I took this picture.
Other
I also finally finished a wooden marble run kit I got to make with my toddler (who I guess is more of a pre-schooler now?). It wasn’t the easiest to do with his help, but we got out the washable markers and he coloured while I built. He coloured most of these not just the scribbles, but sometimes he told me I had to help fill them in if he got bored (and sometimes i did the first scribble and he filled in).
I feel like I have so many things I want to do and so little time before December hits and I switch over to the advent style packages I plan to knit. I might have gone a bit overboard on the advent things this year since I won’t be traveling: I got the ShannaJean Gratitude box, the BySarahS Christmas mkal, and I signed up for the Gnome one too. Plus I got the Katrinkles tool one, though that’s shorter and I don’t have to knit anything.
But on the bright side, Mom’s socks are the only ones I actually “need” to finish in the next couple of weeks if I want to mail them off in time for the holiday! And I don’t have to finish any of the advents on time either!
Time for a little reflection on how my 2020 fiber goals are going!
1 Whittle down the WIPs and Query the Queue.
This has been really successful! I finished up my Poca sweater that had been languishing for two years, the Cascadial Wrap that had been in there nearly as long (no blog post yet because it was finished in a tough week), and it’s kept momentum on things like the Craftvent shawl and Geek Socks that ran into snags and could easily have ended up abandoned.
Poca sweaterCascadial Wrap
The queue part hasn’t gone as fast as the WIPs, but I did get the Geek Socks from deep queue and honestly I feel like looking more often has helped me know and plan.
But I’d still like to get some next steps patterns in. I’ve got some yarn ready to go, but once it got hot here I didn’t feel like knitting brioche so much. (But sweaters were fine? Brains are weird.). I don’t see any point in fighting it so I’m going to resume briocheing once it cools off. I’m excited about what I’ve got planned next!
3. Top to Toes
Success! I did my first Geek Sock and used the top-down pattern in the Made BySarahS Mystery Sock Knit a Long. And it turns out I like top-down just fine. I did have to learn some new measurements for the afterthought heel, but I know those now so I’m good to go.
Geek Sock
To be honest, learning that afterthought heel has left me dreaming of owning a sock knitting machine and churning out tubes and tubes and tubes. They’re so expensive that it’s hard to justify just for fun, though!
Made BySarahS mkal socks
But back on the top-down topic, I’m probably going to make a few more top down socks this year and going forwards. And I won’t try to steer away from top down patterns due to my lack of experience, which I tried not to do but was probably totally doing. To be honest, most of my sock patterns came from a single designer, so just knitting other people’s patterns was a bit out of my comfort zone! I have learned that her rounder toe is still my favourite for my foot, but I know how to adapt toes and practiced it now so that’s not a barrier any more.
I’m hoping to join the next BySarahS Mystery which I’m guessing will include a top-down pattern! But I’ve got a few other beautiful things in mind… Once I finally finish the second Geek Sock.
4. Some Smaller Shawls
This is the goal that I thought would be easiest, and it’s the one that’s gone by the wayside! It’s a casualty of the pandemic: I’ve been using working from home as an excuse to focus on bigger projects that I would normally have trouble finishing. I don’t think that’s a bad thing, and I may let this goal go by the wayside this year as I adapt.
But small projects still still nice for me to have on backyard toddler adventures (especially when sweaters get too big for my toddler adventure shoulder bags). So I’m thinking maybe I’ll just downgrade it to *one* shawl and pull something out of my queue to make it happen. I’ll definitely wear whatever I make!
Other
I listed a few more things at the end of my 2020 fiber goals post that I wanted to quick mention because although they hadn’t made my top 4, I actually did them!
Sweater — I did Poca and am nearly done a Hazelwood sweater
Dyeing — I turned food colouring dye into a family art project and we had a lot of fun with it. I’m hoping to do more, but I’ll need more undyed yarn.
Spinning and Hazelwood sweater
So… The year is going really well, from a crafting perspective. Don’t ask me about politics or my sleep patterns, though! Still, it’s nice to see how much I’ve accomplished against this one metric. Hurrah!
My yarn subscription for this year is the Made Here Yarn Club 2020 from Sincere Sheep, which was a splurge but one I could afford and one that focuses on local makers. Pretty cool!
I decided to make up my own pattern (after getting partway through a lovely hat and realizing I wasn’t feeling it). I haven’t written the whole thing up yet, but I have a chart and some basic instructions. So… here’s a little preview. But I promise I’ll be making something finished eventually!
Patio Stones (pattern preview)
This asymmetric triangle shawl was made with 300 yards of Sincere Sheet Covet (dk weight) and a US-5 needle. It would probably be just as lovely (and not quite as heavyweight) with ~400 yards of fingering on whatever needle size you prefer.
Setup:
co 4 stitches
RS: kfb, k to last 3 stitches, k2tog, k
WS: k2, p to last stitch, kfb (increases 1 stitch)
repeat until you have 15 stitches, ending on a WS row
Main Body:
Follow chart 1. Blue section is repeated, but for first run it will be repeated 0 times.
Note that the chart starts from the bottom, I just haven’t flipped the numbers over yet because this is a preview and not a completed pattern yet. The pink stitches can be replaced with k1, k2tog if you prefer. If you know how to cable without a cable needle for these little 1 over 1 cables, do that. It’s so much easier.
Cast off:
When you’re close to your desired size (or running out of yarn) repeat the eyelet section (rows 5-3 on the chart above) and then bind off.
I know, I know, it’s got some work to go before it’s ready for publishing, but it’s been sitting in my drafts for weeks and I wanted to put it out there in case my toddler poured coffee on my computer before I got it finished!
Last year I subscribed to a year-long mystery-a-long as a birthday gift to myself. It was really a great thing to do, though as I’ve mentioned I didn’t keep up on the last quarter. I haven’t finished, but I figure this is the sort of thing that should be split into two posts anyhow, so this is part 1!
I’ve been thinking a bit about what I’d like for this year, and here’s my list:
Use more of my project kits.
I still have quite a few Beanie Bags I never got around to, plus the big blanket-a-long from last year that I got stalled on. I think a few easy kits might be a good thing this year. I should probably set a number to aim for here, but I’m not sure what it should be. 4, maybe, at least one per quarter, with a month of blanket-a-long counting as 1?
More amigurumi!
Baby Potato is getting into soft toys, so I’d like to make him some more before he tires of them. Especially since I’ve made so many for other people’s kids but none for him yet!
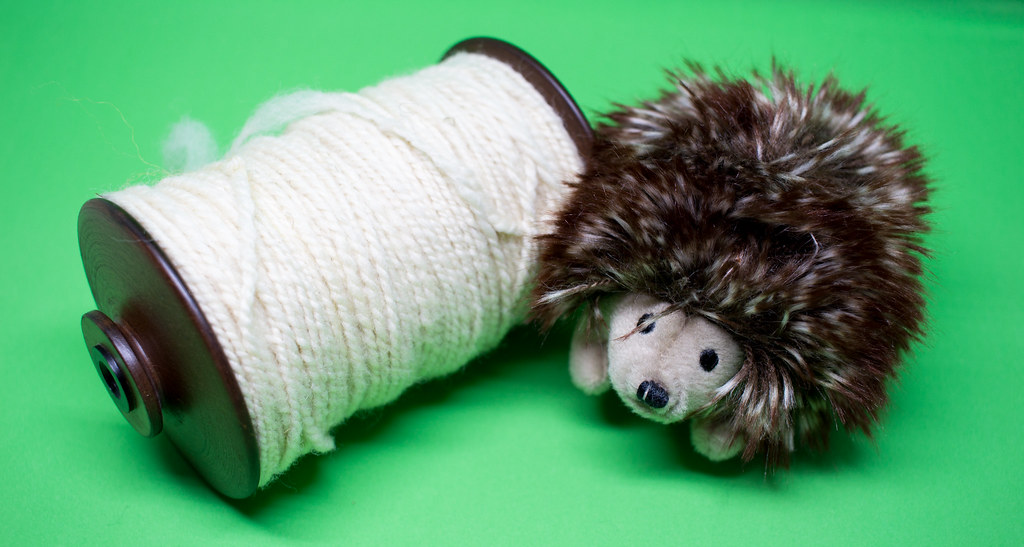
Spin the neat fiber kit Kathy got me
My friend (and spinning teacher) made me a nice kit of different fibers to spin as a Momma gift, and I’m eager to try all the different breeds and blends out. If you want your own, I believe she’ll be selling them through Black Sheep
Organize the stash
I’ve *finally* hit the point where I can’t just remember most of the yarn I have on hand, so it’s time to start cataloging or organizing so that I can find what I’ve got faster. Most of this goal is going to be spent on figuring out what works, I expect, especially as I physically move some stuff in my office to make it more toddler-friendly.
Some photos of the neat spinning supplies: look at all those fibers!
My class has been done for a couple of weeks, but I’m still spinning! It’s actually kind of killing me to leave my wheel behind for my upcoming trip, but I haven’t even tried a spindle yet so there will be no spinning for a little while. So to tide me over, I’m posting some pictures of my almost-finished skeins today. Hopefully I’ll have some comparison photos with them after washing and finishing later when I have time for more photos.
First plied yarn
Before washing:
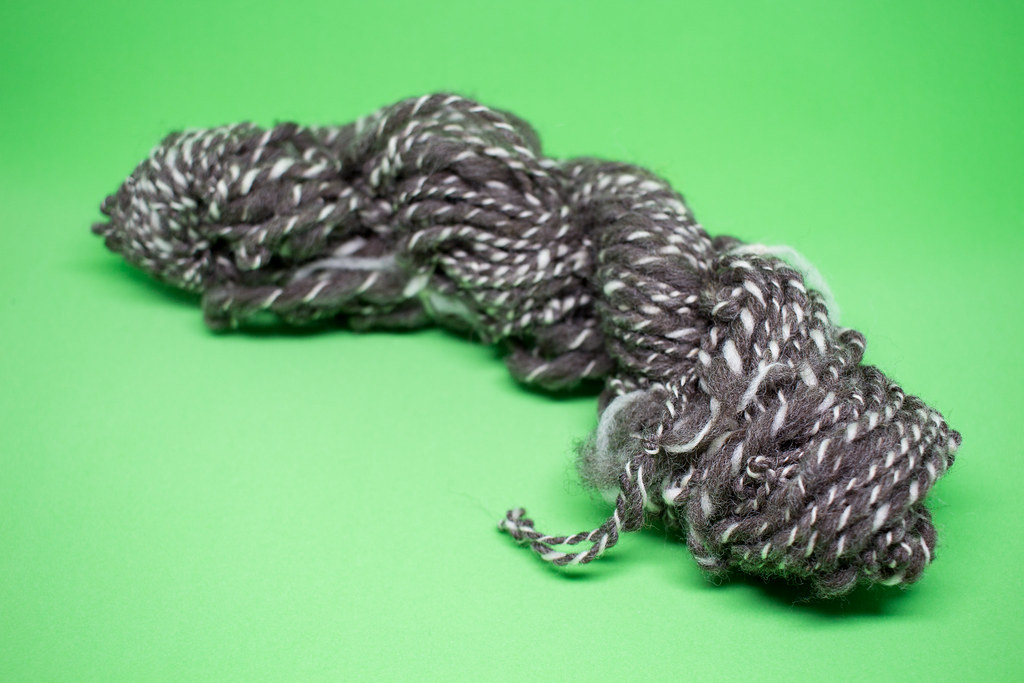
This is two different PCC fleeces. At least I’m pretty sure it was: the label on the bag of the white is definitely PCC but I didn’t check the bag of the brown since that was what we were using in class. That brown skein is my very first thing off the wheel, from the very first class! (It was also done on a wheel that we decided didn’t quite suit me, so I switched out for the rest of my class rental.) Both colours are natural and undyed.
Second plied yarn
This is the same white from the two-toned first skein, out of the same bag. I found the white way easier to spin than the brown since it wasn’t as “sticky” and all of a sudden I could keep it consistent and smaller. Of course, it could have just been that I’d had more practice!
I was focused on spinning so I didn’t stop quite often enough for bits of grass and stuff stuck in there, making this a little extra-rustic. Can you spot any in the photos?
Third plied yarn
In progress:
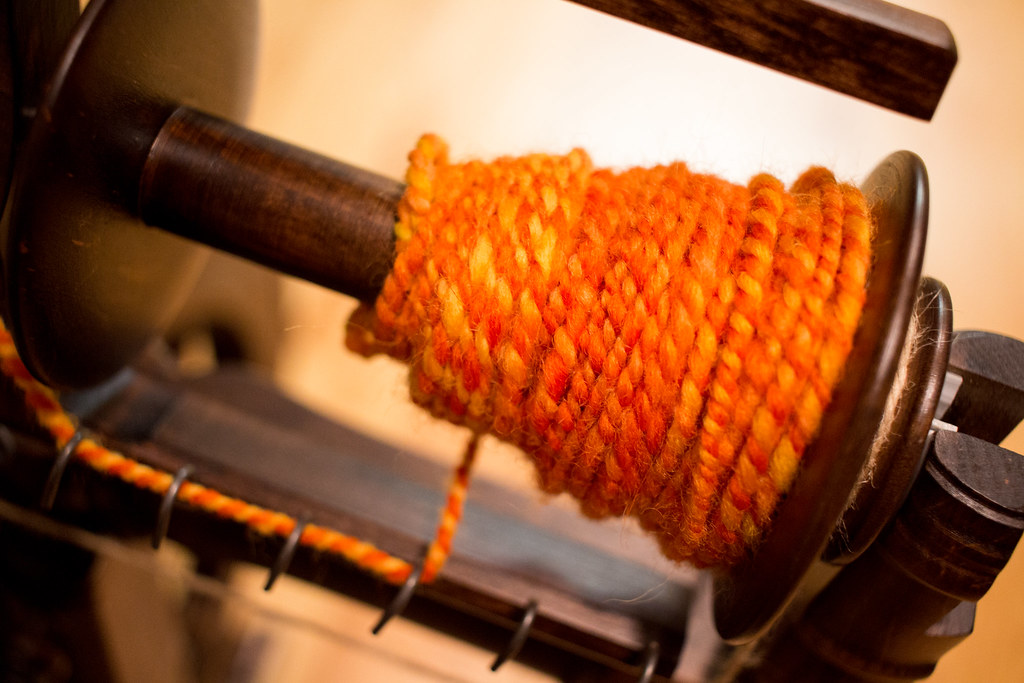
This is a super beautiful hand-dyed fiber braid from Kashmaier Creations. I decided after the success of my second yarn, I wanted to treat myself by trying out some of her beautiful fiber, and I’m really pleased by how it came out!
Looking dramatic:
The fiber is a corrie cross that was recommended to me as suitable for beginners, and I think I agree. I was intentionally making it thicker than the 2nd yarn because I wanted it squooshy, and the plied yarn turned out almost exactly how I envisioned.
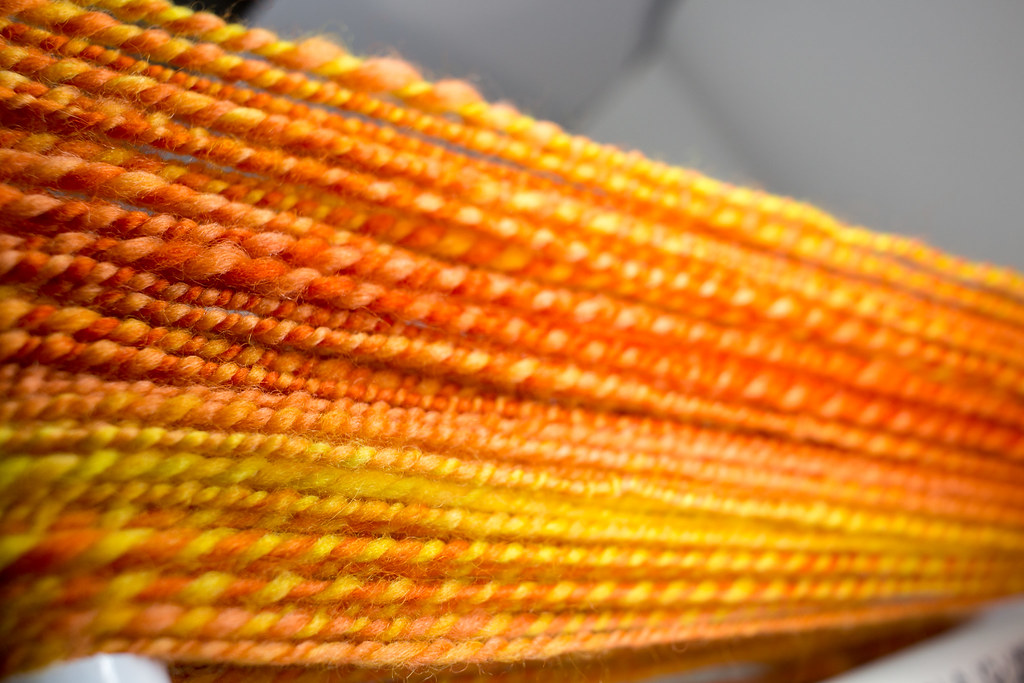
Yarn having a bath:
Look at those colours! I’m not sure what this yarn will be yet, but I definitely want to make it into something I can show off.
Next up, one more hand-dyed extravagance with a different sheep breed as base, then I might try to do something a little more slippery to see how that works out.
I’m really enjoying the process: running the double treadle wheel I’m using is like a little moving meditation, and since I had a hard week of sore leg and sore head, I was sorely in need of that. I didn’t think I needed a new hobby, but I definitely don’t mind having one. If you want a little spin-spiration, check out enfiber‘s great spinning series and fascinating guide to understanding different fiber types. They’re part of why I was willing to stretch my horizons with a new fiber craft, so I was ready to sign up when the right class came along!
I really don’t need new hobbies, especially not ones that require a bunch of equipment. But sometimes you get an opportunity and you just have to go for it: in this case, it was a class taught by an instructor who I was sure would be great for the way I learn. So I’m learning to spin yarn this week and next.
I’ve got to say, I’m not exactly a natural at this, but it’s still kind of a relaxing set of motions, and I’m quite enjoying it. Here’s my first attempt (the fluff on the right is just some unspun stuff at the end):
And my second, which is still on my borrowed wheel waiting for me to continue practice. (The class sensibly includes a wheel rental for practice, although I need to switch wheels tomorrow when the new rental wheel comes in).
Both of these are, I believe, from fleece from the flock at the Portland Community College. Undyed, just different sheep.
But mostly I’ve been knitting it in lengthy, upset work phone calls as everyone got stressed out about the pending release. (That’s not as photogenic, though it *did* help keep me a bit more even-keeled through the process.)
And my Acorn Trail cardi has been slowly getting bigger:
And bigger:
And bigger (Don’t worry, the shaping isn’t that intense, it’s just rolled over a bit and unblocked):
And soon it will have sleeves:
It’s been a learning process. I’ve had to rip back this and that as I did too much knitting while distracted. I’ve had to learn how to alternate balls of hand-dyed yarns. I decided not to knit the sleeve flat and instead do that in the round, which took a few tries before the “seam” of switched yarns looked right to me. I’m terrified that the math won’t work out and my sleeves won’t fit right into the body, because I’ve mostly done top-down seamless baby sweaters and I’ve never had to think about this before, let alone for such a big project. I’m trying to trust in the pattern, but then I mess something up and don’t go back or make a tweak here and a tweak there to make it fit me better and… it’s scary!
But despite the worries and despite the learning process, it’s coming together. I’ve reached the ennui stage of things as I finish off the first sleeve, so I’m eager to be done (and yet, there’s still button bands and sewing to go — next time, more seamless!) but I’m on track to hit the finish line this month!
One of my goals for 2015 was to knit an adult-sized sweater, but I cheated a bit and made one for my sister (who’s smaller than I and one of the smaller adults I know).
So I revised my goal for 2016 and here’s the start of something cool, I hope:
That’s the swatch for my very first sweater for myself!
I’m participating in Cardipalooza (Ravelry Link) in hopes that having a group to post pictures to will help me stay on track. It’d be better if there were weekly checkpoints or something, but I guess I can make my own.
The yarn is Malabrigo Rio, a beautiful 100% merino wool superwash that comes in the most lovely colours. I wanted to treat myself but still have something that wouldn’t be so hard to care for that I’d never want to wear it.
I’m trying Acorn Trail, which might be a bit of a challenging pattern for me because of all the many many fit options, plus all the seaming. But I like the way it looks, and it’s not like anything else I have, so that’s what I’m starting with. Probably not the most scientific way to choose, but honestly, I think most yarn projects are just “I want” and anything else is just justification anyhow.
The photo is from earlier in the week — despite having to tear back twice due to messing up the decreases, it’s bigger now!
I’d planned to just do the knit-a-long for the Rose City Yarn Crawl, but then I went out to a knitting group and saw what the pattern for the crochet-a-long looked like… Not only does it look lovely all crocheted up, but the pattern itself has the most gorgeous crochet charts I’ve ever seen. Colours to distinguish rows! Highlighting to show you where pieces should line up with rows below! Careful layouts to make everything easy to read! One of the reasons I learned to knit (besides needing something to do on the 3hr long car ride to the Very Large Array) is that there are so few good crochet patterns and learning a similar craft was the easiest way to expand the range of patterns I could do. So it would be a shame to know of such a nice pattern and not try it out!
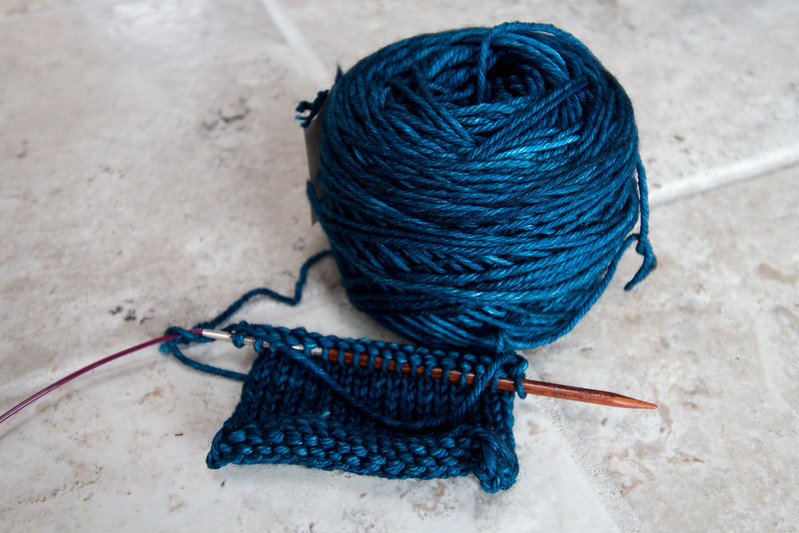
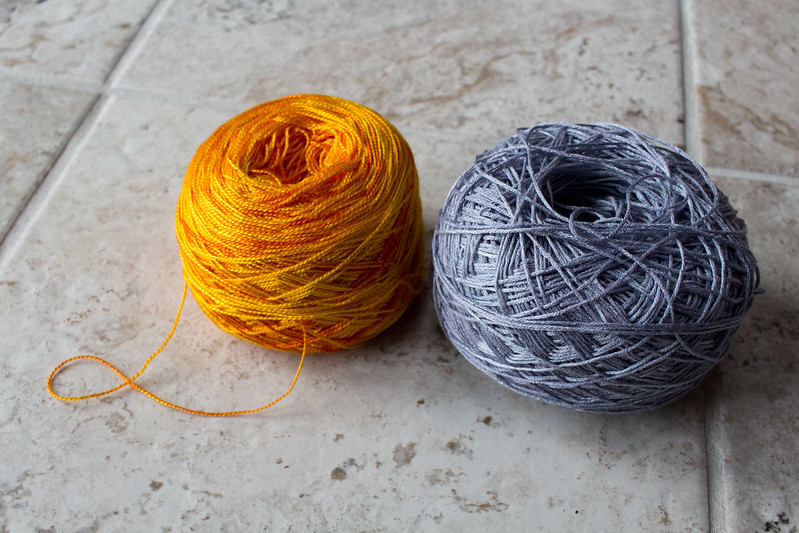
The Yarn
I’d been so good about using stash yarn for the MKAL that I decided to treat myself to something at Black Sheep for this one. These are both from Teresa Ruch, a local dyer who works with synthetic fibers and uses amazingly saturated beautiful dyes. The yellow-orange ball is Tencel, the grey is bamboo rayon. It’s a neat combo because the tencel is much shinier than the rayon, so there’s a serious contrast between my two colours. And it’s a nice excuse to try some different synthetics, since I’m always on the lookouts for allergy-friendly options.
The pattern
Here’s a teensy peek at those charts I’ve been raving about:
Not only are the charts clear, well-written, and easy to follow, but the “flavour” of this pattern is cake, so it’s described in layers of cake and icing. People in the thread have been naming off cakes to go with their colours, and it’s awesome. I’m calling mine creamsicle mousse.
This pattern is named after Rimsky-Korsacoffee house, one of the local places that takes “keep Portland weird” as a personal mission. Also, it has great cake.
Clue 1
Clue one included a layer of cake and the first layer of icing:
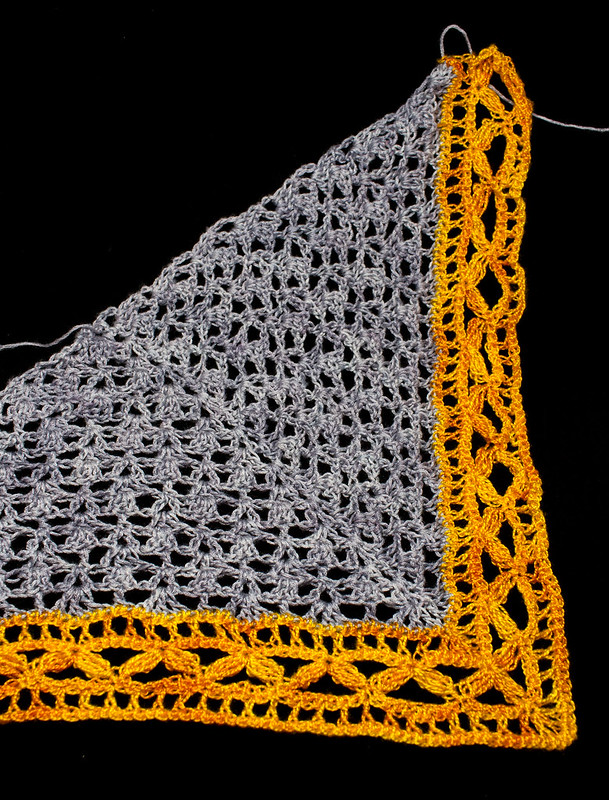
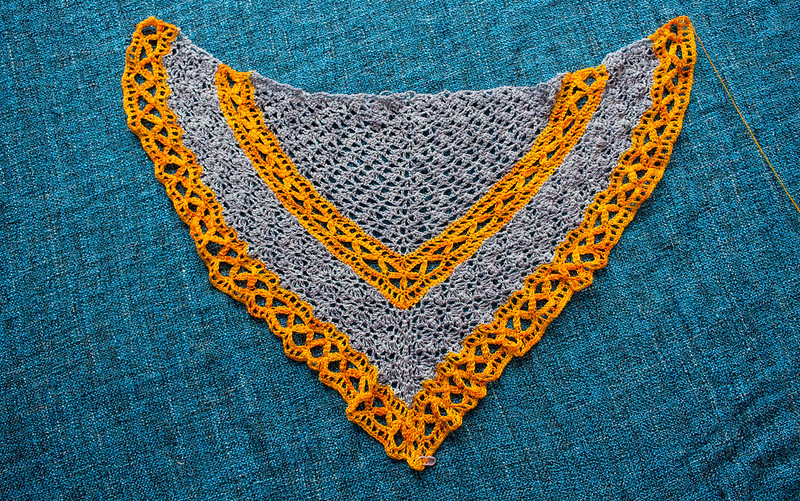
It’s approximately kerchief-sized at this point, and a bit to fit into my photo lightbox unfolded, so I kind of need natural light to take pictures of it (my flash is somewhere in a box from the move).
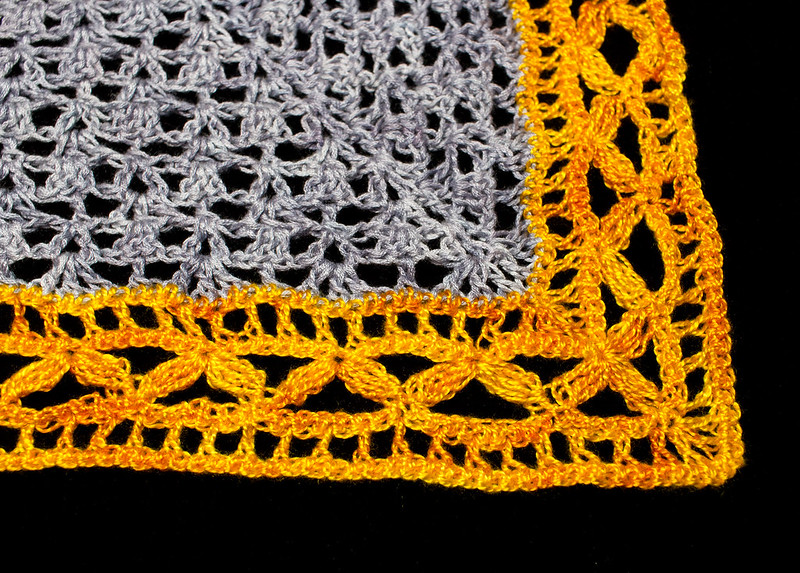
Clue 2
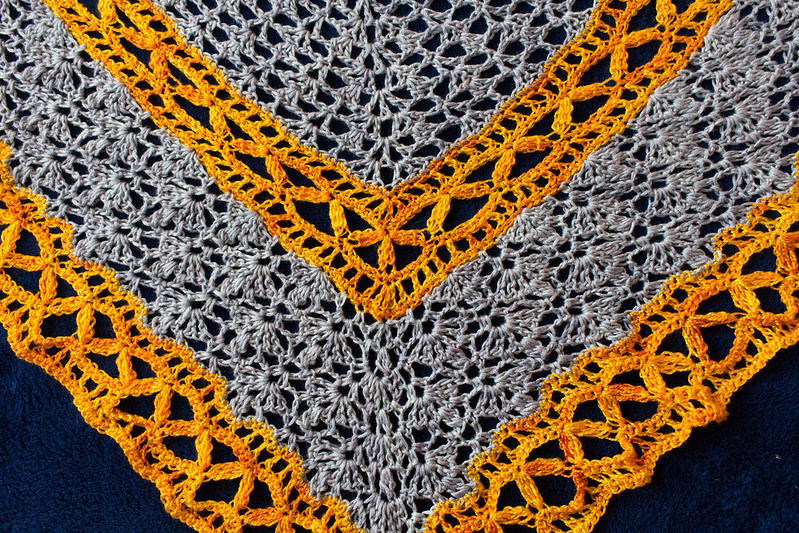
Clue two, also included a layer of cake and layer of icing. The icing is pretty similar, but the cake is quite a different stitch pattern! At this point, it’s starting to really look like a shawl:
And a close up:
This is the first larger, non-amigurumi crochet project I’ve done since I got some “ergonomic” crochet hooks, and I’ve got to say that it makes a difference. My right hand doesn’t get tired nearly as quickly. In fact, it’s usually my left that gets tired first now! If you crochet at all, I highly recommend investing in a set. It doesn’t even have a very expensive investment: They are cropping up at absurdly cheap prices on amazon and elsewhere, maybe $10-15 for a set of hooks with a case and sometimes with some stitch markers or other notions thrown in. I have a set from clover that has a significantly more expensive list price (I got it on sale) but I honestly can’t tell the difference between it and the cheaper sets. I do admit I haven’t tried crochet with the cheaper ones for any length of time, though.
The only weird thing about these hooks that they don’t match up with the sizing of the other hooks I own, so my new G hook is a bit smaller than my old one (4mm vs 4.25mm). Thankfully, it seems to be working out fine on this shawl.
Doing both the MKAL and the MCAL was probably a bit too much, since it’s meant that I haven’t even touched my January Beanie Bags or YOTM samples, let alone the February ones, but I’m really excited about the final piece taking shape, and it’s kind of neat to be doing the less-common one. The last clues came out this past Wednesday and my deadline for the shawl is when the Crawl starts in two weeks, so it’s looking like I’ll be able to finish both without much trouble!
As I mentioned in my post about knit-a-longs, the Rose City Yarn Crawl runs both a knit and crochet a long in the month leading up to the yarn crawl. It’s a real treat seeing people wear their creations out on the crawl, and I wanted to be one of those gals sporting a new finished object on the crawl this year.
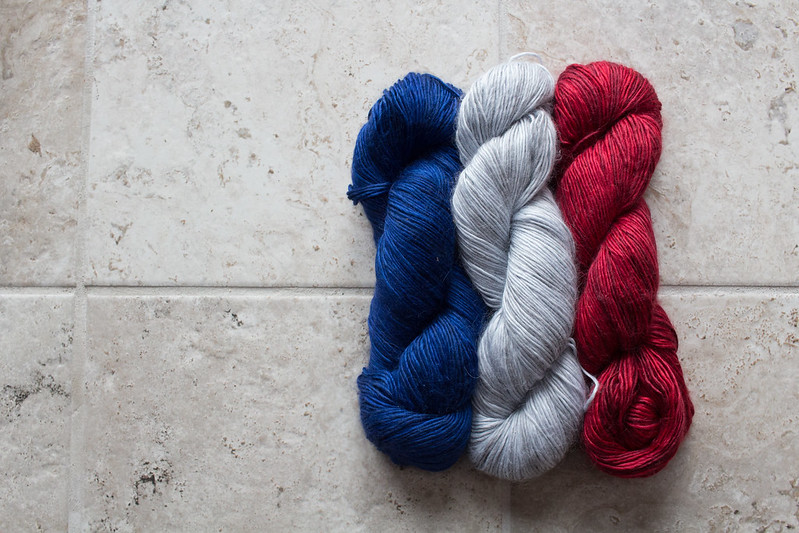
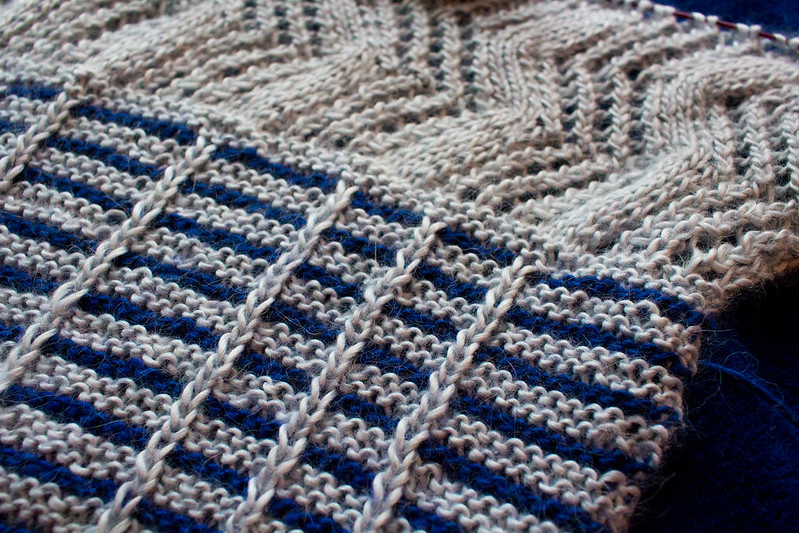
I decided that enough of my yarn was unpacked that I should be able to find some stuff out of my stash. This is actually hard, since I mostly buy yarn for specific projects and this is my first cowl, so I haven’t really shopped with that in mind. Since it’s Presidents day down here in the US, I’ll show you the red-white-and-blue yarns that became my short list before I decided on my two required colours:
Okay, so it’s actually blue-white-red like the French flag, but I am Canadian after all! This is KnitPicks Diadem yarn, bought during the big yarn sale in November two years ago on spec, because it sounded lovely and I wanted to try it. It’s a super fluffy alpaca-silk single ply that *feels* like heaven, but it’s kind of hard to work with because it sheds fluff, splits, and the fluff felts into little loops around the yarn that I have to cut off pretty frequently plus it sometimes loops around to make knots. And it’s hard to photograph because of the halo of fluff.
I was initially pretty disappointed by the yarn, but as I’ve gotten used to it, the luxurious feel balances out the finicky nature of the yarn. This is going to be one luxurious cowl, although I’m going to have to work for it!
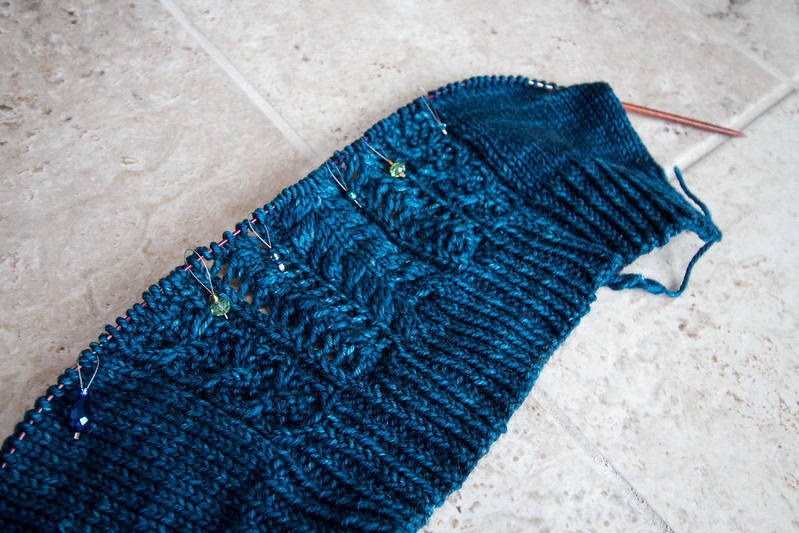
I really wanted to do red & silver but once I saw the first clue, I decided silver & blue would suit it better:
Clue 1 is supposed to remind you of bike treads. I think it does!
The whole pattern is written like a story about a bike ride, with twists and turns. Clue 2 involves some scenery and then some winding roads.
It was at this point that realized that I’d somehow chosen my high school colours, silver and blue, because it reminded me of an old high school shirt when I started to get into the “scenery” part. Oh well, they’re great colours even if it is a bit funny.
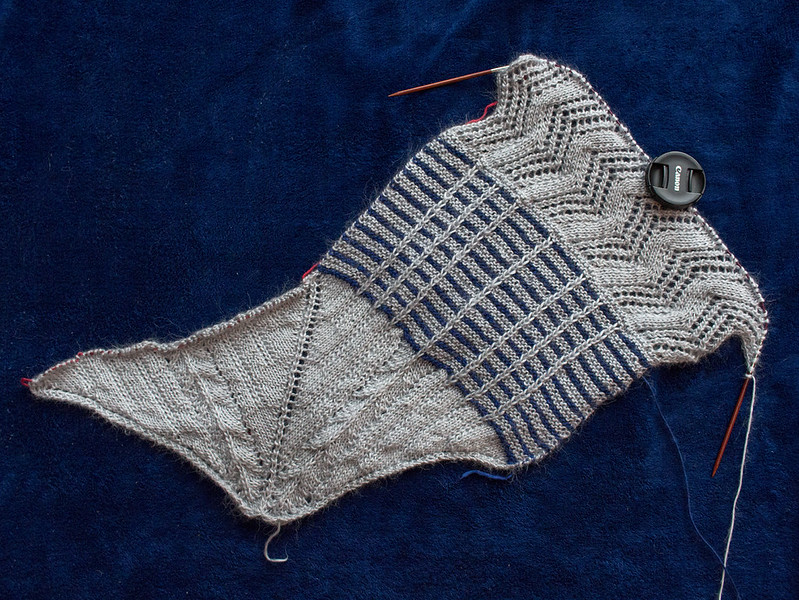
Now let’s zoom out and see clue 1 and most of clue 2. I needed to take the picture while I still had nice light and figured you’ll see the last part next time. Clue 3 has been out since Wednesday so I’m a bit behind!
That… does not look like a cowl at all, to be honest. What a strange beast! I look forwards to seeing how this construction is going to work in the end.
Overall, the story of this cowl kind of makes it fun, and I’m loving how it feels even if the knitting process can be a tad annoying thanks to finicky yarn. I do think I’m done with mystery knits for a while after this, though… after seeing how beautiful other people’s cowls look with colour two as a variegated, I have a deeper understanding of how much I like selecting colours with advance knowledge of how they’re going to work together. But I did choose something high-contrast which looks pretty good, so I can’t be too sad!
I’ve paused on this knit-a-long since the Rose City Yarn Crawl ones have started and I foolishly have tried to do both, but here’s what it looked like at clue 3:
I really liked the bind-off in this. You can’t tell from the in progress photo, but it’s designed so that the bind off is thicker in places to follow the curve, so I plan to block it curvy. Overall, this was a very technically interesting pattern! And very nice for a free KAL to start the year, although not the easiest one on my hands. I really need less slippy small double pointed needles, I think, but my knitpicks laminate ones broke while I was using them. (They replaced them, but I’ve been too nervous to try the replacement.) Anyone got any recommendations?
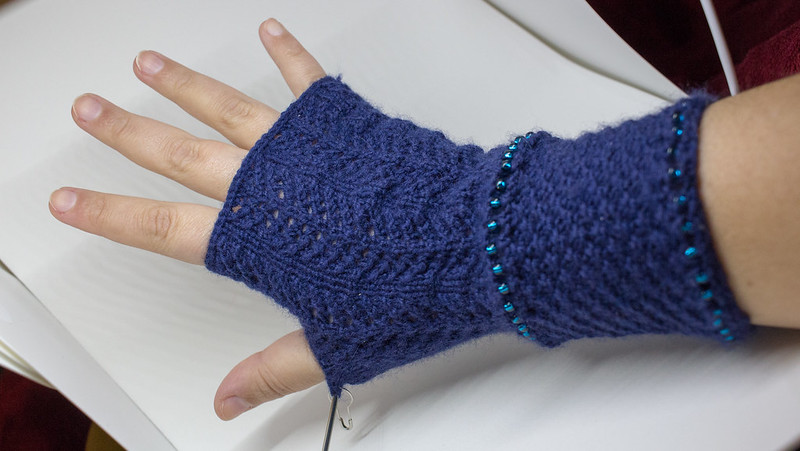
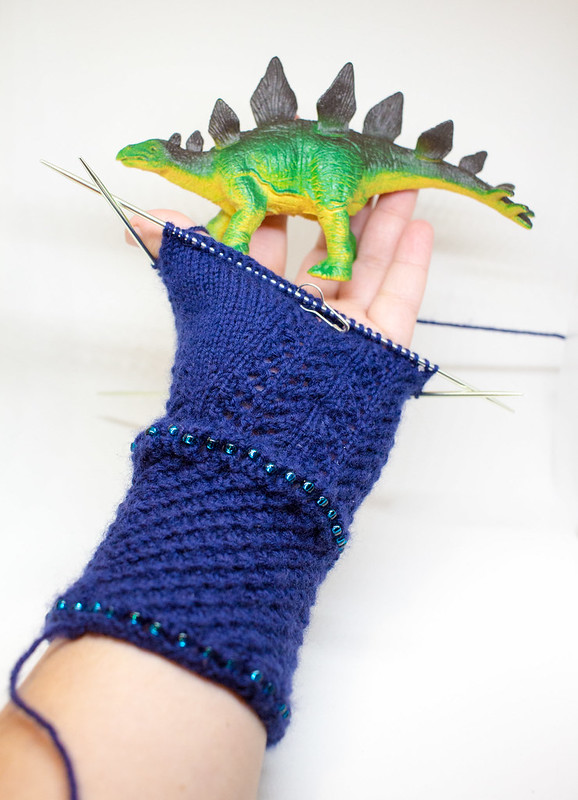
I’ve actually finished this one glove, since as you can probably guess there’s just a few thumb stitches left. I haven’t finished the second glove because I’m on to the next project, but it’s cast on and waiting for me when I’m done and ready to come back to it!
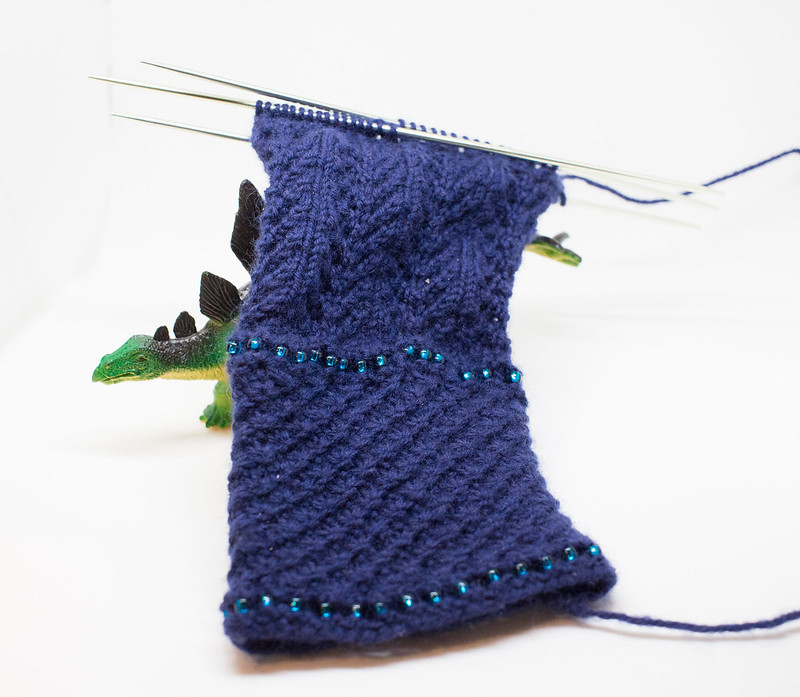
The week 3 clue came out on Friday, so I’m a bit behind still. But Clue 2 was much easier than clue 1, at least! Here’s what clue 2 looks like for me and my dino buddy:
Still loving that thick cuff, but not so much loving the transition at the wrist bead line — it feels and looks a bit lumpy around my wrist, and the beads make strange cool spots. Of course, this is also the part of the pattern that cramped up my hand. Bah!
This is where the mystery is a bit of a disadvantage: if I’d seen the finished product, I might have done something about that transition line. Or maybe I just have absurdly dainty wrists? Either way, I’m not willing to rip back now, though I’m debating a little bit of elastic thread or ribbon to deal with the issue, or maybe it will block a bit flatter. I will ponder it. In the meantime, on to the next clue!
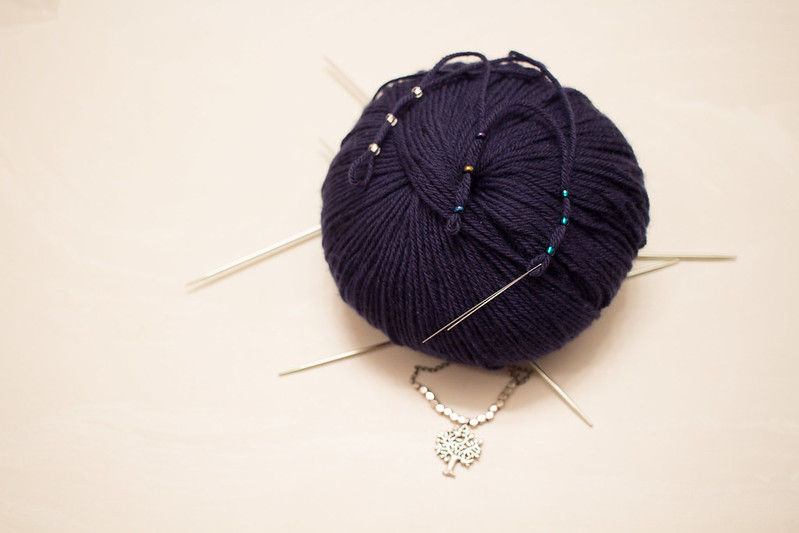
I did manage to cast on one of those knit-a-longs: the fingerless mitt “Catch a Falling Star” MKAL. since clue 2 has now been released (as I write this — I think clue 3 might be released by the time this posts), here’s my pictures from casting on and clue 1!
I’m using Knitpicks Capretta in the Admiral colourway. This is super lush:
Fiber Content: 80% Fine Merino Wool, 10% Cashmere, 10% Nylon
Weight: Fingering Weight
Knitting Gauge: 7-8 sts = 1 on #1-3 needles (2.25mm – 3.25mm)
Crochet Gauge: 21 – 32 sc = 4” on B – E hooks (2.25mm-3.5mm)
Yards: 230
Grams: 50
Put Up: ball
Care: Hand Wash/Dry Flat
I decided after taking this photo to go with the green beads, since I like how they catch the light.
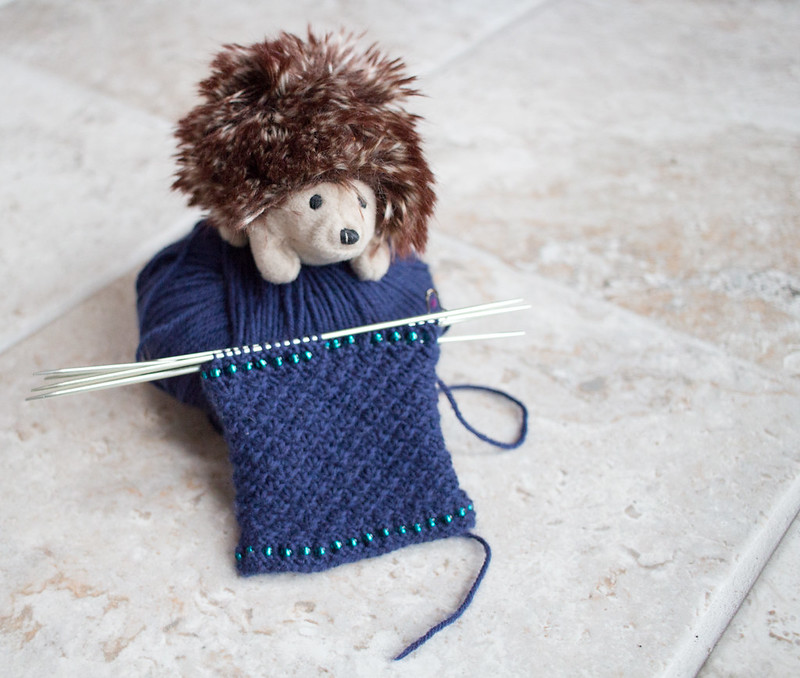
This is not an easy pattern to do: the beaded section made my hand cramp up so badly that I had to take painkillers and rest, and I haven’t had sore wrists with any regularity since high school. I had to switch needles to metal ones to handle the purl-yo-purl that makes the texture there. And you knit part of it inside out and have to do a stitch swap… it’s definitely a challenging pattern.
But it’s so pretty! And it is super soft with the cashmere blend yarn and those plush bobble-like POP sections.
I haven’t done the second cuff because I’m not feeling like pulling yarn out of the middle of the ball *and* I’m not feeling like cramping up my hand again, but I think I will move on to clue 2 now that I’ve documented clue 1!
January is apparently the month to start knit-a-longs! I guess it makes some sense, since many people are done with holiday gift knitting, and maybe have made new years craft resolutions to try new things where a KAL would be a good way to get help and tips as they go. But oh my goodness, I’ve seen so many of them that I feel rather overwhelmed. Normally I see a KAL once every few months, not a pile of them stacked into the new year! Even though I’m totally excited to try some of these, I just *barely* finished a Christmas present shawl to give it to M before I left Ottawa and I’m torn between taking time off and jumping in to these!
Here’s the three KALs that I’m seriously considering, of the very very many that I’ve seen:
2016 Rose City Yarn Crawl Mystery Knit Along : This is one of two mystery patterns associated with the RCYC, a big event in March where you visit some of the many yarn stores in the Portland area over the course of the weekend. This year it’s 14 stores, and that’s not even all the stores in the area! I’m tempted to do this one because it’s so neat seeing so many people making and wearing the same pattern, and I kind of want to have my own plumage for the event this year! There’s actually two Rose City Yarn Crawl mystery alongs, one for knit and one for crochet. I’m gravitating towards the knitted one because I love the description they used to help you choose your yarn. First clue comes Jan 27, so I still have some time to decide.
Catch a Falling Star MKAL: This is the January Mystery Mitt KAL for the Fingerless Glove Fanatics Group on Ravelry. I honestly don’t remember buying the pattern, so I think maybe it was free for a bit in December and I clicked the link on spec. But the designer has nice stuff and I’ve found fingerless mitts incredibly useful in the Portland weather, so I’ll probably be digging through my stash for a skein this week. First clue is already out, next due on Friday! (The Ravelry notification is the only way I remembered that I had this pattern.)
Twin Leaf Crescent KAL: This was designed by a local designer who creates beautiful patterns that are clear and easy to understand, and I’ve loved doing KALs with her in the past. The gradient kit for this is from Black Trillium, a local dyer whose yarn I’ve loved working with, and the colours are beautiful. But it’s a big shawl to add to my KAL list, overlapping directly time-wise with the RCYC cowl, and it requires a yarn purchase.
Since it seems weird to have a post on this blog without a photo, here a quick cell phone snap of what’s currently on my needles that I want to finish as well as these potential KALs:
Hobo Mitts in Progress
This will be a set of convertible mitts for J, who says his old ones are getting pretty beat up. (I think maybe I bought them for him when we were first dating and he didn’t have enough cool-weather gear for regular visits to Ottawa?) They look super tiny on the needles, but they’re *really* stretchy and I didn’t want them to be too loose, so that’s the way they’re going to be… assuming they feel right to J when he tries them on a second time later in the process. They’ll fit more easily in a pocket this way, right?
That picture represents only a couple of days of kniting (I cast on two days ago and barely knit anything today), so they’re going fast enough that I’m hoping I’ll get these done well before the RCYC MKAL starts up! We’ll see if it gets messy when I get to the fingers!
I’ve had a few different types of bacon chocolate chip cookies now, because I have the type of life where that’s a viable dietary choice and plenty of friends who are willing to try something new. But I’ve got to say that I’ve got mixed feelings about them.
Chopped bacon on cutting board. I actually cut all these pieces smaller before putting them in the cookies. I figured they’d be best if the bacon chunks were similar in size to the chocolate chips.
Some bacon chocolate chip cookies are pretty much “I put bacon in this existing recipe” which is fun but not always a true melding of flavour. Some are even “I put bacon on top of this chocolate chip cookie and glued it there with maple goo” which is more the voodoo donut approach to sweet and bacon.
Those are fun, don’t get me wrong. But this is the type of cookie where people go “hey, sure, let me try one of those” and then they do and they go “that was neat” and then they move on to more traditional cookies.
What I wanted was more melding of flavour, which is hard since chocolate and bacon don’t dissolve into each other, flavour wise. So I decided to try merging my favourite spiced cookie recipe with some bacon chocolate chip cookie recipes, in hopes that a bit of spice would bridge the gap.
Spiced bacon chocolate chip cookie dough
The resulting cookies taste sort of like a candied bacon with spiced chocolate, which is what I was aiming for. Hurrah!
I took these to a cookie exchange party on the weekend and am pleased to report that more than one person tried these, said “hey, that was neat” and then ate a second one immediately. This is a particularly high compliment given the number of truly excellent cookies on offer at the party! So I’m declaring them a success and publishing the recipe.
Are these actually the best bacon cookies? The title is a tongue-in-cheek nod to academic speak for “we don’t want to over-state our claims but we’ve made some real improvements in this area.” So they’re probably not the best cookies yet, but I think I feel comfortable saying that I’m on a viable path in the search for the best!
Spiced bacon chocolate chip cookies ready to be baked
Spiced Bacon Chocolate Chip Cookies (with a hint of Sriracha)
Note that I’m calling these “spiced” but not “spicy” — you can easily tweak the spice level, but the current version of the recipe doesn’t rate on my spice scale. The dominant tastes are chocolate, bacon and cinnamon.
1 stick butter
1/2 c brown sugar
1/2 c white sugar
~3 tbsp bacon grease
1/4 c milk
1 egg
1/2 tsp sriracha (in place of vanilla; if you want less spicy you could revert)
2 tsp baking soda
1 tsp cinnamon
2 C flour
1 1/4 C chocolate chips
1/2 C thick bacon cut into 1/4 inch pieces (make them similar in size to the chocolate chips)
Cook the bacon until the edges are just crispy, but the bacon is still chewy enough to work in a cookie. Set aside to cool. I don’t really recommend shelf-stable bacon bits for this because they tend to be too salty and crispy, and thicker bacon is better. Don’t waste money on getting the nicest bacon ever, though; you probably won’t be able to tell once it’s covered in cookie dough.
Cream together butter, sugar and bacon grease. (We just poured warm grease directly from the pan after eating some of the bacon with breakfast, so 3 tbsp is an estimation.) Don’t worry if there’s lumps in your brown sugar, no one minds. Add milk, egg and sriracha and mix further.
Mix in the soda and cinnamon, then stir in the flour slowly and stop when just mixed. Add chocolate chips and bacon, stir. You can tweak the amount of chips and bacon to suit your tastes, but remember that the bacon may be a stronger flavour than the chocolate.
Set the whole thing aside in the fridge to cool for a few hours.
When ready to cook, heat oven to 350F and make small (~ 1 inch) balls. Bake for around 14 minutes. (possibly less if you didn’t bother to chill the dough)
Makes around 48 small cookies.
Spiced bacon chocolate chip cookies, fresh from the oven!
Notes
You can totally make big cookies with this recipe if you want, but I don’t recommend it for two reasons:
The chilled dough is really solid (all that cold bacon grease?), so small balls easier to make.
This is the sort of cookie people will be curious about but not want to commit to, so smaller cookies let them get a taste and decide if they actually want more.
There’s three things that I think really make the meld of flavours work better, so if you’re tweaking the recipe, approach these with care:
The substitution of bacon grease for butter/lard/shortening. It works!
The cinnamon. I think you need this to make the flavour meld work. It might not be the only spice that could do this.
The sriracha instead of vanilla. Seriously, it makes the dough quite a bit different than the original recipe, in a good way.
If I were doing this again, I would increase the sriracha to at least double, probably more. It seems overwhelming when you add it to the batter, but by the time the flour is mixed and the cookies are baked, it’s not as detectable as it could be.
The original spicy cookie recipe this was based on included cayenne pepper to make a mexican hot chocolate style cookie. I removed it because I think sriracha goes better with bacon and my taste tester dislikes cayenne, but if you’re into a bit more chemical heat, that’s a good option to experiment with.
I declare these a success, but there’s not much call for bacon cookies in daily life, though, so it might be a while before I try this again!
Single Spiced Bacon Chocolate Chip Cookie, waiting to be baked
I feel this pain. Because of Mailman, I actually learned Bazaar when many people were learning git, and did most of my contributions through launchpad, so I’m a relative newcomer to git and doing contributions on github (Mailman’s on gitlab now, but I do github for work and other reasons). This is constantly embarrassing to me because I’m a pretty seasoned open source contributor and so people always assume that I’ll be good at git. But I’m not. And lots of other people aren’t either! I was amused at how quickly that comic made the rounds with everyone saying things like, “I thought it was just me!”
Of course, my boyfriend not only does git but used to develop gitweb, so he was horrified when I laughed at said comic and thus cemented his role as my personal git tech support forever. I am both relieved and horrified that he has to look this stuff up all the time too.
Anyhow, in the interest of making my own life easier, I’m writing myself a teensy tiny reminder of the parts of git I most often get wrong. (It’s possible that this tutorial is also wrong, but I’m bugging J as I go so I don’t screw it up too badly.) I’m hoping that writing it out will make it easier to remember, but if not, at least I know where to look.
Setting up my repo
Fork
I do this through the web interface so I have a personal copy to work with and sometimes so I don’t accidentally try to push directly upstream on projects like Mailman where I totally could do that if I wasn’t paying attention.
Clone my fork on my local machine
This makes a nice local copy I can poke at and grep through and whatever. git clone git@gitlab.com:terriko/mailman-website.git
Set up an upstream
This helps make it easier for me to get changes from the upstream original project and integrate them into my local copy.
cd mailman-website

git remote add upstream git@gitlab.com:mailman/mailman-website.git
If I want to get changes from upstream, I then do git fetch upstream
git merge upstream/master
*** see note below
Note to self: don’t use git pull. I know that git pull basically just fetches and merges, but somehow I always screw something up with it if I have changed any file anywhere. As far as I know, git pull seems to be the equivalent of releasing angry flaming wasps into your repository. You might try to clean it up for a while, but eventually you’re going to decide that dealing with flaming wasps is way more hassle than just making a new repo copy and going there.
I know, the guides always tell you to use git pull. I assume most of the guides on the internet are written by angry flaming wasps who desire new homes in your repo.
*** Edited to add: my friend e suggests that merge here might be another source of fire wasps depending on what you want to do. git rebase may be the better choice.
Making a branch
Note to self: always make the branch before making any changes or you’ll find a way to get your tree into some sort of screwed up state and all the git stash and revert attempts in the world won’t push your mess out of the way enough to make git happy. The flaming wasps will win again.
git checkout -b mailman3doc --track
(This will use my upstream settings (set above) and tie this branch to that upstream. With magic.)
Saving my work and pushing it publicly
When I want to check stuff into my branch (aka save what I’m working on) I do
Add the ones I want to save
git add $files_I_have_changed_and_want_to_save
If I’m not sure which files I changed, I can check
git status
Note to self: I never forget how to add, but I often try to use git diff instead of git status so that’s why this is here.
Check in my files git commit -m "Useful commit message goes here"
I also rarely forgot this one, because it’s basically unchanged from the first version control systems I used. yeay!
The first time I want to push my branch to gitlab or github, I do git push -u origin $branchname
The -u part sets the magic for the branch so that in theory in the future I can just use
git push
Note to self: The -u stands for “upstream” but after some point, I’m losing track of what is upstream and what is origin and I can never remember what I need here. It’s all magic incantations as far as my memory goes.
Cleaning up my commit messages before a merge
Often I make a commit, push it upstream, then realize that I have a typo in a comment or something that I want to fix quietly without anyone knowing. Thankfully, git rebase is here for me. If it’s just gone to my personal fork and not to the main repo, I can use it to hide my shame.
Most of my energies have gone into the new house lately, but that doesn’t mean I haven’t been making things too, just that I haven’t had as much time for writing up of late. So here’s what’s currently on the needles while I start sorting through the backlog of photos and creations:
This is from a little ball of Misti Alpaca that I picked up on the last day of my tatting class (more on that later!) as a treat. And it *is* a treat. I wish I could justify the cost and time of a sweater made out of this stuff — its light, soft, and seems pretty warm. Maybe someday.
The plan, half-executed, is to make a little tiny soft hat that can be stuffed in a jacket pocket. A thin tuque, I guess. Since it’s dark, it currently reminds me of what my sister and I called “crime hats” on Buffy (due to her penchant for putting on a tuque before doing anything vaguely criminal in a several episodes).
Pattern so far:
Yarn? Misti Tui from Misti Alpaca. Sport weight, chains of thin alpaca. What’s the gauge? 6 st/inch on US 7 (4.5mm) What’s my head circumference? Around 21 inches
Since I didn’t want much negative ease (i.e. stretch), that meant 21×6 = cast on 126 stitches
Brim ribbing: {k3, p1, k1, p1} repeat 21 times
(or as many times as you have inches of head circumference)
Repeat brim rows until you reach an inch or so then switch to stockinette
My plan is to continue the stockinette without decreases to make slight kitty ears. We’ll see how it works out!
A local designer (PDXKnitterati) started advertising her February Knit-a-long (KAL) and I thought I’d give it a try. It’s an excuse to try out one of her lovely patterns, to take more pictures for sharing (I definitely need more practice photographing my knitting projects to best effect) and there are even prizes, which is fun. This one came at just the right time for me, since those rainbow socks (see previous post) had been almost ready to come off the needles and I needed a push to get them done.
I’ve never tried a KAL before, although I guess I did have a mutual “create as many crocheted angry birds as possible before PAX East” pact with my friend M one year, which I guess is sort of similar, maybe?
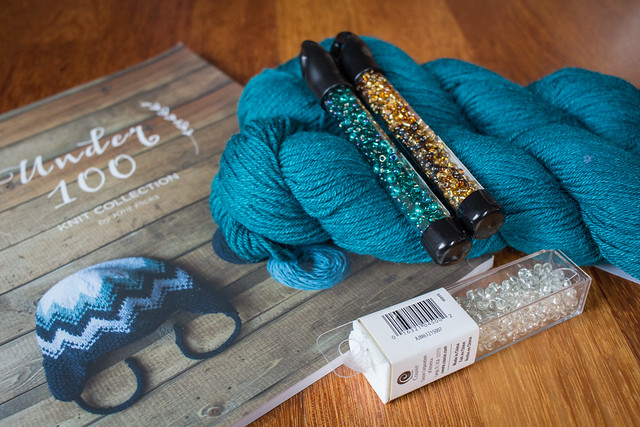
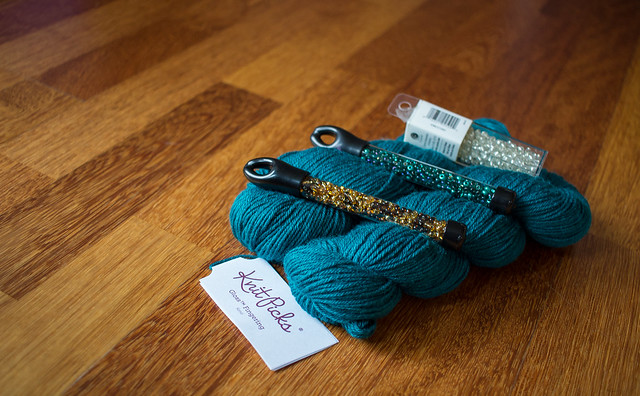
Feb 1st, I gathered up my ingredients… The pattern I’m using comes out of the Knitpicks “under 100” (as in under 100g of yarn).
The yarn is Knitpicks Gloss fingerling in the Kennai colourway. (Two 50g hanks, you see?)
I had 3 bead options, all of which I liked. At a suggestion, I tried a swatch with them all to see which ones worked best for me:
The silver and gold were clearly better than the blue/greens (which barely showed up) but what really decided me was thinking of ferns and what the fruiting bodies look like:
The pattern beads are designed to go in the center, but I liked the idea of brown to remind me of real ferns anyhow. Perhaps someday I’ll work on some fern lace with pairs of beads, though!
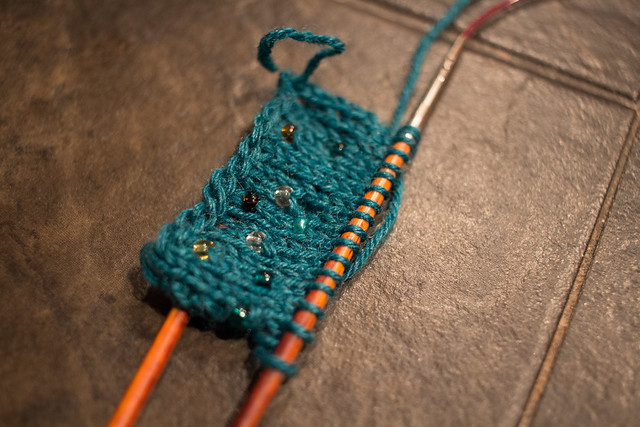
Here’s what it looks like in the shawl:
After a few false starts and times where I had to rip back to where I went wrong, I finally made it through a few repeats of the pattern. Here’s how far I was near the end of the first week:
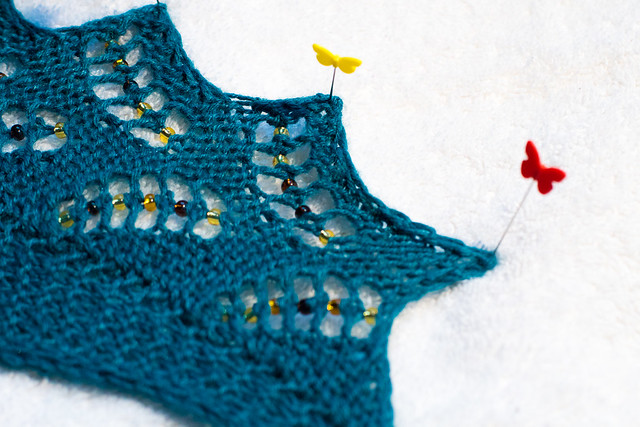
I guess I must have been tired since I blocked it upside-down. Thankfully, that doesn’t matter!
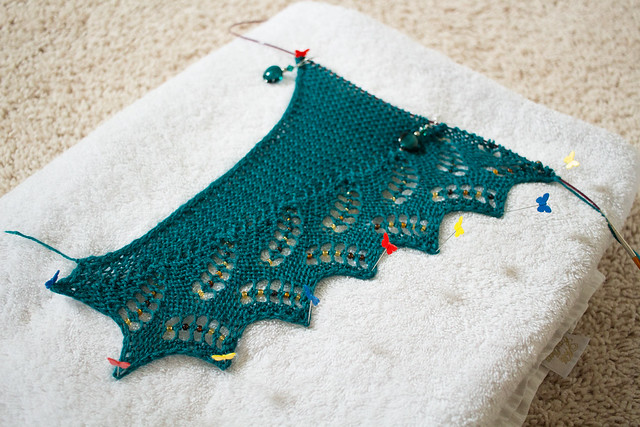
Now that we’re at the end of week 2, I’ve gotten much further! Here’s one to show the current length.
I was actually the lucky recipient of the week 1 prize, which was a pair of bead aids. This has made it way easier to put on the beads, as previously I was using a teensy crochet hook that didn’t quite grab all the yarn, so sometimes it would take me 2 (or more!) tries to get the bead on. The bead aids are much easier to get right, so that’s helped a lot. Here’s a wingpsan-y view to show the beads and the detail of that blocked tip while it’s rightside up!
And finally, here’s a photo with real live ferns!
Those last photos were taken along the Columbia River Gorge, since we have an out-of-town friend visiting and since she’s a photographer and it’s been a gorgeous weekend, we’ve been trying to hit some prime photo spots. So to round this out, here’s a picture of the famous Multnomah Falls:
It’s a bit of a unusual photo because the falls are usually photographed vertically to show off how tall they are. I was showing off my new very wide lens to my boyfriend, which is why I took this one, but I kind of like it because it’s not a shot you see that much! (Sadly, I didn’t get it perfectly horizontal, so clearly I’ll have to try this again another day…)
Want more KAL photos? I have an album for them which has a few that I didn’t put here. More waterfalls will probably show up in my flickr photostream shortly as I process the weekend’s photos.
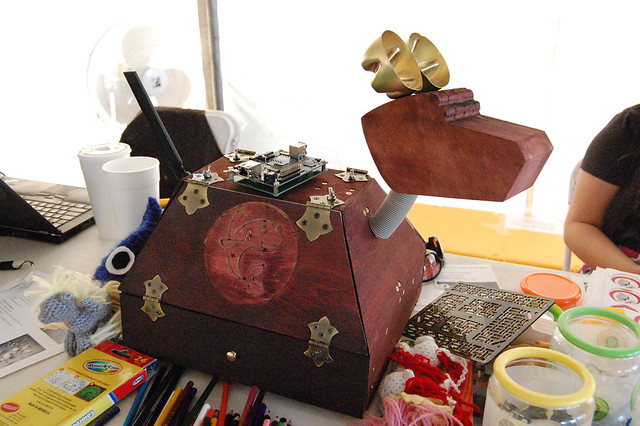
So, remember a while ago I posted about a work in progress? She’s still a work in progress, but while I don’t have full setup for her internal hardware, her chassis did indeed get “finished” in time for ABQ Maker Faire, so here’s a picture of her on my table:
This picture care of the fine folk at Quelab. I’ve kind of forgotten who actually took the picture. You can tell it wasn’t me because that’s my elbow in there!
You know how people joke that building ikea furniture together as a couple is the ultimate test of your relationship? Try designing steampunk robots together! With a deadline looming! I think we did most of this in around 2 weeks, although we had batted the idea around for a while.
The germ of the idea was my fault. I wanted a puppy k-9 who would be less hassle to travel with than John’s full-sized k-9 replica, which weighs over a hundred pounds when you include the 3 pelican cases needed to ship him. And I wanted her to be steampunk, because it would break us away from being show-accurate and make her amusingly photogenic. Her job, by and large, is to convince people to come talk to us, although we have some other functional plans for her too! However, it’s a long path from idea to finished project, and I have to say that John did the bulk of the execution while I handled the details — he got the c&c machine to cut out dog panels and engineered it so I could have the wing doors I wanted without compromising structural integrity, while I convinced the c&c to cut out a modified minnowboard logo for the resin inlay, and figured out the hinges and staining. I admit, we might have done some arguing, but we worked her out!
I am quite pleased with the details we managed to get in. I insisted she have ears and a tail because John’s larger k-9 replica still doesn’t have those details. Her tail is a functional USB wireless antenna, and John even inserted a proper usb port into her butt so it’s detachable when she gets packed for travel or so you can plug something else in easily while leaving the case closed. Her ears gave us a different kind of trouble, and we were running out of time until I started digging through the recycling bin and found a pair of 7-up bottle bottoms which I painted gold.
The computer on top there is the Minnowboard MAX, which will serve as Puppy’s brains. We didn’t get it mounted inside until after the show, and you can see the nice laser-cut mounting plate (again care of Quelab; thanks Morgan!) in front of her (it’s the smokey grey piece with all the holes). That’s all inside now, with a whole lot of hardware attached.
More pictures to come eventually, but since she’s gotten side-tracked by xmas present projects, it might be a while before we get back to her!