My kid decided he wanted to have a “meat hat” and after some consultation to figure out what he meant by that, it was determined that he wanted a green hat with some sort of meat pixel art on the hat, possibly inspired by Minecraft. He picked out the yarn in the spring, but it was already too warm for a hat so I didn’t get around to actually knitting it until fall. I got him to make some additional design guidance and handed him a pixel art editor for final designs, and this is what he drew:
He then clarified:
The types of meat are steak, chicken and meatballs
Each one could go on its own line but had to be repeated around the hat
Seems clear enough, although I’m still not sure what inspired the need for a meat hat. But he has outgrown his previous winter hat, so away we go! I can’t really imagine other people wanting to knit a meat hat so it feels a bit odd to document this as a pattern, but who knows maybe your kindergartener is also into meat?
Spoilers: here’s what the actual hat looked like after we made it!
The Meat Hat (and matching mitts) designed by my kindgergartener. The meats represented are meatballs, chicken, and steak.
My kid’s head is 21″ which is basically an adult small. Yes, he has a huge head (and I had the stitches to show for it, thanks. And not the knitting kind of stitches!).
I used the free Barley hat pattern from Tin Can Knits as a base to figure out sizing because it was free and I wanted to try out the new sizing in their app (which is pretty neat). If you need a different size, you could maybe use that to help you figure it out. The matching mitts are the kid’s size from the simple collection, also available in the app or their website.
Sorry, I haven’t made a written or accessible version of this because I honestly can’t imagine anyone but me knitting it. There is alt text describing what’s in the charts for curious passers by, but no written instructions or higher contrast charts available, and my kid’s dark green and dark brown colour choices aren’t the easiest to read. If you do want an accessible version and you promise to actually try knitting it, ping me at terri(at)toybox.ca and I’ll see what I can do.
Yarn: Worsted weight. I used Dream in Colour Smooshy for the main green colour, Amano Yarns Warmi for the brown meat colour (the heathering really rocks for this) and Knitpicks Swish Worsted for the black and white bits. The contrast here isn’t as good as it could be, but that’s what happens when your kid picks the colours based on what feels nice in the yarn store. I’m not sad: these were lovely to knit with.
Needles: US6 for brim / US 8 for body. If your colourwork tends to be tight you probably want to go up at least one needle size for the colourwork. (I did not do this, but then had to stretch the hat a bit during blocking as a result.) There are some long floats here: this might be a good piece for practicing the ladder back jacquard technique if you want an excuse.
Brim
Cast on 84 stitches with smaller needs (US6 for me) in main colour (or a contrast colour, you do you!)
Ribbing Row: (Knit 2, purl 2) repeat around
Work ribbing row for around 1.5 inches or however long you want your brim to be.
Switch to larger needles (US8 for me)
Stockinette Row: knit around
Work stockinette row for 1.5 inches if you wish to have a folded up brim and don’t want the pattern to get hidden. If you don’t like a folded brim, you can just work 2 rows instead, but you’ll have to start decreases earlier in the hat colourwork (or enjoy a slouchier hat!)
Colourwork
Increase row: m1, knit around
My pixel art program produces 16×16 sized images, but 84 doesn’t divide evenly into 16. However 17 is a multiple of 85, so I just added an increase in the first motif and repeated each steak motif 5 times. Technically my kid drew stuff with a lot of white space so if you’re really committed to 84 stitches for some reason you *could* trim his charts down to 12 stitches and make them fit. I just didn’t do this for the steak and chicken charts.
If you tend to have tight colourwork, you should go up another needle size here.
Follow steak chart for the motif, but I removed most of the green lines and kept only 2 between the steak and chicken.
Follow chicken chart for the motif, skipping some green lines as you prefer. I moved my stitch markers so that the chicken lined up with the gaps in the previous chart. I kept 1 green row before starting the meatball chart and removed all the others. I personally did the top of the chicken and black bits as duplicate stitch because I was tired of carrying long floats, but you do whatever works for you. (if you took out more green columns the floats might not be so bad.)
At this point, I decided I wanted more meatballs, so I tucked a k2tog in the start of the meatball chart to go back down to 84 stitches and adjusted to a 14 stitch motif repeated 6 times instead.
Note that I needed to start crown decreases while I was in the midst of the meatball motif on the top meatball, so I just stuck them in between the meatballs (see below for decrease instructions)
If you went up a needle size for the colourwork, you can decrease again here.
Crown decreases
Once the motifs have reached around 6 inches you’ll need to start decreases:
Decrease row: (k12, k2tog) repeat around (6 times)
(Or if you’re still in the middle of a motif, work motif for 12 stitches then the decrease. )
Work decrease row then stockinette row for first 4 decreases, then work decrease row only until you have 6 stitches. Cut yarn leaving a 6 inch tail and weave through the final stitches then pull tight and tie closed. Weave in ends. Block.
The Dread Pirate Kid wearing his Meat Hat in the snow.
And that’s the meat hat! Kiddo did indeed wear it this week when we had actual snow and cold, though I expect the hat won’t get much use since he’s pretty anti-hat unless it’s actually cold. It’s seldom below freezing here for more than a week per year . But it was fun to work on his design so I’m not sad even if it only gets worn a few times. He says he wants a rainbow sweater next!
I know the yarniverse is all abuzz with a very pink movie coming out this weekend, but my kid and I are more excited about Pikmin 4, so he asked for this last night and I made it today:
Terri is wearing a hat based on the video game pikmin. It is blue with a round base tapering to a point with a green leaf sticking out of it.
It’s a Pikmin hat!
Yarn: some bulky blue I had in stash with no label, plus some green variegated Red Heart Super Saver held doubled.
Before rows 3, 4, 5 I added a row of double crochet to make the “stem” a bit longer than it was in the original design. It would be a bit more game accurate to make it thinner/taller but then it might need some reinforcement to stand up. As my 5 year old immediately put on the hat and started headbang-smacking his dad with the leaf, I think I made the right choice to avoid any stiffeners or wire in this project.
Then I sewed the leaf to the top with some extra work and some longer stitches into the stem to make sure it was on securely and wouldn’t flop over too much.
My kid has an adult-sized noggin so it fits both of us.
It took most of the day to make between playing board games with my kid and giving the dog a bath. (That is to say, it took all day but very little of that day was spent crocheting.)
Of course now I kind of wish I had more random bulky yarn to make a yellow and red one so the whole family can match.
[Note: I wrote this up last year/summer of 2022, never quite finished it, and never published it as a result. I don’t know if I remember enough here to finish writing this up properly without knitting the socks again. I don’t want it languishing in my drafts and I’m not sure when I’ll feel inclined to write it up as a real pattern. So I’m just gonna publish it anyhow and I hope it helps someone else who wants to play with a fun technique!]
The folk at Knitted Wit had a fun summer bingo this year, and one of the squares was “I tried a new-to-me sock technique” so I decided to try knitting two at a time socks with the socks nested inside each other. One of the people in my old Saturday knitting group used to do this somewhat regularly and I was intrigued. I wasn’t up to knitting full sized socks just to try a technique, so I worked from the knitted mirror socks pattern and scaled it down to 24 stitch mini socks and took out all the colour changes.
Since I couldn’t find anyone else who’d done a tiny version of this, I’m writing up my notes in case you too want to try a new technique but don’t want to commit weeks of your life to doing it!
Tips before you start
Choosing yarns: make sure they look very different. Ideally you want high contrast and not a single speckle that matches. I used one speckle and one solid to help me differentiate and because I was using leftovers from previous projects. You might find it easier to just use two solids for the least stressful experience. It doesn’t matter in the finished project since the socks will be separated, but it’ll make the learning experience easier if you can tell your yarns apart even when you can only see a little stitch sticking out.
Two high-contrast yarns and my sock start.
Choosing needles: you want sharp needles with long tapers at the tips because p2tog through the back loop is a pain on blunter tipped needles. I used chiaogoo size 1 because it’s what I have on hand that suits the fingering weight yarn I used. I think this pattern would have been frustrating if I’d tried to use my Knit Picks or Addi needles, even though the addis are my usual go-to for socks. I used a long circular and had a “top” and “bottom” needle. Two dpns (with a third working needle) would work just as well.
You’re going to be knitting top-down with the two socks nested, with the outer one inside out. This arrangement keeps the yarns to the correct side of the socks slightly more easily. If you’ve done double knitting before, it’ll feel pretty similar, you just have to be very careful about not crossing your yarns inside the tube.
Casting on
CO 24 stitches in the round. Do 4 rounds of k1, p1 ribbing. (You could do this two at a time but it’s only 4 rows and this way you get to start on something easier.)
Get a second set of needles, do it again. (Cast on 24 stitches, do 4 rounds of k1 p1 ribbing)
Decide which is going to be sock A, the outside sock that you’re going to purl in reverse stockinette, and which will be sock B, the inside sock that you will knit in regular stockinette. If one of your yarns is a bit thicker than the other, you’ll want it to be sock A because the gauge is going to be slightly bigger and you might as well have the yarn help. This wouldn’t be as important on full sized socks, but it’s noticeable on such tiny ones. (Guess how I know…)
Close up of my socks showing the alternating stitches.
Arrange the two socks on one set of needles so that the stitches alternate. Sock A, sock B, A, B, A, B and so on. I put 24 stitches on one needle (12 of A, 12 of B) to be the top of foot, and the remaining 24 on a second needle to be the bottom of foot.
Move yarn A to the front and B to the back. I hold both yarns in my left hand, so I found it easier to keep A in front with my thumb while working B.
Leg
Leg Row: Purl A, Knit B 24 times being careful not to cross your yarns.
Knit for about one thumb width of stockinette/reverse stockinette, checking periodically to make sure your yarns haven’t crossed. My thumb is around 2cm or 3/4 of an inch if you prefer to use a ruler, but since this sock doesn’t have to fit anyone I’m sure your thumb will be good enough too. Or you can just eyeball it.
Checking the socks to make sure they’re still separate.
Heel flap
Go to whichever needle you’ve designated as the bottom and start the heel flap. This will be knit flat over only the bottom needle’s stitches.
Row 1: slip A, slip B, then [Purl A, Knit B] 11 times, turn work.
Row 2: slip B, slip A, then [Purl B, knit A] 11 times, turn work.
Repeat these rows 6 times, so you should have 6 slipped stitches up the side.
Turn heel
You’re going to be doing decreases now, which means you’ll have to rearrange the stitches so two A and two B yarns are next to each other.
Row 1: [purl A, knit B] 7 times, rearrange stitches for decreases, dec A (p2tog), dec B (ssk) turn.
Row 2: [purl B, knit A] 3 times, rearrange stitches dec B dec A turn.
Row 3: [purl A, knit B] …
Continue like this until dec is at end of each row 8? stitches per sock
Pick up 6 stitches along edge of flap, continue as before across sock, pick up 6 on other edge.
PK dec,
You likely will have a little hole at the heel, particularly on the outside socks that are stretched out a bit more. Rather than fussing over it, just plan to sew it closed at the end.
A pair of socks showcasing the gap at the heel turn.
Foot
Foot Row (same as leg): Purl A, Knit B 24 times being careful not to cross your yarns.
Knit in stockinette/reverse stockinette until the foot looks long enough to you. I once again used my thumb to measure and made it about the same length as the leg section.
Toe
Now here’s the part with the awkward p2togtbl so that you can match the k2tog. If you find it hard, sharper needles will tend to help. Also, since no one’s going to wear these and likely no one will care if the decreases don’t match, you could also just do a p2tog and call it a day if you want. You can graft the last few stitches if you want but these are so tiny that running the end through the last few stitches and pulling tight works fine.
I bought these lovely yarns from the ChemKnits Spring Mini Series. My kid and I have been enjoying her tutorials for dyeing yarn with food colouring, and so I thought this would be a nice way to support the channel and give me and kiddo a week of videos to watch. Plus he loves rainbows. He didn’t watch all of them with me, but we did a bunch!
Kiddo enjoying the yarn.
I was looking at my 2022 Fiber Goals and decided to try doing two at once: rainbows and skipping the pattern. But in case I decide to make a pattern later, I’m putting some notes here. If you’re an experienced knitter this is probably enough to knit this shawl. If you’re not comfortable doing stuff like using a stitch dictionary to fill in a different pattern into a space, this may not be enough for you. (There’s lots of great other patterns out there though! If you like rainbows and don’t love garter stitch, I recommend Shannon Squire’s Spell Shawl which is great for fading)
Full view of the shawl after blocking
Shaping: My spring rainbow shawl is an asymmetric triangle (because it’s one of the shapes I wear most).
Starting: co 7. K3, place edge marker, k5.
Right side row: work edge pattern, slip marker, k2tog, work body pattern, then knit + yarn over + knit in one stitch then k1 for a double increase at the end. (1 dec + 2 inc = 1 inc for the whole row.)
Wrong side row: k4, do body pattern, do edge pattern (no stitch count changes)
Colour changes: I 2-row striped a few times between colours to get a bit of a fade. I sort of eyeballed it to start striping in the last 25% of the ball (so around 5g of the 20g skein) then striped until I ran out of the first colour. I actually ran right to the end of the first colour then cut the second colour and spliced it in rather than worry about whether I’d have enough for the full two rows.
Body: I don’t love garter stitch, but I like some of the properties of it: it lies pretty flat and it doesn’t take much brainpower to knit it. With that in mind, I dug through stitch dictionaries and settled on a pattern that was basically k2, p2 ribbing for 4 rows, 2 rows (1 ridge) of garter stitch, then swap it so the knit sections have purls above and vice versa, then another garter ridge and swap back.
Lazy chart: – is purl on right side, knit on wrong. ” ” Is knit on right side, purl on wrong.
Edge: #249 from the Japanese knitting stitch Bible.
Note that the body pattern is a 12 row repeat and the edge chart is not, which would make this annoying to put into a single chart. So just do them separately and it’s no big deal.
Bind off: I finished my striping to finish the blue and fully switch to purple, then swapped to chart #246 from the Japanese stitch dictionary. I did a bit of math to see how many repeats I could fit, and since it wasn’t exact, i continued doing the k-yo-k increases until I had one more complete repeat.
Terri is wearing a rainbow shawl and a rainbow sweater, because one can never have too many rainbows.
Steven the Bat socks with the bag from the Halloween countdown set
Years ago, a friend named the local bat who appears in the evenings at our house “Steven.” Since I can’t identify humans in the dark let alone bats, we have henceforth declared that all bats are named Steven. Which is why it’s especially appropriate to have two Stevens on your socks.
This isn’t a complete, perfectly tested pattern, but rather a recipe of components I used that you can adapt to suit you. I’m going with “the perfect is the enemy of the done” and posting what I can manage now rather than trying to be like a professional designer. As a result, this is not a beginner pattern. You’ll need a copy of the Japanese Knitting Stitch Bible until I get around to making my own charts for the cables. Have fun!
Yarn
I used a delightful sock set from Valkyrie Fibers that came with the Kitty With A Cupcake Halloween box. You can use any sock set or yarns with decent contrast between them (for the colourwork) and a tonal or solid main colour (for the cables).
Stitch count / Gauge
I did my socks on 64 stitches and a US 1 needle because that works for me. The cable in these isn’t too big so whatever you use normally for plain stockinette socks will likely work for you. If you need more or fewer stitches, increase or decrease in units of 4 so the colourwork section on the bottom can be extended or reduced to fit.
Toe
I did my socks toe up on 64 stitches. I use a rounded toe as follows:
Cast on 24 stitches (12 for top, 12 for bottom) using Judy’s magic cast on.
Increase row: top: k1, m1r, k to 1 before end of top, m1l, k1. Bottom: same.
Increase every row until you reach 26 stitches per side (52 total). K one row, add another increase row, k 2 rows, add another increase row, k3 rows, add a final increase row (32 stitches per side, 64 total)
I knit around .65 inch of plain knit rows after this to get the bat to sit where I wanted.
Bat Chart
Do the top chart (starting at the center line row) for Steven. You can repeat the chart twice or do as I did and use the + motif (bottom right) to fill out the bottom. This just means fewer long floats on the bottom of the sock.
If you start at the bottom of the chart like I did, the bats will be head-up to others but head down to you. I kind of like it this way, but if you don’t then just start at the top of the chart instead.
Cable
I knit another 8 rows plain before starting the cable. I used 1 repeat of motif 101 from the Japanese Knitting Stitch Bible, and added a border of two purls and a knit through the back loop on either side. I lined it up directly over Steven’s head; note that this uses an odd number of stitches so you will have one extra on one side.
Heel
I used a center-increase heel. Since my toes are wider than my ankles, I don’t quite increase all the way to double my bottom stitch count, so i increased to 60 stitches instead of 64. As a result, after turning the heel i have 60 stitches in total. I used a slip stitch heel and switched to the contrast colour when i started working on the heel stitches only.
Leg
Continue the cable pattern in front. If desired you can repeat it on the back too. If you did like I did and decreased your stitch count note again that your numbers for the back will be different than the front. I continued for two repeats of the cable because that lined up nicely, but you can do whatever.
Cuff
I used motif 200 from the Japanese Knitting Stitch Bible. This is a 6 stitch motif, so if you used a different number of stitches than I did you might have to either increase/decrease/add an extra rib. I used the contrast colour.
Photos
Happy Halloween!
Steven the Bat socks with the charm bracelet from the Halloween boxSteven the Bat socks. A set of handknit socks modeled on feet. They feature a colourwork bat, a cable motif along the top of the foot and front/back of the leg, a contrast-colour slipped stitch heel, and a fancy cuff also in the contrast colour.
This one’s for all the folk who might not “look” queer: the bi folk in “straight” relationships, the trans and non-binary folk who maybe don’t “look” queer to outsiders, the ace folk, and everyone else who struggles with whether they’re really “queer enough” for a LGBTQA+ space. This free shawl pattern is intended as a gift to the many people who’ve wondered how they fit in as well as those who are gloriously out.
Queer Enough Shawl modelled by the designer, Terri Oda. It is a crescent shaped shawl featuring rays made from lace and tiny cables. The shawl has been made in bright rainbow colours.
I’m going to warn your right now that the name “Queer Enough” is also a pun on “Clear Enough” — I’m intentionally not writing out all the details because I’m worried if I aim to make it perfect and beginner-friendly it’ll never get out there. As such, I’d say this pattern requires intermediate-level pattern reading skills or the sort of mind that sees patterns easily. You might have to search for your own tutorials if you need ’em. But I know you can do it! You’re resourceful! Go you!
And if you’re the sort of person who *loves* filling in these details and just knows you can make this pattern better, please get in touch because I’m happy to have it improved, I just didn’t want to block myself from releasing it. I do plan to improve it as I go if I can.
This shawl was originally knit as part of the Quiet Queer Craftalong, a June-July knit-a-long intended to encourage folk to make things using patterns from queer designers and materials from queer dyers, kit makers, and more. I consider myself queer enough that this should count, but I always encourage you to also purchase patterns/materials from queer folk who make fiber arts part of their regular income! (I’m a computer security person professionally and get paid more than enough to be able to give away patterns but not everyone can afford to do that.)
Edit Aug 9, 2022: Added little repeat charts for each section. Also, thank you to the many people who told me the message and the title of this pattern resonated with you! <3
Shawl overview
“Queer Enough” is a top-down crescent shawl pattern with simple lace and cable “rays” that come out from a center spine.
Gauge/Needle Size/Yarn are all flexible. Use what feels comfortable to you and make it as big or small, thick or thin as you like to wear.
My gauge was 21 sts and 36 rows /4 inches (unblocked in pattern) and I used a US 6 needle and sock/fingering weight yarn.
Choosing colours
I used KnittedWit sock-weight yarn in an older version of a temperature rainbow kit available from the ShannaJean Etsy. These use 10g “gem” sock minis, which are smaller than the more commonly available 20g mini size. This particular yarn inspired the pattern because it has dark/light pairs of colour for the garter/lace rows to pop a bit more. These kits come with 14 colours, I only used 12 for my shawl.
You could get a nice effect by using a single main colour for one of the sections and minis for the other, or just using two skeins of yarn.
Shawl worn bunched up around the neck as a scarf
If you like to wear shawls wrapped around your neck like scarves, please note that the garter section may tend “stick out” and be more visible, particularly if it’s been a while since your shawl was blocked. If you tend to wear your shawls less bunched up, the lace section will block to be larger and potentially more visible. You can choose your colour configuration with those in mind! I used the brighter rainbow for the garter and the pastel rainbow for the lace.
Icord cast on/set up section:
Use Judy’s magic cast on to cast on 6 stitches (3 per side). We’ll be using this as a provisional cast on to make a 3-stitch icord edging, so you’re going to be leaving behind those rightmost three stitches until setup is done, and we’ll be adding one more to the “left behind” section with each row.
Row 1 (first after cast-on): knit all 6 stitches.
Rows 2-10: Slip 3 stitches to left needle and work only those 3 stitches in this row. Knit front and back in first stitch, knit next two. Do not turn work. (increases 1 stitch)
Once this is done you should have 15 stitches on the needle.
(If that all sounds terrible/confusing, you can also make a 9 row long icord and pick up 9 stitches along the side and three stitches at the beginning for a total of 15. I just wanted to try a cast on option that wouldn’t include picking up stitches.)
You can mentally divide your 15 stitches like this:
3 left icord border,
2 left shawl body,
2 for left leaning cable,
1 for center,
2 for right leaning cable,
2 right shawl body,
3 right icord border.
Row 11 (wrong side): slip 3 (place marker if you like to have a border marker), knit front and back, knit 3, place left spine marker, slip 1, place right spine marker, knit three, knit front and back (place border marker if desired), slip 3. (increased by 2, stitch count 17)
I didn’t bother with border markers, but I’ve noted where they go in case you want them. Slip them as you come to them from now on.
Row 12 (right side): knit 3, knit front and back, knit 3, right leaning 1 by 1 cable, slip spine marker, left-leaning 1 by 1 cable, knit 3, knit front and back, knit 3 (increased by 2, stitch count 19)
You’re now set up to start in a garter section.
General Pattern Overview:
Your shawl is going to come in 5 “wedges”: two matched borders on the edges, two “body” sections, and one slipped stitch spine in the center.
Right Border icord + increase:
knit 3, knit front and back (right side, increase 1)
knit front and back, slip 3 (wrong side, increase 1)
Right Body section: this will vary depending on whether you’re doing a garter or lace section.
The garter section features cables and a spine that “float” over the garter stitch, with 9 stitches between garter rays (10 if you include the bottom part of the cable, for a total of 11 stitches per repeat).
Right side row:
Border + increase: Knit 3, kfb
Work right wedge:
If you have enough space before the first ray (12 stitches) to add a full repeat then do so by working a 1:1 right leaning cable, k9. This should take you to 1 stitch before the next ray
Knit to 1 before ray, work 1:1 right leaning cable. There will always be 9 knits between cables (or 10 stitches between rays of you count the bottom of the cable as a stitch)
If you have enough space before the center marker (12 stitches) to add a full repeat then do so. K9, 1:1 right leaning cable.
Slip center marker, knit 1, slip center marker
Work left wedge:
If you added a repeat in the right wedge center, do it again on the left wedge center. (work 1:1 left leaning cable, k9. This should take you to the next ray.)
Knit to the ray, work 1:1 left leaning cable. There should be 9 knits between cables in the middle
If you added a repeat in the right wedge edge, do it again on the left wedge edge.
Increase+ border: kfb, knit 3
Wrong side row:
Slip 3, kfb
Knit to center marker but slip each ray as you come to it (I find it easier to use stitch markers to mark the rays, but you can count)
Slip center marker, slip 1, slip center marker
Knit, slipping rays when you come to them
Kfb, slip 3
Queer Enough Shawl: charts for cable sections
If you find out your stitch counts are off so there’s not enough space between rays (it should always be 9 knit stitches or 10 if you’re counting and include the bottom half of the cable) or your left and right sections aren’t set to start a new ray at the same time, you can fudge them by adding an increase or decrease next to where the ray happens; the rays can disguise the adjustment. (Or you could go back and fix the mistake, but who has time for that? I give you permission to fudge if you need it.)
If you miss a slip on a ray, you can correct it on the right side by undoing that stitch and letting the yarn hang behind.
Lace Section:
The lace section features “rays” coming out from the center spine with yarnovers on each side and a decrease on the outer edge. The center ray needs to line up with the previous row.
Right side row:
Work border + increase: k3, kfb
Work right wedge:
If you have enough space (12 stitches) before the first ray, start a new ray with ssk, yo, k2tog, yo, knit 7 (which should take you to 3 before the first ray.)
[knit to 3 before next ray, ssk, yo, k2tog, yo] repeat until center marker. There should be 7 knit stitches between inner rays.
If you have enough space before the center (at least 11 stitches), start a new ray with k7, ssk, yo, k2tog, yo.
Slip center marker, k1, slip center marker
Work left wedge:
If you worked a new repeat on the right wedge center do it again on the left. (Start a new ray with yo, ssk, yo, k2tog ssk, yo, k2tog, k7.) This should take you to the stitch before the next ray
[knit to next ray, yo, ssk, yo, k2tog] repeat until last 4 border stitches. There should be 7 knit stitches between inner rays.
If you increased on the right edge, do the same on the left edge. You need at least 15 stitches including the 4 stitch border+increase), start a new ray with k7, yo, ssk, yo, k2tog
Increase + border: kfb, k3
Wrong side row:
Slip 3, kfb
Purl to center marker
Slip center marker, slip 1, slip center marker
Purl to last 4 stitches
Kfb, slip 3
Queer Enough Shawl: charts for lace sections
The new rays should be paired: the two center ones happening at the same time, and the two edge ones happening at the same time (but not all 4 at once). If your stitch counts don’t match in these places, you’ve probably made a mistake. You can go back and correct it or just fudge it
In the lace section, the easiest place to adjust without it being noticeable is the decrease beside the ray: make it a double decrease (to remove an extraneous stitch) or make it a k (to add one).
Continue this section until you want to switch back to garter. I stopped after a wrong side row when I no longer had enough in my mini skein to complete two rows. You can use a scale to figure this out and maximize your use of yarn or just eyeball it. I won’t tell. I actually switched yarns near the end of a row because I got in a groove and didn’t realize I was running out of yarn a few times and I don’t find it very noticeable.
If you’re feeling fancy you can start the lace repeat a bit early and fit only one yarn over and decrease in. I’ll leave this as an exercise to the reader. Please note that although the shawl increases are all on the outside, because of the way the rays tilt you will have +1 space to count towards your repeat in both the center and edge sections. So if you start your half-lace the instant you can, you’re going to need to keep it going twice before you get to a full repeat. If none of this makes sense just do the repeats when you’ve got the full 11 stitches and save yourself the headache.
Lace to Garter Transition Row:
I found one extra yarn over helps make the cabled rays and the lace rays line up better. They won’t line up perfectly unless you block it very carefully (and as you’ll see below, that’s not an option in my life) but I like the transitions better this way.
Close up of shawl showing the transition between lace and garter sections and the fact that my rays aren’t perfectly straight.
Right side row:
Knit 3, kfb
Right side: knit to 3 before each ray, ssk, yo, 1:1 right leaning cable, knit to center marker
Slip center marker, k1, slip center marker
Left side: knit to ray, 1:1 left leaning cable, yo, k2tog, knit to last 4 stitches
kfb, knit 3
For the wrong side row and onwards follow the garter pattern.
Queer Enough Shawl: Chart for transition rows
Continue swapping between garter and lace sections until you run out of yarn or you decide you’re done.
Charts
These charts are intended to help you see visually how to line up the sections so that the rays continue in unbroken lines. (The lines will, however, still be a little wobbly at the transition unless you’re very careful about blocking them. It’s ok.)
Legend for Charts
Here’s a very-wide chart to show how everything fits together:
Very Wide Chart (click to enlarge)
And here’s it split into two hopefully more readable segments:
Right side chart. Note that the left side of the chart will line up with the Left Side Chart)Left Side chart. This needs to line up with the Right side one)
If I try to make a printable version of the pattern I guess I’ll have to make these prettier.
Final section:
For my shawl, I ended on a lace section. I like the way the lace can be blocked to points so I used a strechy bind off added a picot at the end of each ray. If you don’t like frilly edges, you could also try ending on a garter section and using an icord bind off.
Start the last two rows on a wrong side row: slip 3, kfb, knit to 4 before end, kfb, slip 3. Turn work.
We’re going to do a stretchy picot bindoff where the picots go over the end of each ray.
Bind off part: knit 2, take two on right hand needle and knit 2 together through back loop (bound off 1 stitch). After that first pair, you can just k1, knit 2 on right hand needle together through back loop. (Every time you add a picot you’ll be back to the knit 2 beginning again, though.)
Picot part: cable cast on 2 then continuing binding off as before.
Bind off with picot row: bind off 1, picot, bind off until stitch before ray, picot. Continue in this manner until you reach the center spine. On the left side of the shawl, switch to adding picots after binding off the ray stitch. Add one more picot when you reach 2 stitches left at the end.
Close up of the shawl showing the center picot after blocking.
Finishing the Shawl
Like most lace projects, this shawl should be wet-blocked and stretched well for best effect.
Rainbow shawl being spun in a salad spinner. This is one way to remove some excess water after soaking (another example would be to wrap it in a towel and squish)
People always seem to have questions about blocking. Unfortunately, my process is ridiculous because I have a child who wants to help. So here it is for posterity, but what you should do is search for someone else’s blocking instructions if you need them.
Shawl blocking in progress. You definitely don’t need this many blocking wires.
Blocking this shawl was a lengthy process:
1. Soak shawl 2. Squeeze shawl and put in salad spinner 3. Child hears salad spinner and nearly has meltdown because he wanted to do it. I manage to negotiate not re-wetting the shawl so we can “start over” 4. Dog hears child with salad spinner and comes to investigate 5. Child determines that face licks are detrimental to his process and banishes dog from kitchen. 6. Dog waits a few minutes then goes around to the other door and gets banished again. 7. Child decides this moment must be recorded (see reel), gets mad at mom for not hitting the video button and instead getting the second picture. 8. Shawl is finally released from its torment and taken downstairs. Gate is locked so dog can’t follow. 9. Dad opens gate to follow and brief altercation with child ensues. Dad insists he is not a dog who has learned to open gates, and not trying to horn in on special shawl blocking activity. 10. Blocking mats have previously been used for pom pom snowball fight and some cleaning must occur. 11. Shawl is blocked while child adds “traps” with extra pins and wires and a “timer” made from a stitch counter. 12. Child explains his creative process in great detail. Possibly as an attempt to postpone bedtime.
And there you have it, 12 “easy” steps. As I said, search for someone else’s blocking tutorial if you need one that doesn’t include child management.
I hope this is enough that at least a few people can make a Queer Enough shawl of their own. Thanks for reading!
My yarn subscription for this year is the Made Here Yarn Club 2020 from Sincere Sheep, which was a splurge but one I could afford and one that focuses on local makers. Pretty cool!
I decided to make up my own pattern (after getting partway through a lovely hat and realizing I wasn’t feeling it). I haven’t written the whole thing up yet, but I have a chart and some basic instructions. So… here’s a little preview. But I promise I’ll be making something finished eventually!
Patio Stones (pattern preview)
This asymmetric triangle shawl was made with 300 yards of Sincere Sheet Covet (dk weight) and a US-5 needle. It would probably be just as lovely (and not quite as heavyweight) with ~400 yards of fingering on whatever needle size you prefer.
Setup:
co 4 stitches
RS: kfb, k to last 3 stitches, k2tog, k
WS: k2, p to last stitch, kfb (increases 1 stitch)
repeat until you have 15 stitches, ending on a WS row
Main Body:
Follow chart 1. Blue section is repeated, but for first run it will be repeated 0 times.
Note that the chart starts from the bottom, I just haven’t flipped the numbers over yet because this is a preview and not a completed pattern yet. The pink stitches can be replaced with k1, k2tog if you prefer. If you know how to cable without a cable needle for these little 1 over 1 cables, do that. It’s so much easier.
Cast off:
When you’re close to your desired size (or running out of yarn) repeat the eyelet section (rows 5-3 on the chart above) and then bind off.
I know, I know, it’s got some work to go before it’s ready for publishing, but it’s been sitting in my drafts for weeks and I wanted to put it out there in case my toddler poured coffee on my computer before I got it finished!
Here’s another project that’s become a new staple in my wardrobe!
The fuschia looks glorious with black or grey, and since a lot of my free tech shirts come in those colours, it works out to upgrade my look without replacing too many clothes. (Of course, I wear it with other colours too.) Here it is with a grey Carlsbad Caverns souvenir t-shirt:
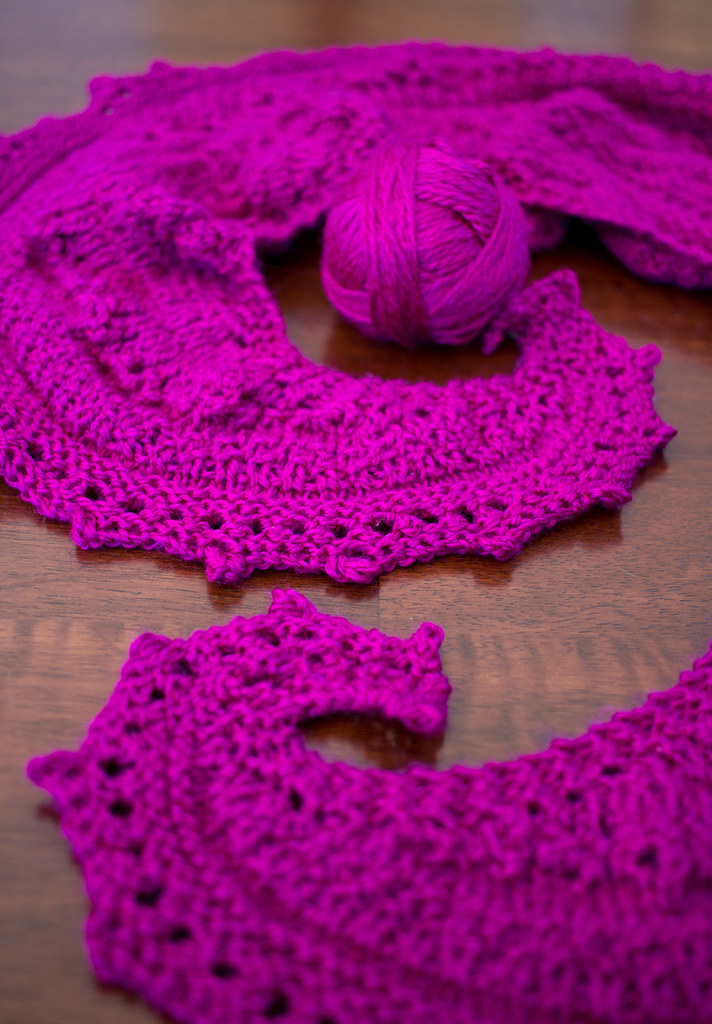
I’d been admiring this yarn in the shop for ages before I finally bought some, because the silk content makes it positively glow with those rich colours, and it’s a delight to sink your fingers into. Luckily for me, it’s also lovely to knit with: soft but it’s only got a minimal halo so textures still pop, and it was a dream on my needles. It’s also glorious to wear — so soft, so light. Surprisingly, I haven’t seen much pilling or problems with my finished object either. Even unblocked, you can see the textures:
And blocked it’s even better. Technically this is a dk weight, but I used it with a fingering-weight pattern without trouble. I’m imagining the colourwork sweater I could be wearing and my resolve on not buying more until I’ve used my second ball is slipping…
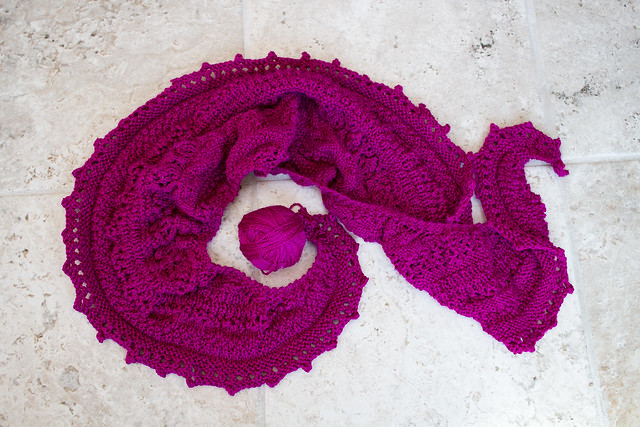
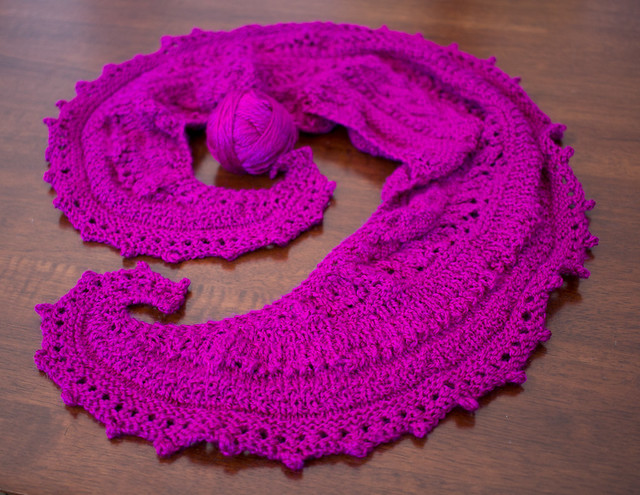
This is a great free pattern with a whole slew of different textures. I wanted something to show off the yarn that was designed for under 400yards of yarn so I wouldn’t have to play too much yarn chicken. I particularly like the long curly ends on this shawl, which were fun to block and photograph, and look fancy when worn. My only complaint is that the pattern is all written, no charts, and thus it was sometimes kind of hard to figure out how things were supposed to line up. I spent a lot of time looking at included pictures for details. But hey, free pattern!
This became my travel knit for my trip to India for PyCon Pune (where I gave the keynote on open source security!). It was challenging enough to make for an interesting knit in transit (that’s a long set of flights!), but during conference talks I had to be super diligent about marking the pattern, using stitch markers and noting the stitch counts so I didn’t get off track.
Unblocked:
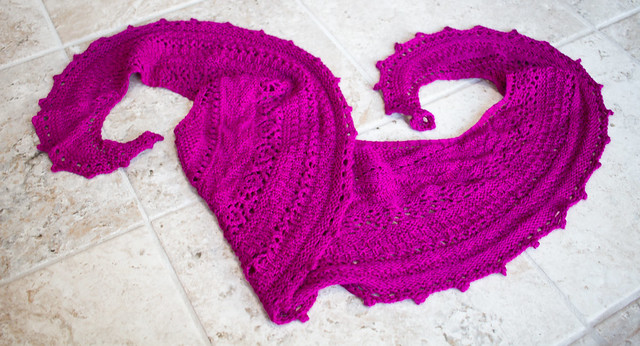
Blocked:
Overall: this is a great pattern and a great yarn. I rarely do patterns twice, but I might consider trying skysweepings by the same designer. And as for the yarn, well, I may be making a Very Expensive sweater when my resolve crumbles!