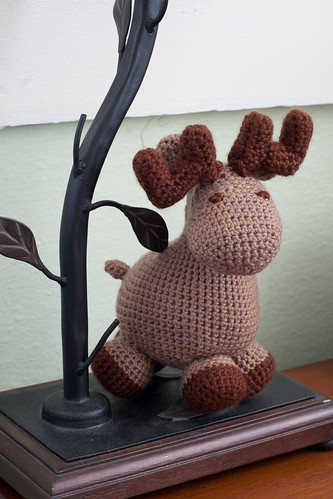
My colleague George is from the lovely tree-filled part of the west coast and went to UBC for his undergrad. For some reason, this meant that when he and his wife announced they were expecting, I thought “Hey, I should make a moose for George!” And so I did, but I wound up making a new pattern to do it, so here it is!
I’m a big fan of Ravelry, an excellent site for knitters and crocheters that provides a huge repository of patterns, so that was the first place I looked for moose patterns. But for some reason when I searched for moose none of the patterns really looked like what I had in mind.
Eventually, I realized why. What I wanted was a Moose version of the giraffe I’d made for another colleague at UNM:
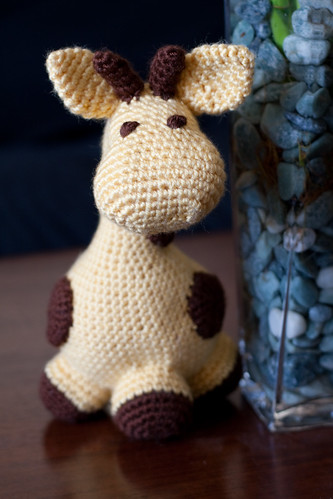
Look familiar? Having established the what I wanted to see, it wasn’t too hard to go and adjust the pattern to make a moose!
And now, on to the instructions!
The original pattern
Gigi Giraffe — It’s free and nicely written. If you’re not set on a moose, I highly recommend just doing this pattern as it is! It’s so cute!
Two more pictures of the giraffe I made for another colleague: here and here
My moose-y modifications
Obviously the largest one is in swapping out the yellow for light brown (the dark brown for the hooves is actually the same as the one I used for the giraffe).
The neck
The next is the neck: I shortened it considerably. I forget exactly how many rows I did, but it was probably somewhere around 5 compared to the 17 repeats in the original pattern. You can maybe even count the repeats in this picture if you’re desperate to duplicate my moose exactly:
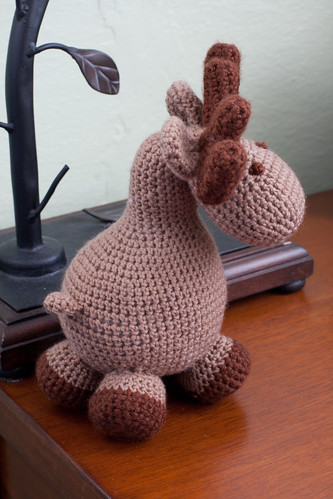
You’ll note also that I sewed the neck on a little funny. This was intentional! Moose are funny, humpbacked kind of creatures and this was my way of making a nod to the “yeah, I know what a moose looks like” while still going for something chibi-cutesy in true amigurumi form.
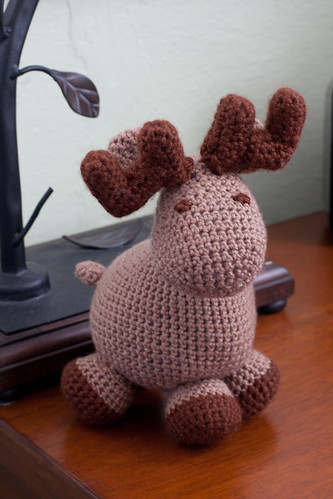
The antlers
The antlers obviously didn’t come from any modification of the pattern. Let’s look at them again:
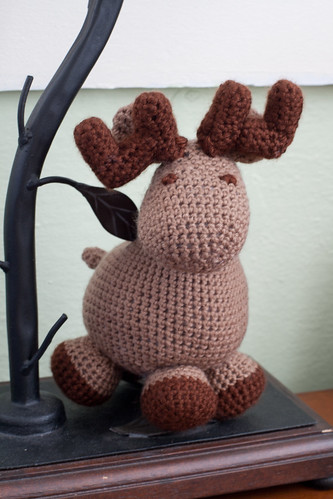
They’re made in 3 pieces that all start like this:
Row 0: Magic circle (6 stitches)
Row 2: {increase (2sc in one stitch), 1sc} repeated 3 times (9 stitches)
Row 3-?: sc around (9 stitches)
Basically, make one short antler tube for the end piece (probably around 5 rows long), a longer one for the part that comes out of his head (around 9 rows), and one to attach the two together (again, around 9 rows). If you want him to be an older moose with a more impressive rack, make the joiner piece longer and add extra antler bumps on top. Stuff each tube relatively firmly and sew together.
Tail
The tail is also brand new and not part of the original pattern. I crocheted a little circular-ish piece and sewed one end to a bit of a point, then sewed the other onto the moose’s bum. The pattern was probably something like this:
Row 0: Magic circle (6 stitches)
Row 2: increase (2sc in one stitch) repeated 6 times (12 stitches)
It’s possible that I only went to 9 like I did with the antlers, though.
So in conclusion…
If you, like me, are making this for a baby, remember to sew things on really well, and tie extra knots as you go. Smaller pieces like the tail could be dangerous if removed and swallowed, and kids are tenacious. That said, crochet tends to tighten up into horrible knots when drooled on and pulled on, so it’s pretty safe to give to kids. And I should know: my grandmother made me a lot of crocheted things, and I seem to have flourished and “inherited” some of her talent for making new patterns on the fly. Clearly this means crocheted gifts are a way to foster creative adults, right?
Happy moose-making!
PS – For my records, this moose was finished ~ March 7, 2013. My next set of works in progress is also a gift, but the recipient gets the pile o’ projects at PyCon, so you can expect a post about that when it’s been received!