The first time I got to use a button machine, I was a kid. It was at the Ex (a fair with livestock, music, and a midway, not unlike state fairs in the US only with fewer deep-fried things), and I was kind of astounded by this giant button press because I’d never really thought about how a button was put together, let alone that this might be done by a human-powered machine.
Fast forward, years later, and one day it just occurs to me that as an adult with some income (not much; I was still a student) there was absolutely no reason I couldn’t just buy a button machine and make silly one-off buttons whenever I wanted.
I’ve used them for costumes, for befriending random people off the internet who like snarky kitten commentary, for hanging out at abq maker faire and helping people make their own, and for anything else that might amuse me.
Since I sometimes bring the whole machine with me to places like quelab or abq mini maker faire, I often get asked about where I got it and how much it costs, so I figured I’d make myself a post that contained all the info so I can find it easily. This is that post!
The button machine
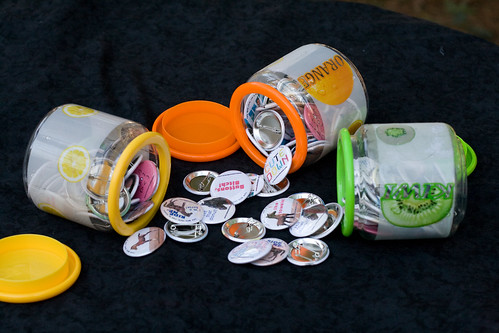
Here’s what my personal machine looks like:
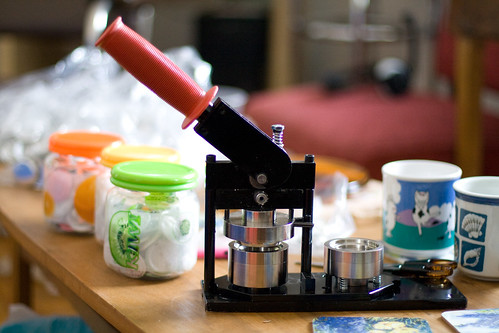
I have a 1.5 inch button machine. It has a visible “top” area of around 1.37 inches, with a bit more visible space wrapping around the edge of the button. The circles I cut are 1.87 inches wide.
Although I realize this listing won’t stay live forever, here’s a current listing equivalent package I bought. It’s the Tecre model 150 1.5inch button machine with 1000 button blanks, and as of this writing it costs $264 (although I think it might have been a bit less when I got it).
For when that link no longer works: The vendor is called “button boy” and goes by the username “politicsstinks” on ebay. Here’s a link to the ButtonBoy ebay store. The latest stuff I bought from them also recommended the ButtonBoy etsy store.
It’s a small machine although very heavy, but I did a lot of research and the Tecre machine seemed to be the best type of machine for my needs: It’s physically easy to use, hard to damage, reasonably well designed so that with a bit of adult supervision kids can make their own buttons. I went with the 1.5 inch size because it was large enough to have reasonably legible text or enough space to colour, but small enough to be cuter and easy to fit on a bag strap.
If I were to buy a second machine I’d probably go with the 1″ because I’d love to try the magnetic jewelery stuff they have now, but I expect I’d still want my 1.5 inch because visible text is important a lot of the time!
Recommended Accessories
Button punch
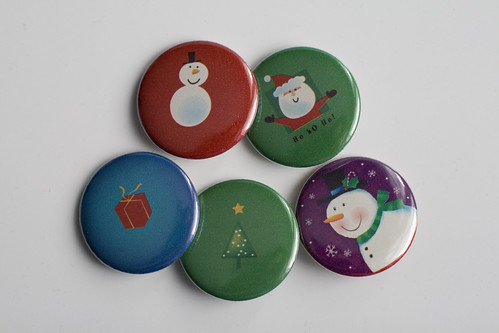
My number one recommendation is that if you’re going to do any larger runs of buttons, it’s worth investing in one of the button hole punches. Especially if you’re letting people colour their own buttons, it’s annoying to colour a teensy piece of paper, so I find it’s more pleasant to punch things out on the spot after the colouring is done rather than cutting the circles in advance. The punch is also great for using magazines or wrapping paper, like I did for these Christmas buttons (although I didn’t have the punch at the time so these were done by tracing circles with the mylar and cutting them out with scissors):
Alternatives:
Scissors work just fine. Invest in a comfortable pair rather than doing like my sister and I did on our first big button run where we gave ourselves bruises cutting out 200 buttons by hand, though.
I do *not* recommend trying to use a a cheaper adjustable circular cutter from the craft store. I have one, and there’s a couple of problems with it:
1. The center has a point, which makes a teensy but noticeable hole in your design. I can feel this through the mylar cover on the finished button and it annoys me. I stuck a piece of rubber on it to compensate, but that just makes it more finicky.
2. It’s very hard to line up the design nicely (at least compared to a hole punch or scissors)
Basically, it turned out to be more annoying than drawing circles and cutting them out with scissors. The punch, however, is way better.
Some folk at my former hackerspace have pointed out that a cricut machine would be excellent for this, and probably the laser cutter would work as well. Both of these are a lot more expensive than a punch, but if you’ve got them, why not? The only downside is that neither is as convenient for on-the-fly button making using magazines or quite as convenient for maker faire purposes.
Paper Guillotine
If you’re printing 8.5×11 sheets of buttons to cut out, you may also want to invest in a paper guillotine. This is handy if you want to hand out smaller segments for kids to colour, and great if you’re using a button punch that can’t punch holes in the middle of a piece of paper.
Again, scissors work just as well, but when you’re spending all day making buttons, little things that make life easier like that are worth it. So once again, I recommend it if you find you’re doing a lot of buttons, but it’s not needed for small runs.
Inkscape
I’ve found inkscape to be the most consistently good tool for making buttons because it’s so easy to whip up a template (1.85in circle with inner 1.375in circle) and import things into it. It lets you do things like fit text to a path, trace bitmaps so they can be converted to fewer, easier to read colours, etc. It’s fast for duplicating buttons and laying them out as a sheet for printing, too. And it’s free software that runs on linux, mac, and windows, all of which I occasionally use to make buttons. http://inkscape.org/
Really, any drawing program will do, but I think Inkscape is particularly nice for letting you set sizes and fix alignments quickly and easily, so although I’m also reasonably capable a few other art tools (I use photoshop, for example, to do photography work), Inkscape is my tool of choice for buttons.

Non-button things!
If you look through the Tecre catalog, you’ll notice that depending on the size of machine you have, you can make a few things that aren’t buttons. Not all of them are available for my size of machine; for example, some of the larger machines can be used for small hand mirrors and some of the smaller machines can be used for jewelery-buttons.
I’ve thus far tried the flat-backed magnets (the magnet goes inside the button) and the smaller split-ring keychains. Unfortunately, neither came with instructions so here’s some notes on what did and didn’t work for me:
Flat-backed Magnet instructions
The way the button machine works, you crimp the top half together, then you crimp the top onto the bottom. In the case of these magnet blanks, the magnet part goes with the bottom half (because the machine doesn’t have space for it in the top half die). It’s a nice strong magnet… which unfortunately means that it can pull the top half down if you’re too slow when you flip the machine around and crimp it the second time, and if it gets pulled out of alignment you get a messed up button. I messed up two before I figured out what was going on, and since then it’s been pretty easy to avoid the problem, but hopefully I can save someone else some annoyance.
I don’t know if this is true with other magnet backs, which may have less strong magnets, but if you’re having trouble it’s worth trying to go faster and see if it helps!
I am *very* pleased with the feel of the flat-backed magnets. They’re smooth and strangely pleasant to hold in a way that I was not expecting.
Short split key-ring instructions
In this case, the bottom half of the blank has a small hole in one side. You crimp the top and bottom together, then insert the keychain clip into this hole (note to self: take some pictures of this later).
Things to note:
1. The instructions I found online implied that you had to be super careful about how much you crimp. It seems like the version I have is pretty well designed to avoid this problem, because the bottom half has a slightly raised edge over where the hole is, and clamping the machine all the way down does not seem to squash the hole, so don’t be *too* nervous about getting it right.
2. While the clip can be inserted either way, if you insert it so the sticking up part of the clip faces the front of the bottom, the piece sits more flat relative to the back of the button.
All in all, I found the magnets harder than expected and the keychains easier.
Conclusion
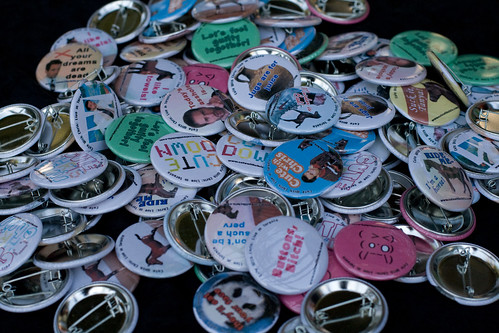
When I bought the button machine, I really wasn’t sure how much I’d use it, but it’s turned out to be even more fun than I hoped. The highlight was probably that first big giveaway my sister and I did at the Cute With Chris show. When we walked down to the front to give out buttons before the show started, people actually cheered for us! And then we went around talking to each person at the show while they chose their designs, which was pretty neat.
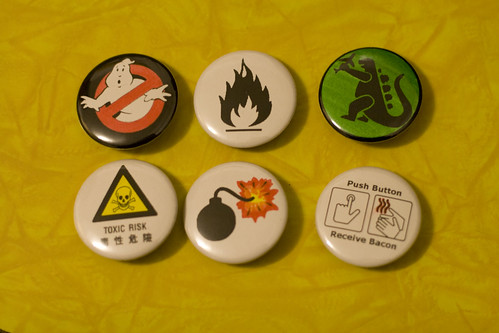
But there’s been lots of fun stuff since then. In the past year alone, I’ve made buttons for open source projects (real and most desirable), given out slightly subversive buttons at defcon, made silly buttons for one-off jokes and IRC bots, watched literally hundreds of kids and adults make buttons with my machine, even wound up making some blank ones to serve as a temporary whiteboard-style expression-changing doll face for a friend’s guerrilla photography and crafting project!
It’s a bit of a weird hobby, but each button is so cheap that it’s one you can share with a lot of people! (At the current rate of blanks, each button costs me under 10 cents) And as someone who always enjoyed getting free stuff, it’s fun to be on the side of designing and giving! :)