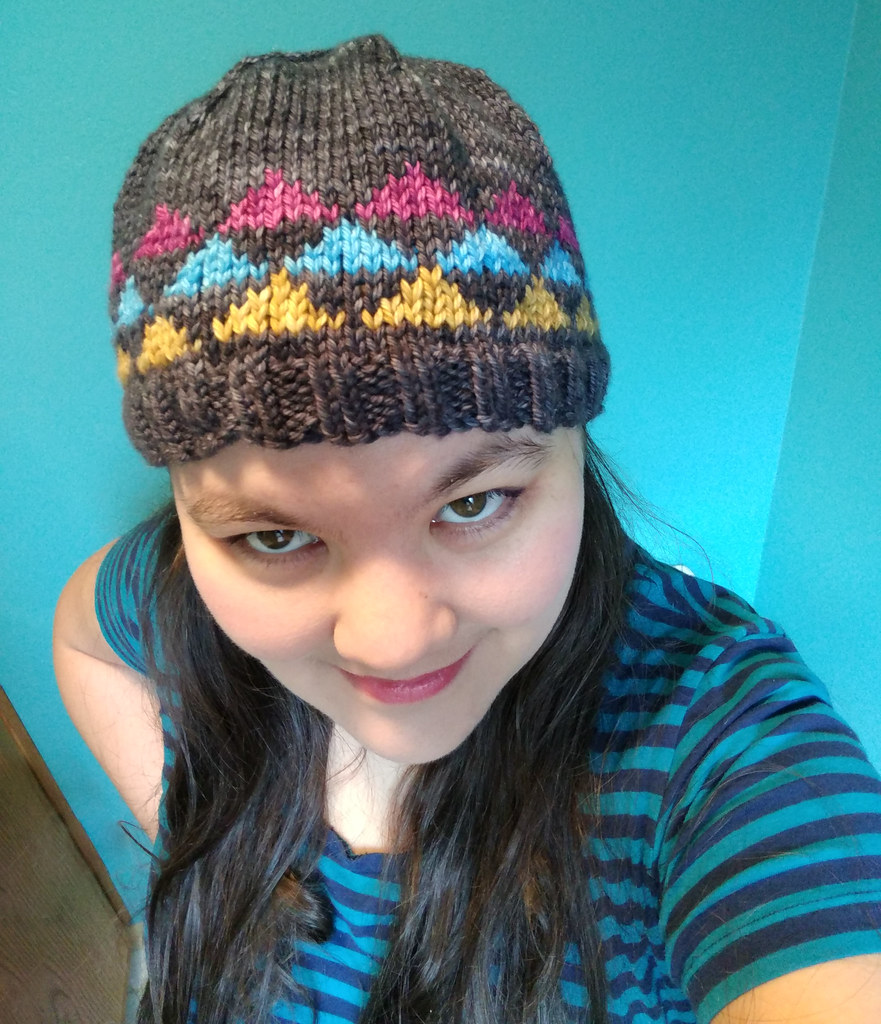
I bought some mini skeins from Knitted Wit to make a hat, but then the pattern that I was sure I had didn’t seem to exist in my pattern collection, so I made it up as I went and this is the result. (I suspect in hindsight that I might have been thinking of the triangle mitts from the Knitpicks 2015 spring accessories and not a hat at all.)
Edit: Someone on Ravelry pointed out to me that this is eerily close to a pattern from Twisted, which I almost certainly saw when I bought my yarn. This is a made-from-scratch hat with different triangle sizes and fewer colours and probably wildly different math since it was sized from my swatch and my head, so I’m quite sure that it’s legally fine, but I feel uncomfortable about it looking so much like someone else’s paid pattern, so I’ll be reworking the colourwork before re-releasing it. (It seems a shame to lose all that work I did on figuring out the crown-shaping decreases and all for myself, so the new chart will be around the same size as the old one.) I’ve taken it off ravelry but will leave it up here for my own convenience while I knit a new sample. I’m sorry!
I’m calling this Triangle Hat, but you have to think of this song when you say it to get the full effect of what’s inside my head. Or perhaps you’d rather not.
If you prefer, there is also a printable Triangle Hat pdf, and it’s on ravelry as well.
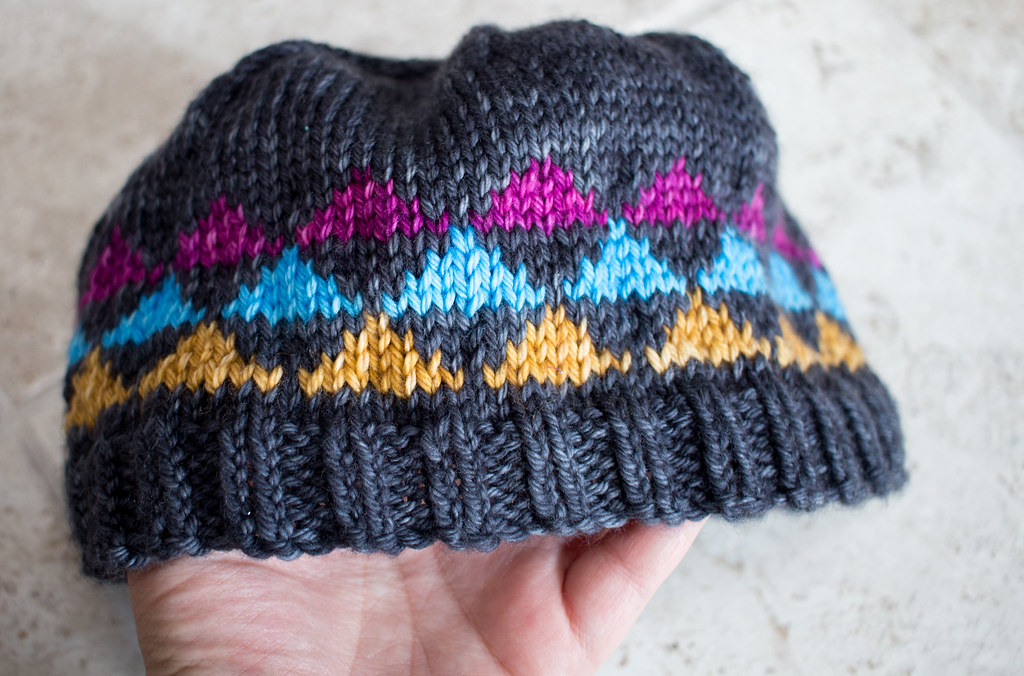
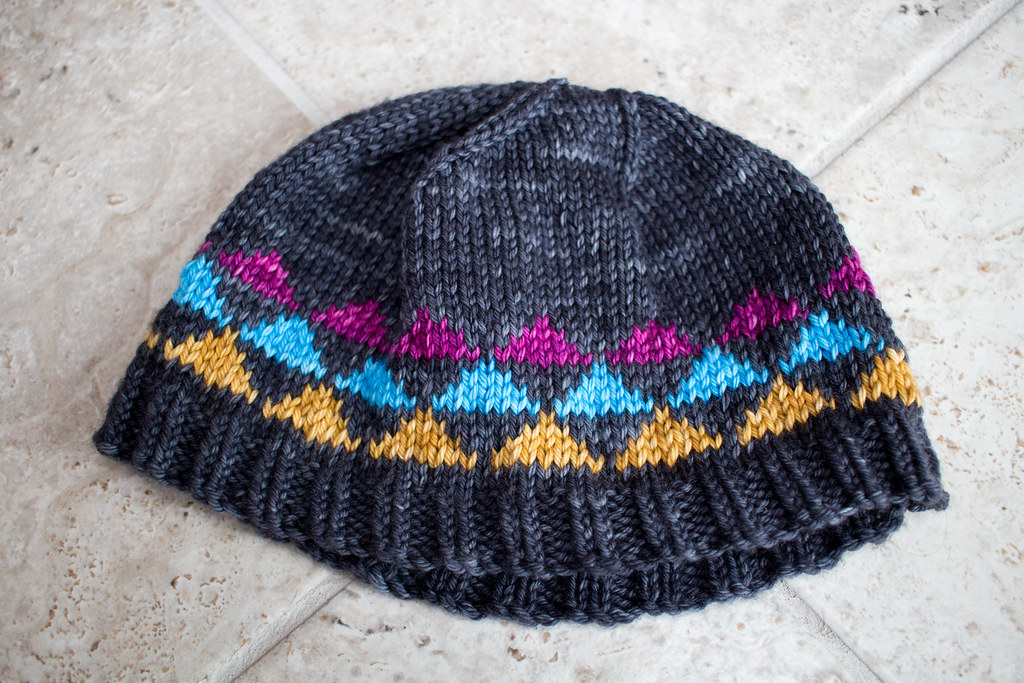
Triangle hat
Needle size: 6
Yarn: Knitted Wit Superwash Worsted. I am utterly in love with this yarn and immediately made two more hats after this one and will likely buy more at the next available opportunity.
1 ball main colour, 3 “gobstoppers” in contrasting colours
(This gets you two hats with leftovers)
Gauge: 21 sts per 4 inches
Sizing:
This pattern was designed to fit my head, which measures just under 24 inches. If you need something larger or smaller, the pattern happens in groups of 8, and you can scale up or down to fit your needs. For example, for a 1 year old child with a head circumference of 18 inches, you’d want 6 inches less, and the closest multiple of 8 would be 32, so you should cast on 80 stitches.
Not sure how big your intended recipient’s head might be? Here’s a head size chart. I am amused to discover that I have a “large” head as I know quite a few people with heads much larger than mine!
Brim
For “one size fits most” adult hat: CO 112 in the round.
The brim is around 1 inch of ribbing. I did the k2 through the back loop to make the stitches pop a bit more.
Rows 1-13: {k2 through the back loop, p2} repeat around
Pattern

Apologies for the chart having been done in a spreadsheet program so the numbers don’t match, but start at the bottom (with the two main colour rows) and work your way up (or make your triangles upside-down relative to mine, that’s cool too).
Row 14-15: knit all stitches in main colour
First triangle section:
16: {k7 in colour1, k1 in main colour} repeat around
17: {k1 in main colour, k5 in colour1, k2 in main colour} repeat around
18: {k2 in main colour, k3 in colour1, k3 in main colour} repeat around
19: {k3 in main colour, k1 in colour1, k4 in main colour} repeat around
Second triangle section:
20: {k3 in colour2, k1 in main colour, k4 in colour2} repeat around
21: {k2 in colour2, k3 in main colour, k3 in colour2} repeat around
22: {k1 in colour2, k5 in main colour, k2 in colour2} repeat around
23: {k7 in main colour, k1 in colour2} repeat around
Third triangle section:
24-27: repeat first triangle section but using 3rd colour instead of first
Rows 28-37: Continue to knit all stitches in main colour for another 9 rows (or desired height)
Decreasing
38: {k14, k2tog} repeat around
39: k around
40: {k13, k2tog} repeat around
41: k around
42: {k12, k2tog} repeat around
43: k around
44: {k11, k2tog} repeat around
45: k around
46: {k10, k2tog} repeat around
47: {k9, k2tog} repeat around
48: {k8, k2tog} repeat around
49: {k7, k2tog} repeat around
50: {k6, k2tog} repeat around
51: {k5, k2tog} repeat around
52: {k4, k2tog} repeat around
53: {k3, k2tog} repeat around
54: {k2, k2tog} repeat around
55: {k1, k2tog} repeat around
56: {k2tog} repeat around.
Cut yarn and thread through remaining stitches to close the top of the hat then tie off.
Oh My Goodness! I laughed so much at the song. Truly do need to hear the song to appreciate the pattern. lol