I was browsing this thread about project bags, saw this design, and thought I should try it out. A quick search of the internet found me some basic instructions (this tutorial has particularly decent pictures and nice clear indications of where to sew), so I free-handed a pattern and gave it a shot.
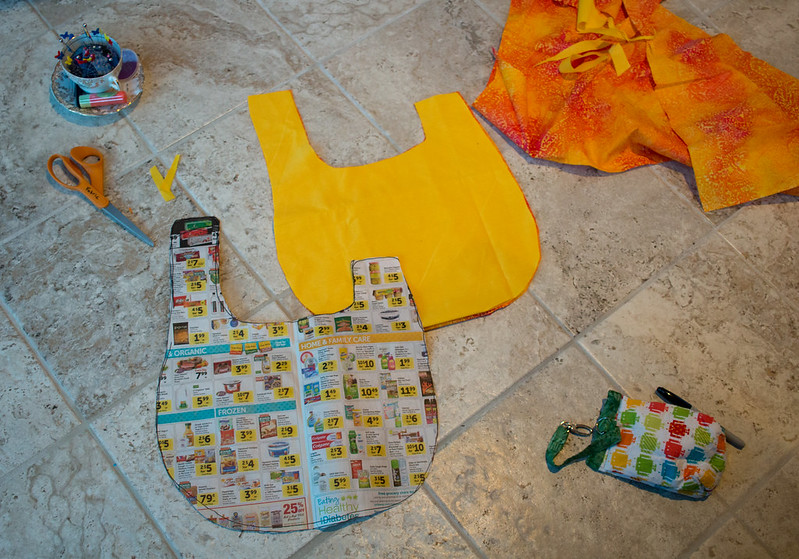
In the picture above, you can see my free-handed pattern. I knew I wanted a project bag for my current knitting project (the sweater) that always has me carrying at least two balls of yarn (that’s to allow me to switch back and forth between two balls and avoid abrupt colour changes when I switch balls). So I basically put the two balls and proto-sweater on my grocery store ad and drew around it.
You cut two of both the inner and outer colours, then pin them right-sides in.
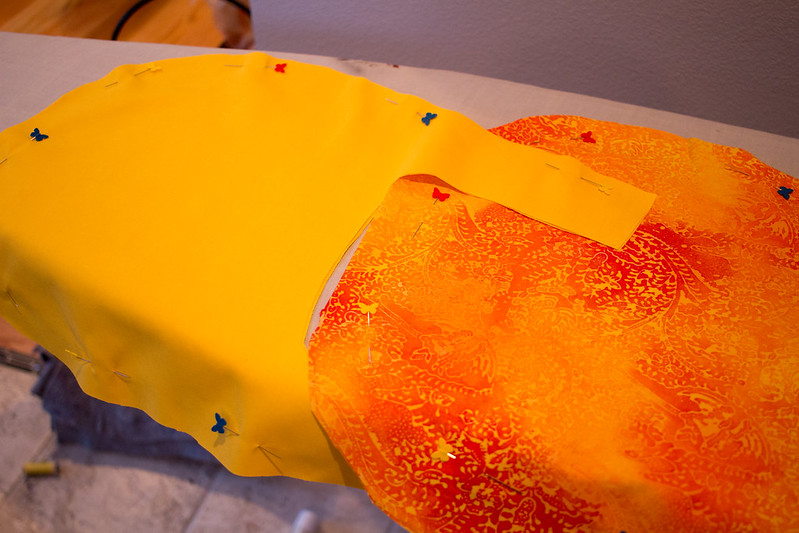
Then sew the outside/bottom edge of the bag EXCEPT the outside handles. Basically, start below the handle part and sew along the bottom until you get to where the handle starts on the other side. If you look at that first picture of my template, you’re basically ignoring everything above the grocery store ad likes that say “organic” on one side and “home & family care” on the other. Snip along the curve if you want it to sit better.
Also, sew the top flat part of the handles at this point.
Then, you turn the inner lining right-side out and stick it into the bag, re-pin, and sew the whole top curve INCLUDING the handles but only the one side of them.
It’s going to look kind of goofy as you turn it right-side out:
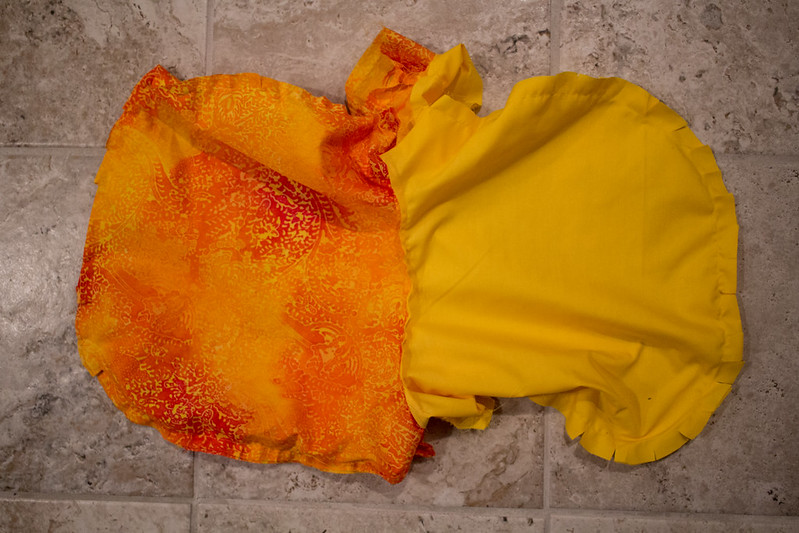
You pretty much have a big oval bag attached in the center with handles sticking out. Wrap it all around and you get a bag with holes in the handles on either side. You need the holes in both handles for it to turn correctly, don’t try to do something clever like I did or you’ll be making friends with the seam ripper. There’s probably some way to do that so it works, but I wasn’t going to experiment too much.
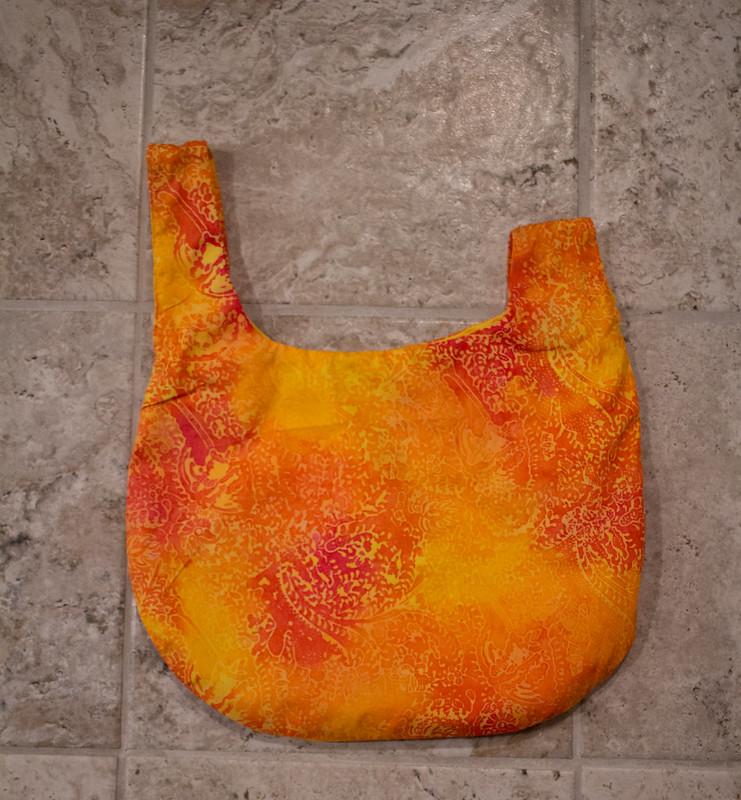
Iron the edges so they’re folded in and then complete the seams, do a bit of stitching at the bottom of each handle for strength, and voila, you have a bag!
You fold the long handle through the short one, and it stays reasonably closed and looks like it could be a cousin to the little hobo bag on a stick of the type you see in cartoons (wikipedia tells me this is called a bindle).
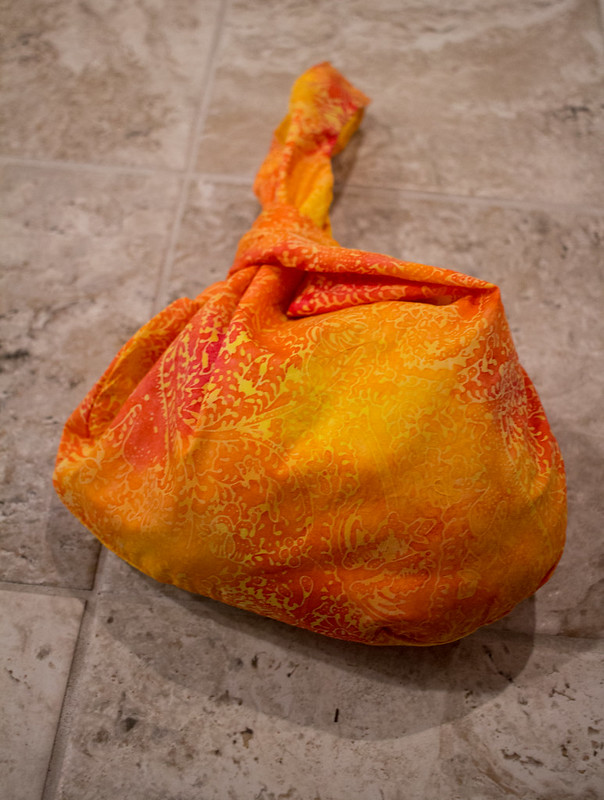
It’s a pretty simple project, on the same scale as my favourite drawstring bag, but with curvy seams instead of a fiddly drawstring.
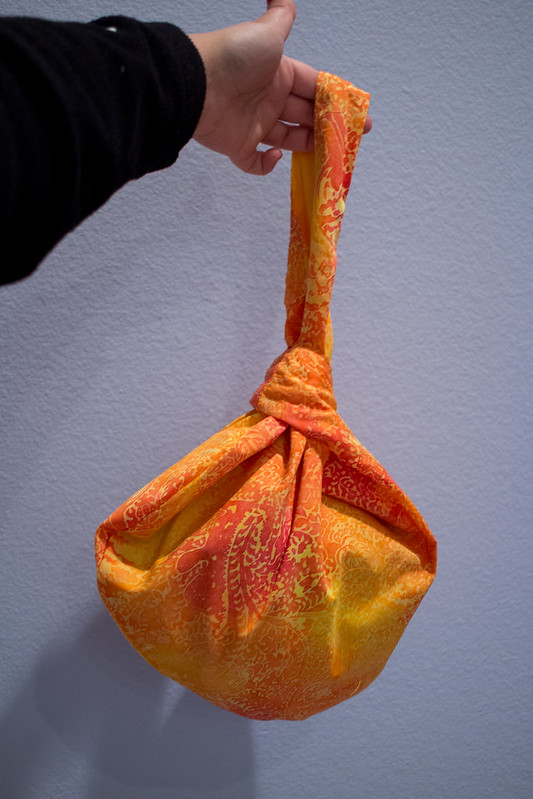
We’ll see how it does after I’ve toted it around for a while, but it certainly looks prettier than the beat up old small cloth conference bag that I was using before! This is also a great bag to hang on a wrist if you’re knitting while standing in line or just want your yarn close at hand so it doesn’t get tangled or tempt a kitty.
Overall, I think I’d need to be a bit more careful if I were giving this as a gift, since I didn’t love my final seams that much, but I like it enough that I kept my freehanded template in case I want to make another!